

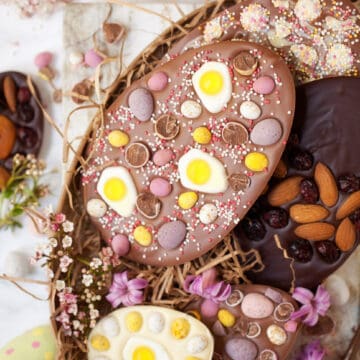
Homemade candied Easter eggs are immensely fun, entirely bespoke and very simple to throw together. Delight your recipients and learn how to temper chocolate in the process in this Easter egg recipe.
Have you seen my eye-catching millionaires caramel eggs? They are little works of art.
Jump to:
Homemade candied Easter eggs - are they worth the effort?
I don't know about you but I look at the selection of Easter eggs available in the shops sometimes and feel a mixture of emotions. On the one hand, yes they make lovely gifts, but on the other hand, they are, on the whole, virtually the same: a standard chocolate egg with one or two chocolate bars inside.
Perhaps if your wallet is bottomless it's a different story. And don't get me going about the plastic packaging.
Why you'll love making your own candied Easter eggs
In truth there are numerous reasons to go down the homemade route:
- making candied Easter eggs is a particularly fun activity - get the kids to design their own
- they can be personalised with names
- and toppings can be tailored to the recipient's tastes
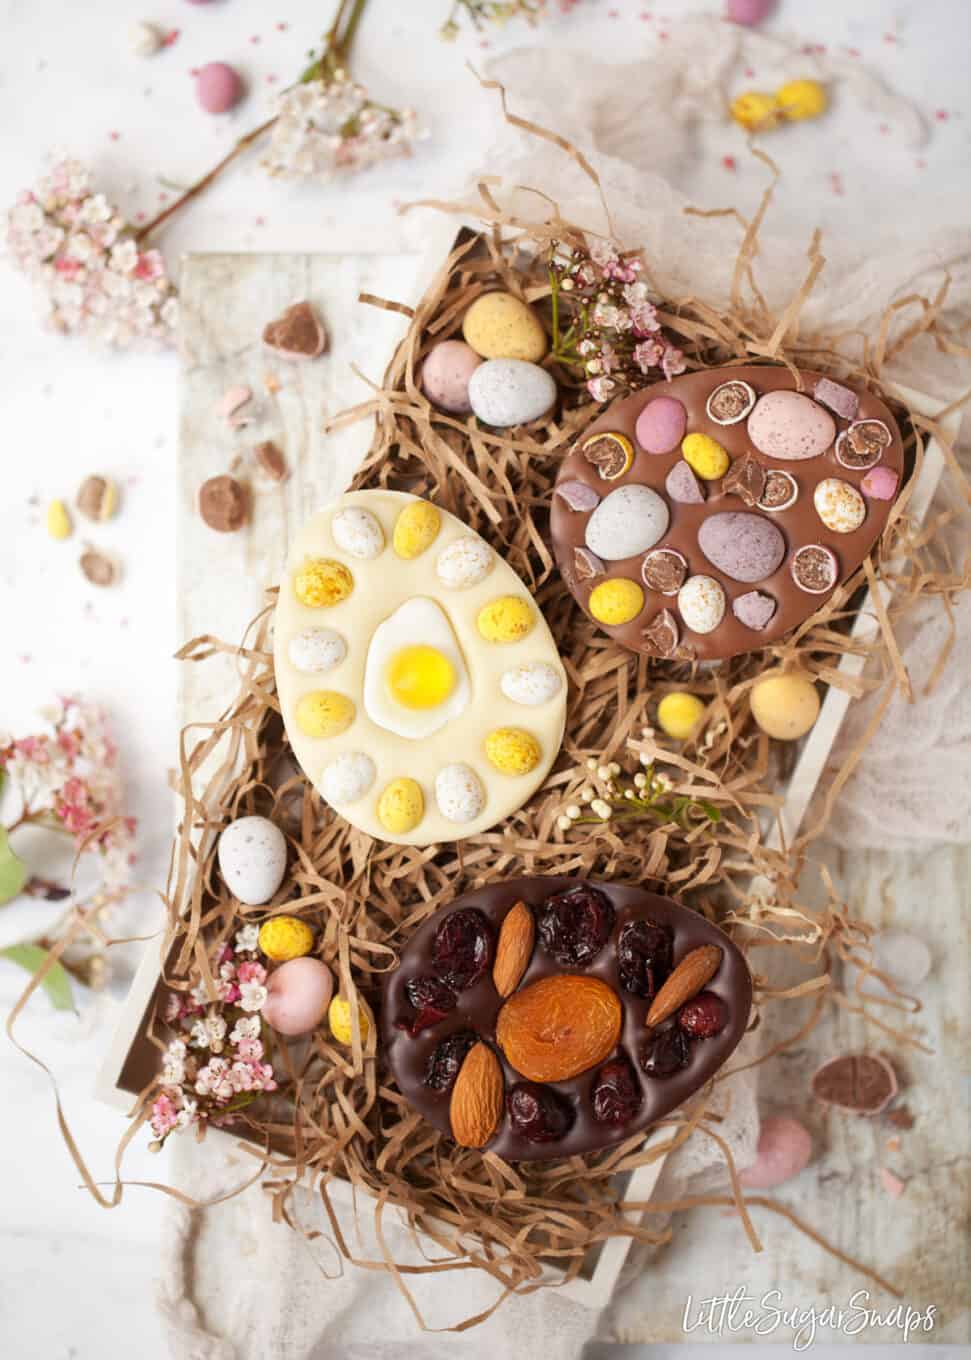
- each egg can be different... or all the same
- likewise, you select the molds to make them as big or small as you like
- they can be packaged in an environmentally friendly way
- the molds can be used over and over again
- you get to pick the quality of ingredients used
Depending on the type of egg you might usually purchase, it's highly likely that homemade Easter eggs will work out cheaper too. Especially if you have a lot of eggs to buy.
So yes, making this Easter eggs recipe is definitely worth the effort in my opinion.
Ingredients notes
Quality chocolate is essential for these homemade candied Easter eggs. It doesn't matter whether you choose milk, dark, white, ruby or a combination of chocolate, just pick the best couverture chocolate you can afford. I have great results using Callebaut.
Sadly, although I am partial to nibbling on them, the likes of Dairy Milk and Galaxy are not well suited to being tempered.
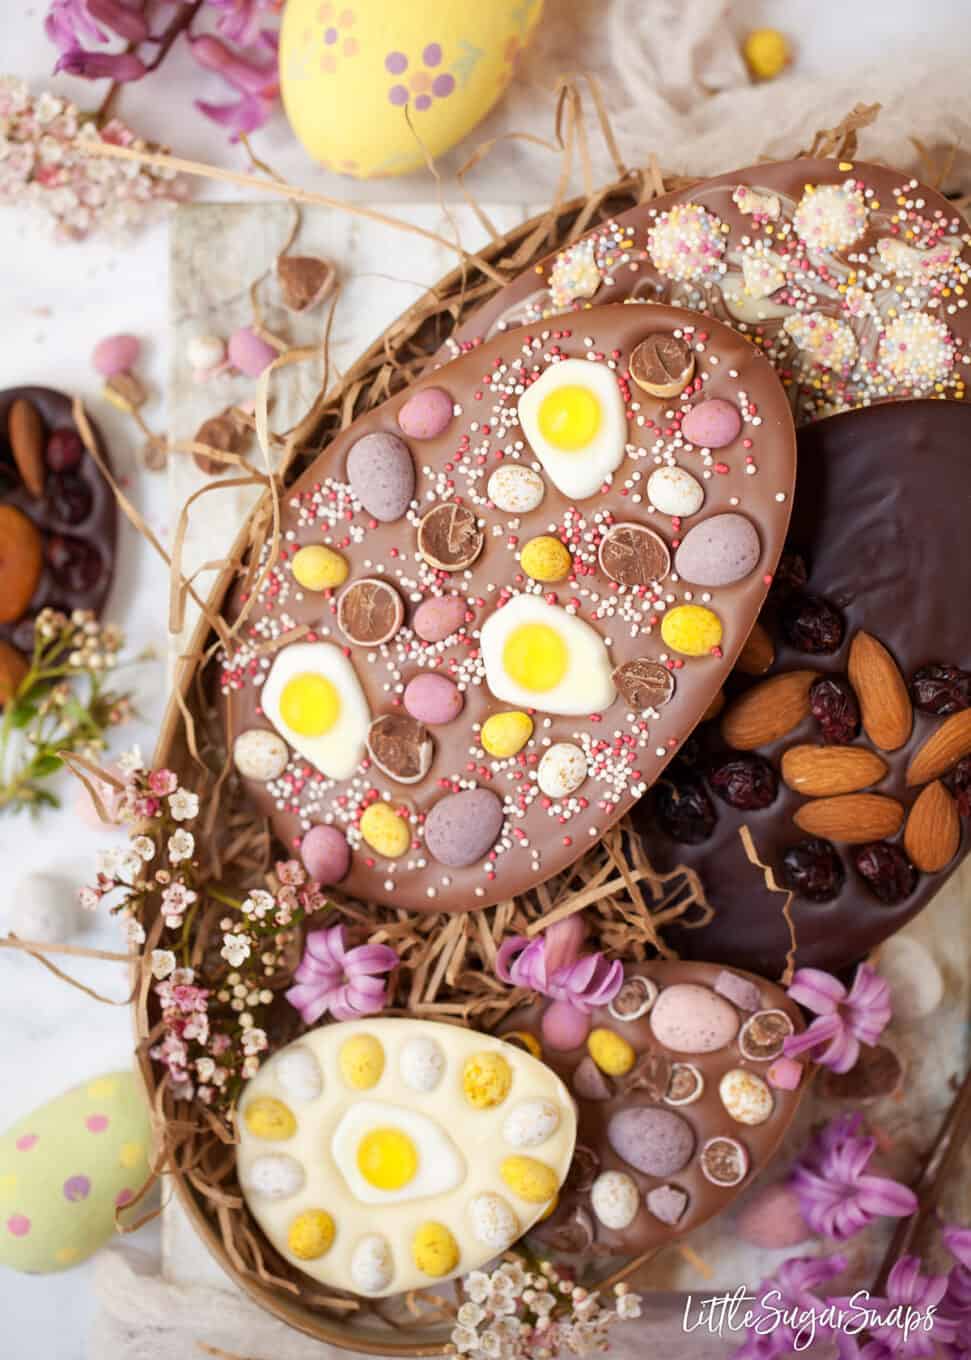
For the toppings pick a variety of sweets, chocolate, dried fruits, edible flower petals, sprinkles, sugarcraft shapes or even cookies. Be inventive - the best thing you can do is visit your local store and see what's available.
Step by step instructions
This recipe for candied Easter eggs is relatively quick to make and a lot of fun:
Step 1: Select the toppings and ensure they will fit well inside of the egg mold without it looking overcrowded or too sparse - it's a good idea to lay them out in the mold before chocolate is added to be sure
Step 2: Check the mold instructions for how much chocolate will be needed to fill it - reduce the amount of chocolate by ⅕ of this amount to avoid overflowing the mold once toppings are added. (My molds hold 150g (large) and 50g (small) of chocolate, so I scaled that back to 120g and 40g to account for the additional toppings)
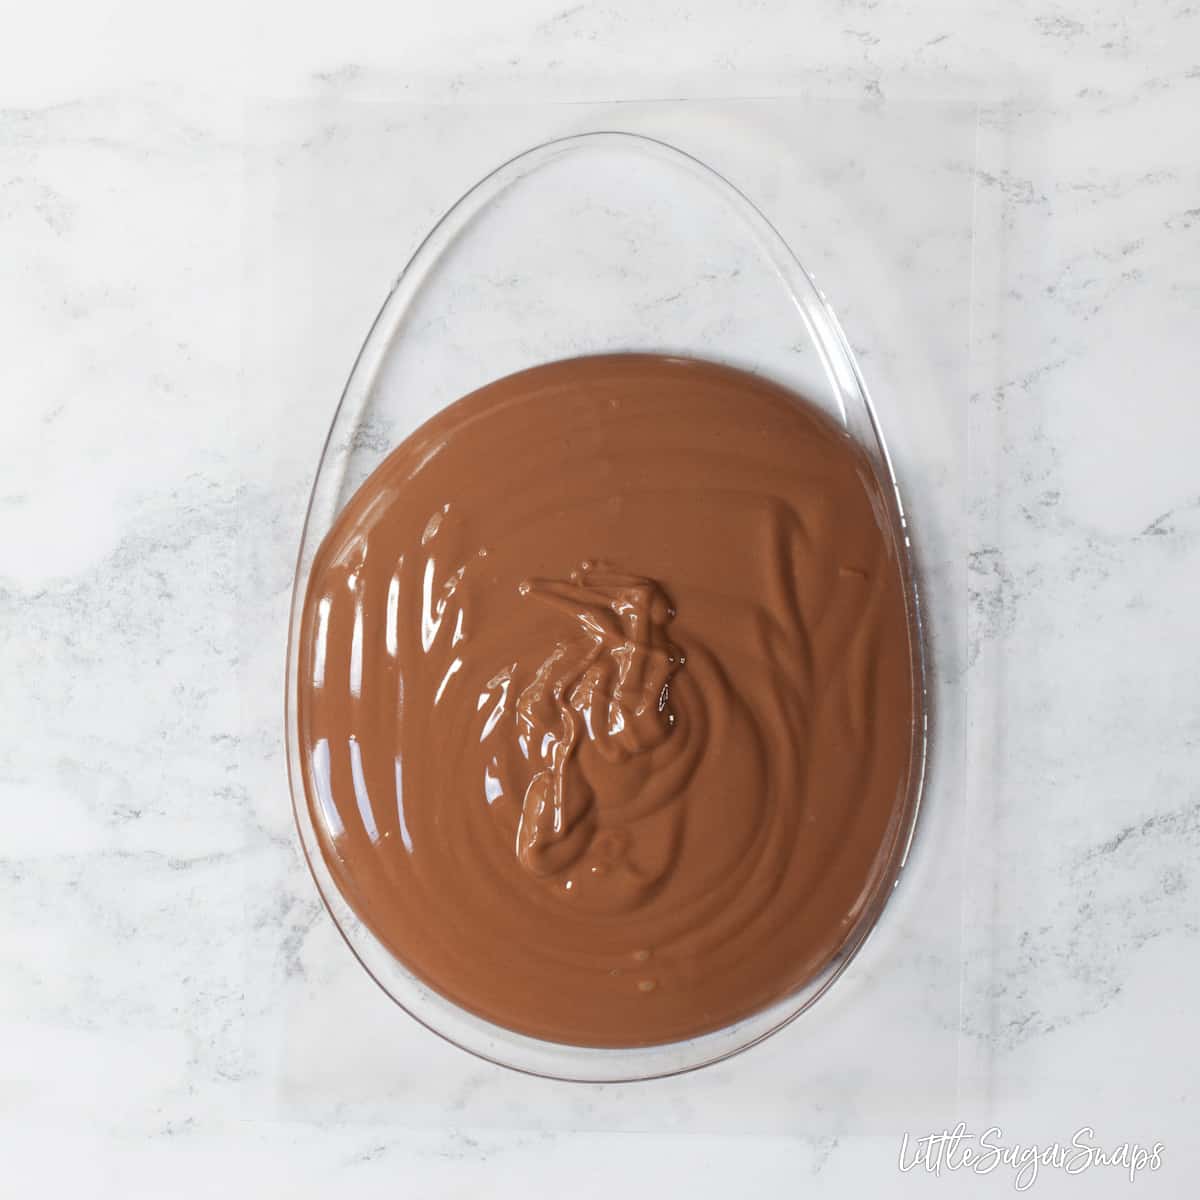
Step 3: Temper or melt the chocolate - I highly recommend using tempered chocolate for this recipe, since it will give far better results - full details on how to temper chocolate are given details below
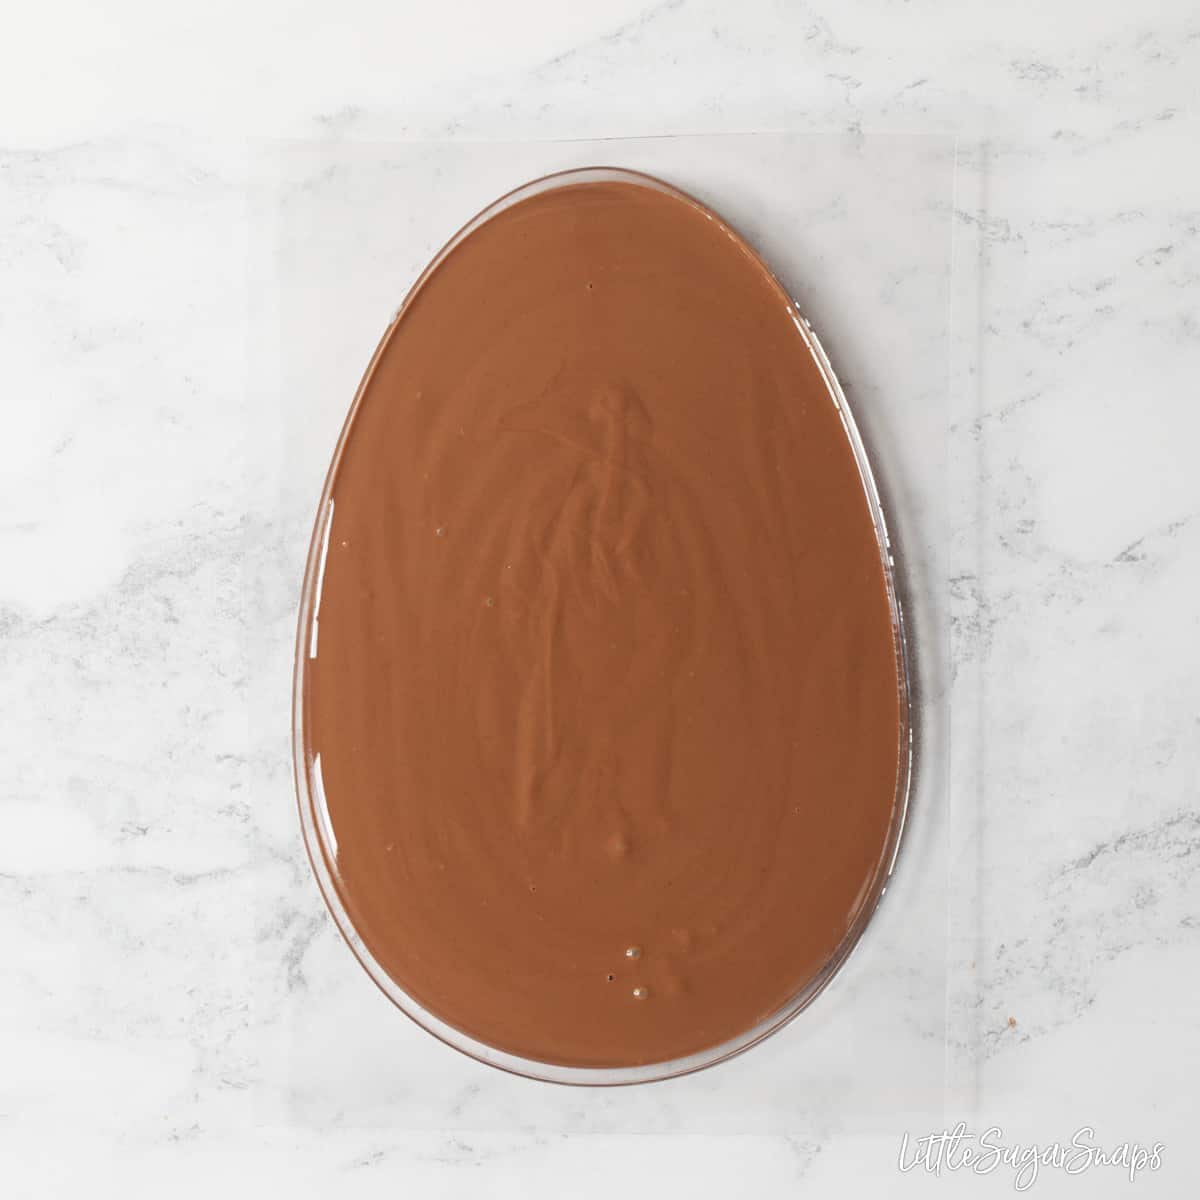
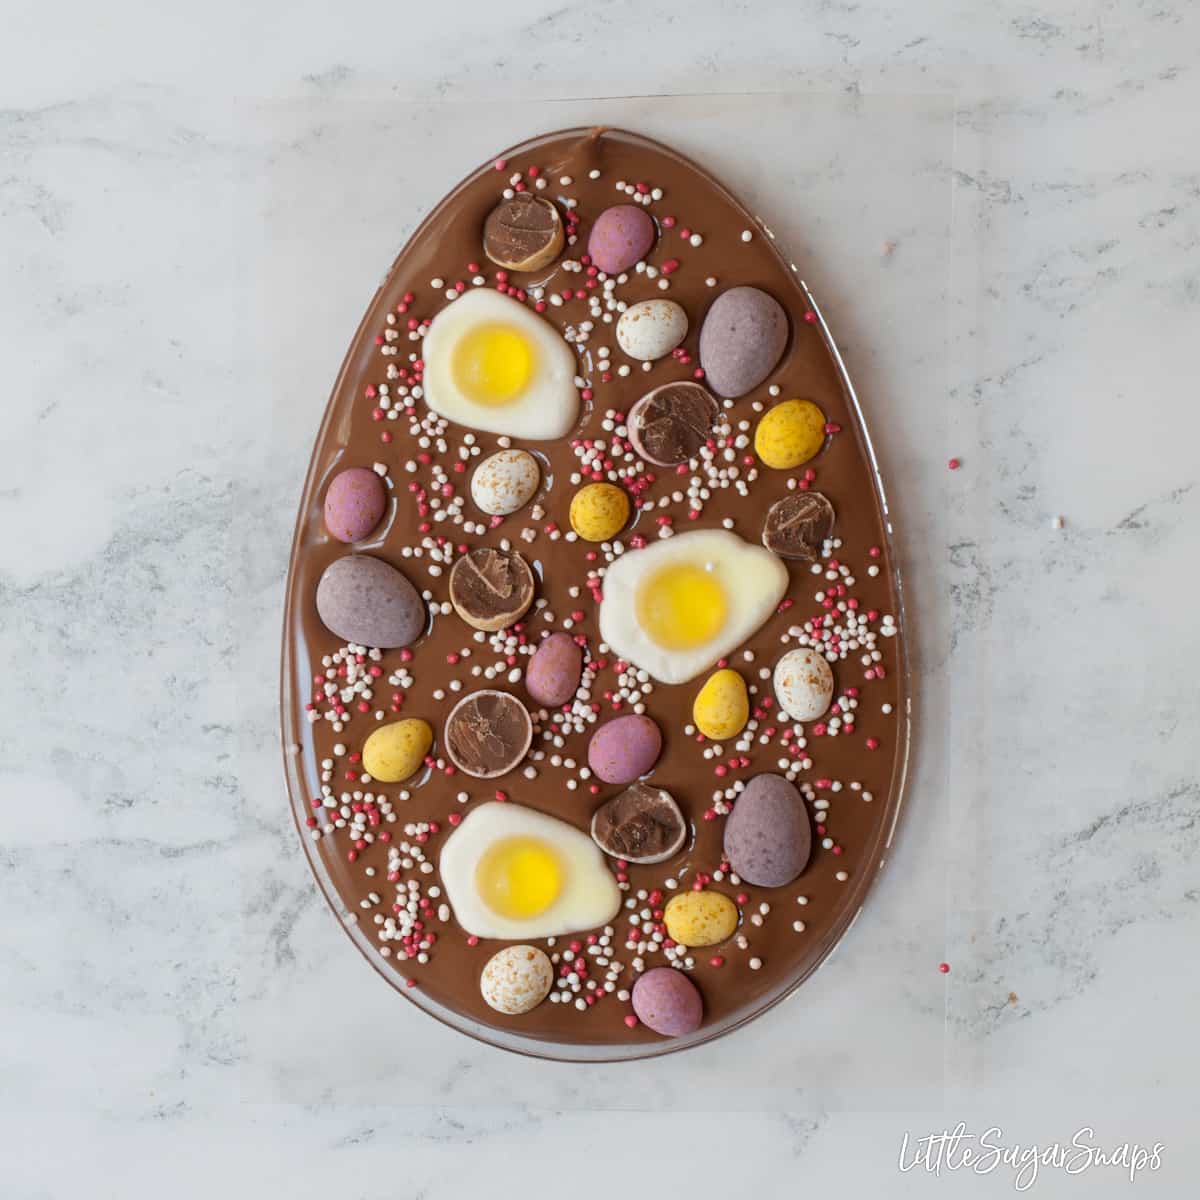
Step 4: Pour the prepared chocolate into your egg mold and gently tilt the mold from side to side until the chocolate reaches the edge then lay on a flat surface
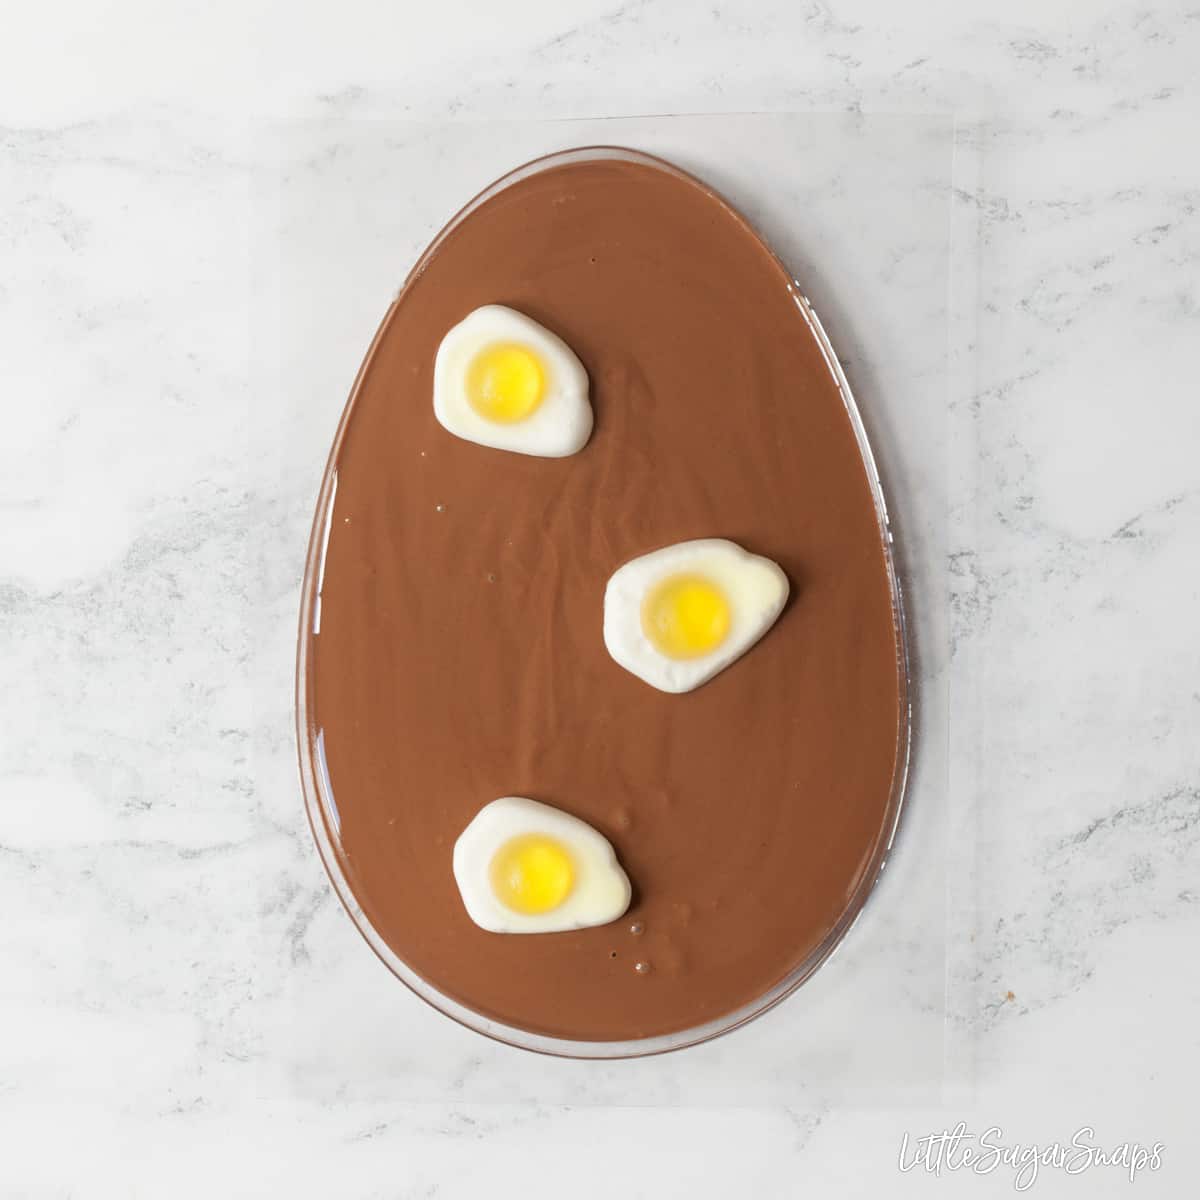
Step 5: Add the topping(s) to the egg, working quickly, as the chocolate will begin to set within a couple of minutes
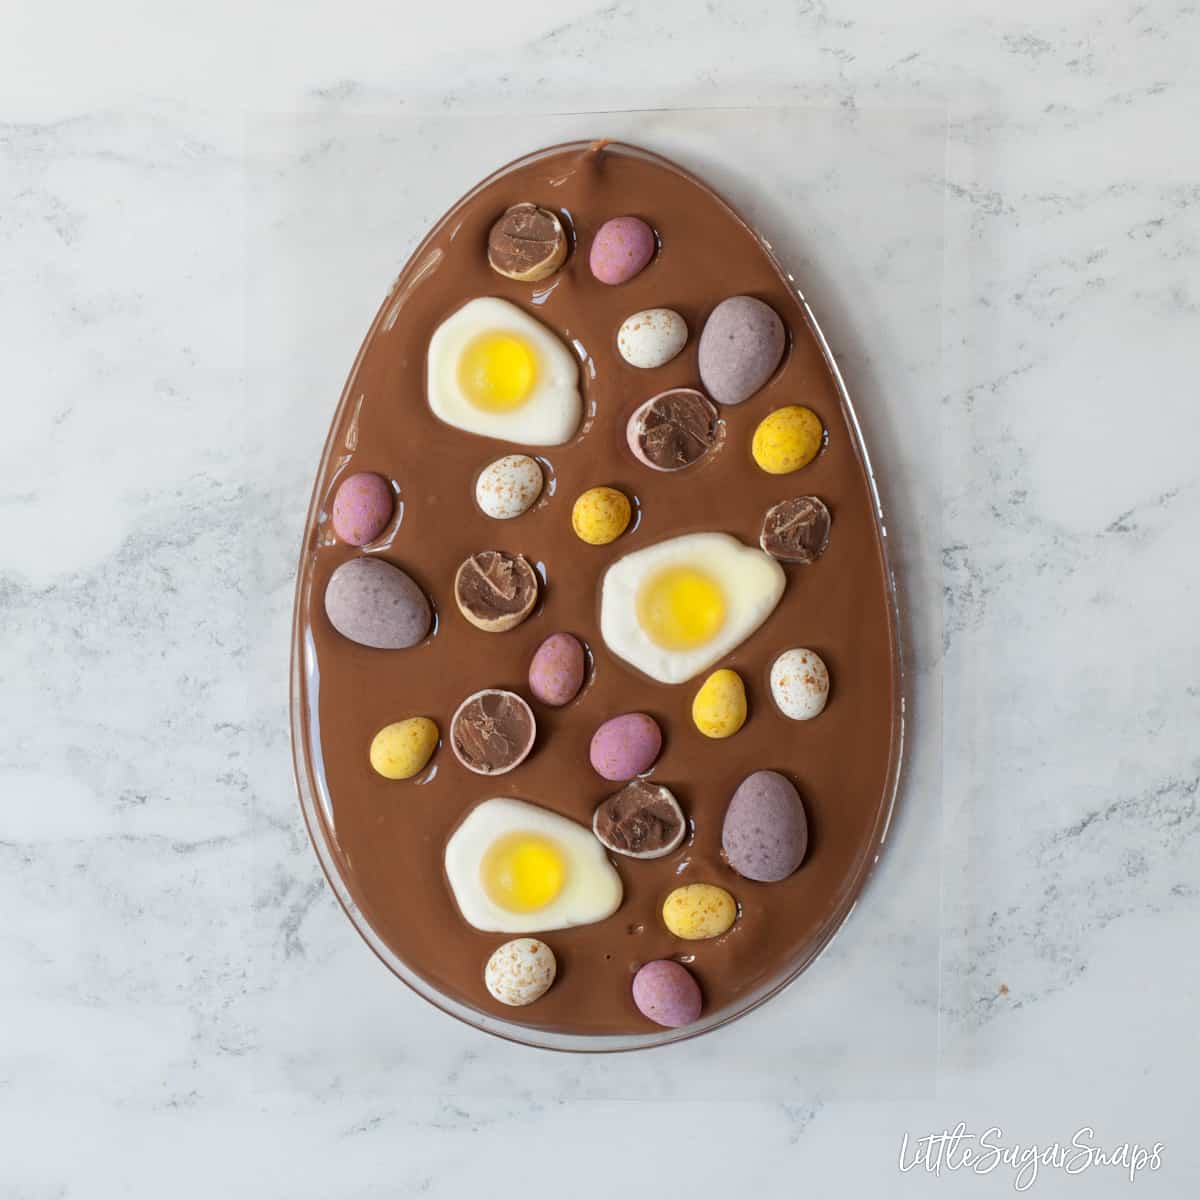
Step 6: Leave to set then carefully remove from the mold
Why & How to Temper Chocolate?
Quite simply, tempering means heating and cooling chocolate to ensure that the fats in it crystalise uniformly, thereby stabilising the chocolate for molding and making chocolates.
Tempering chocolate gives it a smooth and glossy finish and a firm snap. It's vital for this Easter egg recipe for a stylish presentation.
Why Temper Chocolate
One word: bloom. In fact, there are two types of chocolate bloom:
Sugar bloom - this occurs when moisture comes in contact with the chocolate - it dissolves the sugar crystals on the chocolate's surface, leaving a white, powdery look. When making these homemade candied Easter eggs sugar bloom should not be an issue.
Fat bloom - this can occur due to substandard storing conditions, dramatic changes in temperature, or a poor tempering process. Fat bloom leaves nasty white-grey streaks across the chocolate and can soften the texture.
The only sure-fire way to avoid fat bloom when making this Easter egg recipe is to properly temper the chocolate. Luckily, I have already published a guide on how to temper chocolate which is essential reading if you are new to this kitchen skill.
How to Temper Chocolate in the Microwave
My guide to tempering chocolate gives full instructions on this technique. I highly suggest you read it fully before embarking on this recipe, but in a nutshell, here's how to temper chocolate in the microwave successfully:
- Chop or grate all the chocolate and set aside ⅓. The rest of the chocolate should be microwaved on half-power, stirring the mixture every 30-60 seconds until it is almost completely melted
- Using a thermometer, check the temperature of the melted chocolate. You are aiming for the following heat ranges:
- Dark Chocolate: 45 - 48°C (113 - 118°F)
- Milk Chocolate: 40 - 43°C (104 - 109°F )
- White Chocolate: 37 - 40°C (99 - 104°F)
- If necessary, return the chocolate to the microwave and heat it gently in 10-15-second bursts until it is within the temperature range listed above
- Add spoonfuls of the grated chocolate you set aside and stir it in continuously until the desired temperature (see below) is reached and the bits have melted completely:
- Dark chocolate should be 31 - 32° C (88 - 90°F)
- Milk chocolates should be 30 - 31°C (86- 88°F)
- White chocolates should be 29 - 30°C (84 - 86°F)
Your chocolate is now ready to use for making these candied Easter eggs - hurrah!
Top tip: do not be tempted to set the microwave for 5 minutes and wander off. There's every chance that patches of the chocolate will burn using this approach. Instead use 30-45 second bursts of power, stir and if the chocolate is looking fluid, test the temperature with a digital thermometer before heating further.
Inspiration for Toppings
Think about colour contrasts when deciding what toppings to put on your candied Easter eggs. Your choices might depend on whether you are using milk, dark or white chocolate. Here's my list of ideas:
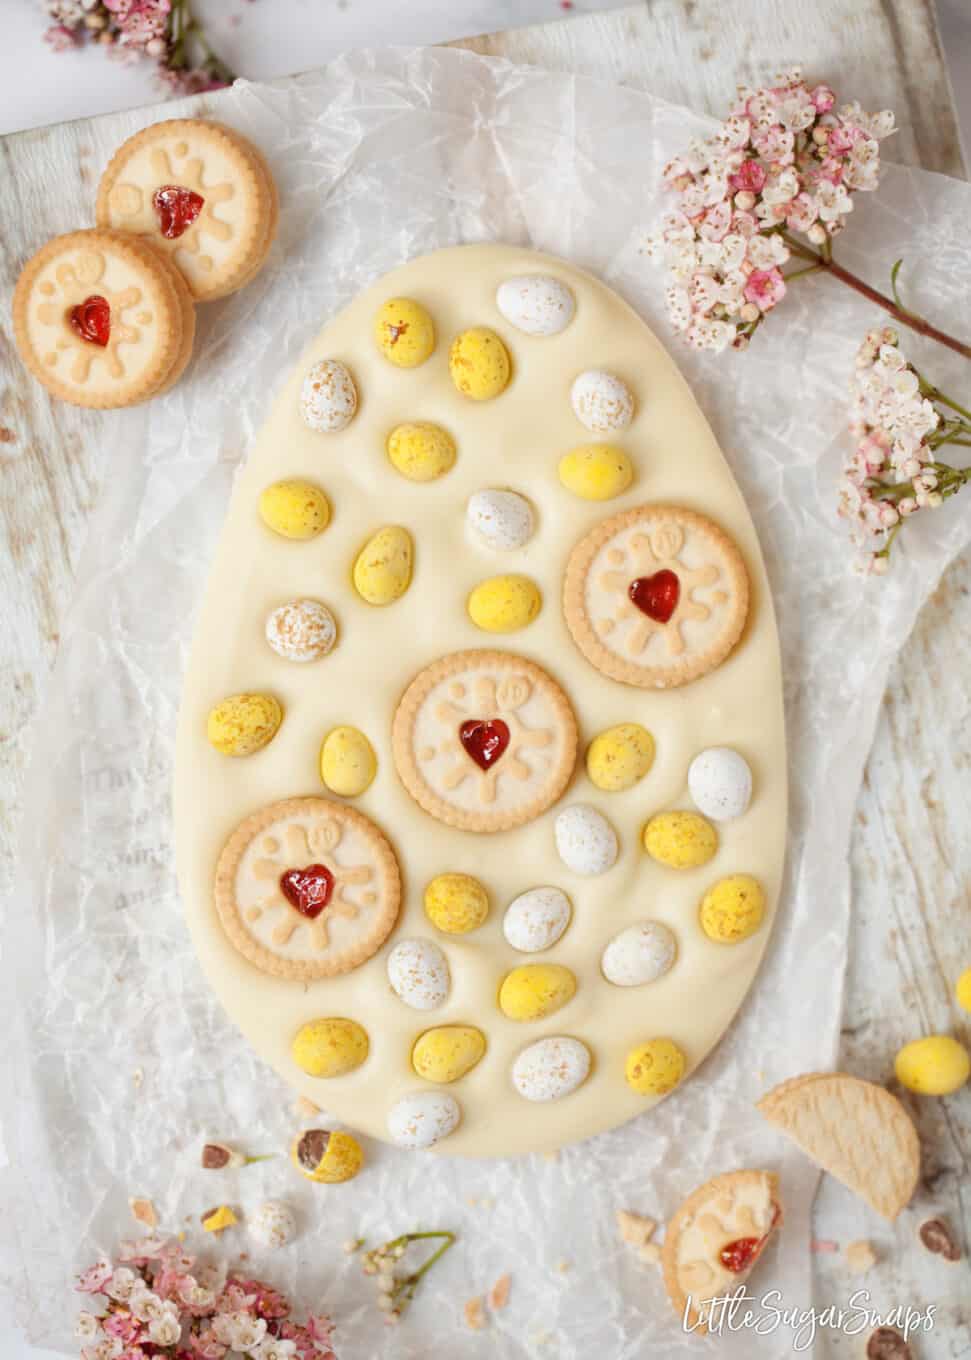
- Mini biscuits or cookies such as Jammie Dodgers, Iced Gems and Party Rings
- Jelly sweets - not just the fried eggs
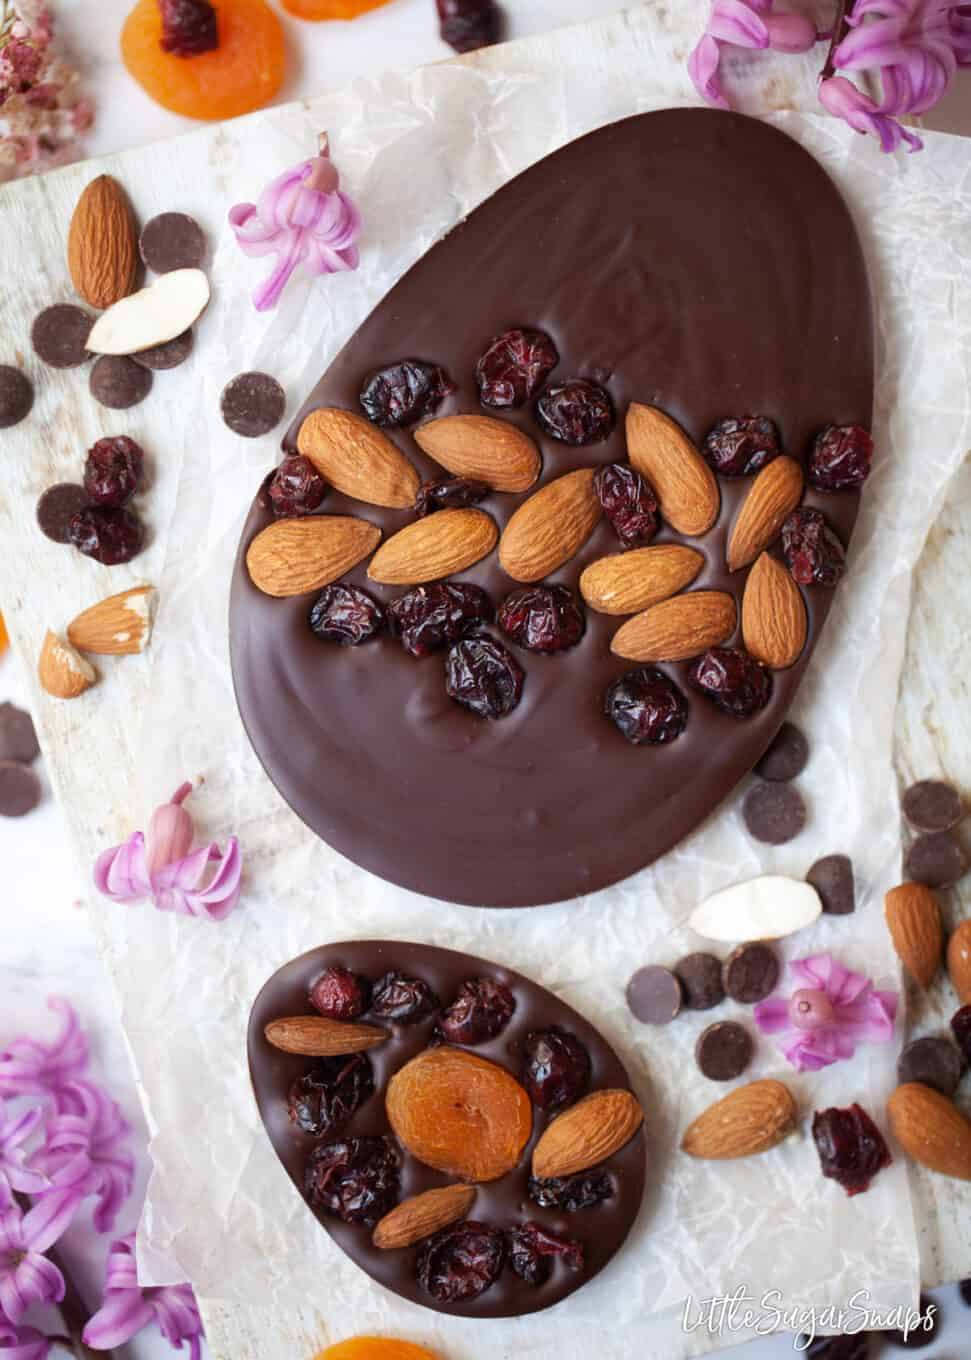
- Dried fruit - cherries, cranberries and apricots all pair really well with dark chocolate
- Nuts - another winner with dark chocolate, especially almonds and pistachios
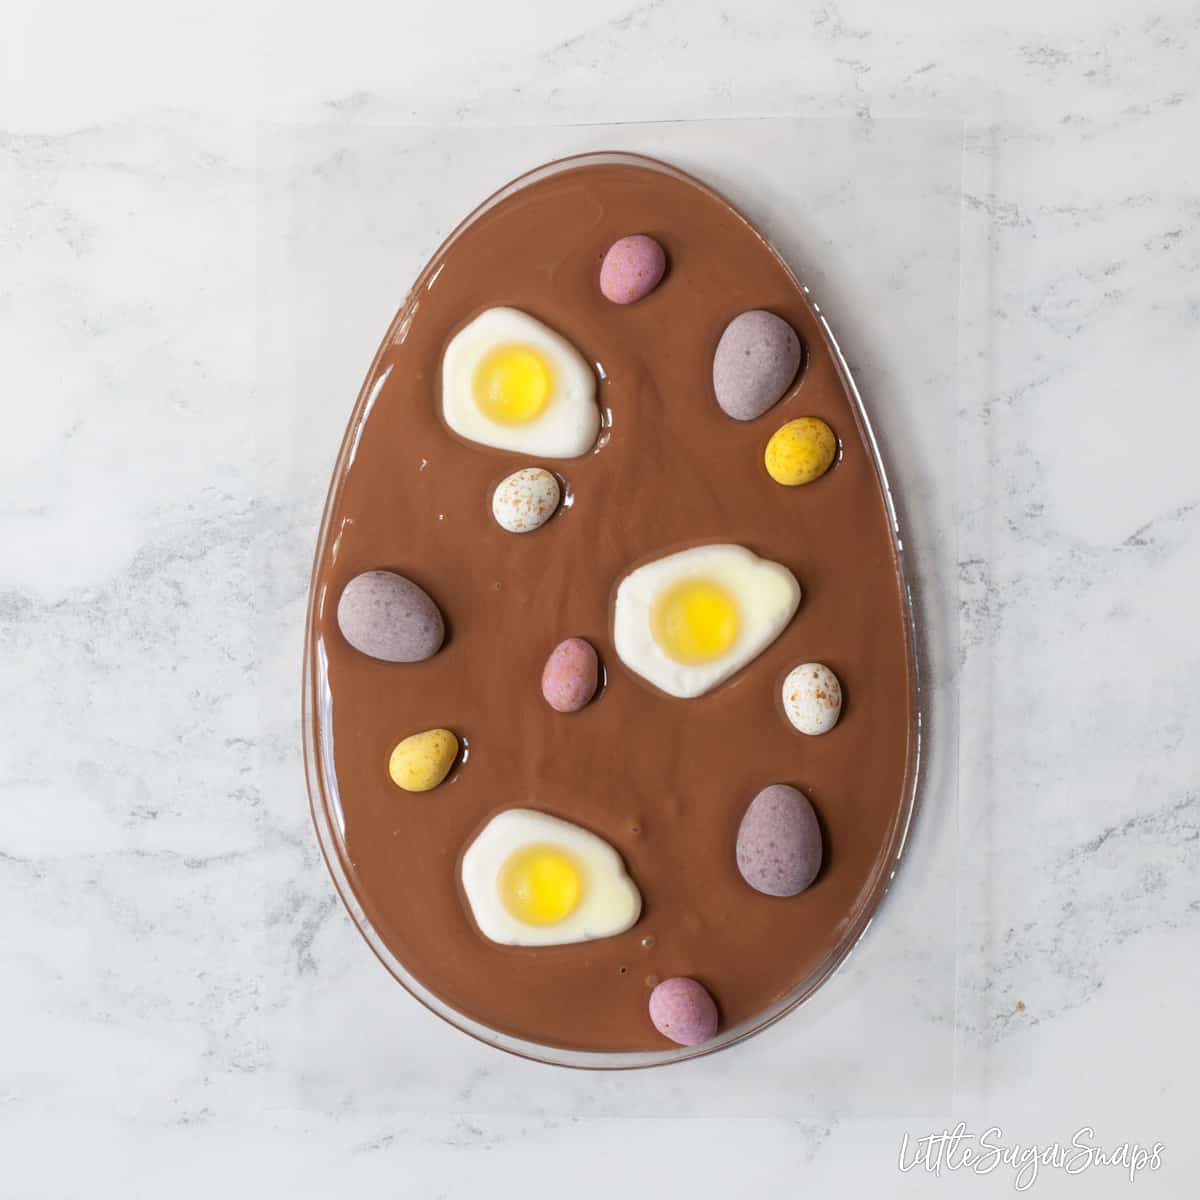
- Mini eggs - obviously, Try cracking a few open for visual interest
- Sprinkles - any colour, any variety
- Mint Aero balls - cut them in half and lay face-up
- Honeycomb chunks - storebought or homemade
- Fudge pieces
- M&Ms - any variety
- Mini pretzels
- Mini marshmallows
- Edible flowers
- Sugarcraft decorations - stick with the Easter theme, plump for something pretty such as flowers & butterflies or for older kids go with Harry Potter
Of course, marbling milk, white and dark chocolate together also gives a visually impressive result without the need for further adornment.
Expert tips
Once the chocolate has been tempered these candied chocolate Easter eggs are very simple to pull together. However, there are a few pointers to keep in mind:
- Ensure all of the toppings are assembled and chopped (if necessary) before the chocolate is melted. It can set quickly, so there will not necessarily be time to chop toppings once the chocolate has been poured into the molds
- The chocolate mold will overflow if too many toppings are added. Sometimes less is more - keep an eye on the chocolate level and moderate your design if it looks in danger of spilling out at the sides
- Sprinkles are very lightweight and can easily fill empty spaces in your design without making the chocolate overflow
- If using biscuits, honeycomb or sugarcraft decorations as a topping in this Easter egg recipe, do remember to store the egg in an airtight container once made and gift it quickly, to avoid them going soft or stale
Frequently asked questions
You can melt the chocolate rather than tempering it, but this may result in bloom on the surface of your eggs. Please keep this in mind before deciding to take this approach
By all means - I believe it can be tempered just as regular chocolate is. It's perhaps worth doing a little research before you buy to double-check your brand is suited to tempering though
Store them in an airtight container at room temperature. The length of time these eggs can be stored for depends wholly on the topping selected.
More Easter Recipes
If these chocolate Easter eggs leave you in the mood for more festive treats take a look at these recipes:

Have you made these candied Easter eggs? I hope you enjoyed them. Let me know how you got along by leaving a comment or rating below. You can also show me your creation on Instagram by tagging me @jane_littlesugarsnaps.
Please add us as a trusted site on Google so that our recipes show up more in your searches!
Stay in touch: sign up to receive LittleSugarSnaps newsletters to hear when new recipes are published. Or follow me on social media:
📖 Recipe
Homemade Easter Eggs
Ingredients
- 160 g/ 1 cup Dark/ Milk/ White Chocolate exact amounts will depend on the size of your mold - check how much they will hold
Toppings - one or a few or some of the following
- Mini Cookies Jammie Dodgers/ Iced Gems/ Party Rings
- Dried fruit Cherries, cranberries, apricots etc
- Nuts Almonds, pistacios etc
- Sprinkles
- Mini eggs Cut a few open for visual interest
- Pretzels
- M&Ms
- Aero balls Cut in half
- Crushed honeycomb
- fudge pieces
- Sugarcraft decorations
Instructions
- Select your toppings and ensure they will fit well inside of your egg mold without it looking overcrowded or too sparse - it's a good idea to lay them out in the mold before chocolate is added to be sure
- Check your mold instructions for how much chocolate will be needed to fill it - reduce the amount of chocolate by ⅕ of this amount to avoid overflowing the mold once toppings are added. (My molds hold 150g (large) and 50g (small) of chocolate, so I scaled that back to 120g and 40g to account for the additional toppings)
- Temper or melt the chocolate - I highly recommend using tempered chocolate for this recipe, since it will give far better results - see my guide to tempering chocolate
- Pour the chocolate into your egg mold and gently tilt the mold from side to side until the chocolate reaches the edge then lay on a flat surface
- Add the topping(s) to the egg, working quickly, as the chocolate will begin to set within a couple of minutes
- Leave to set then carefully remove from the mold
Notes
Cooking Tips
- Ensure all of your toppings are assembled and chopped (if necessary) before you bin melting the chocolate. It can set quickly, so there will not necessarily be time to chop toppings once the chocolate has been poured into the molds
- You can melt the chocolate rather than tempering it, but this may result in bloom on the surface of your eggs. Please keep this in mind before deciding to take this approach (I whole-heartedly recommend tempering your chocolate for the best result)
- Vegan chocolate can be used, but it's worth doing a little research before you buy to double-check your brand is suited to tempering though
- The chocolate mold will overflow if too many toppings are added. Sometimes less is more - keep an eye on the chocolate level and moderate your design if it looks in danger of spilling out at the sides
- Sprinkles are very lightweight and can easily fill empty spaces in your design without making the chocolate overflow
- If using biscuits, honeycomb or sugarcraft decorations as a topping in this Easter egg recipe, do remember to store the egg in an airtight container once made and gift it quickly, to avoid them going soft or stale
Donna says
Can I please ask where you got the flat egg shaped moulds?
These look amazing
Jane Coupland says
I got them from Amazon - there's a link in the post to them, but it looks as if they are currently unavailable. If you search 'plain Easter egg plaque moulds' then a few options show up for craft stores and Etsy.
Healthy World Cuisine says
Your homemade Easter Eggs are super cute. Almost too pretty to eat! Perfect treat for the Easter Holiday. Stay well and take care
Jane Saunders says
Thankyou - they are the perfect weekend activity to keep my kids entertained right now.
Sarah says
Jane, this is just what we all need to entertain the family and have fun. We will definitely be having a go. Thank you
Jane Saunders says
Ah thankyou Sarah. I've been feeling bad about posting new content this week, but pleased it's caused some joy!