

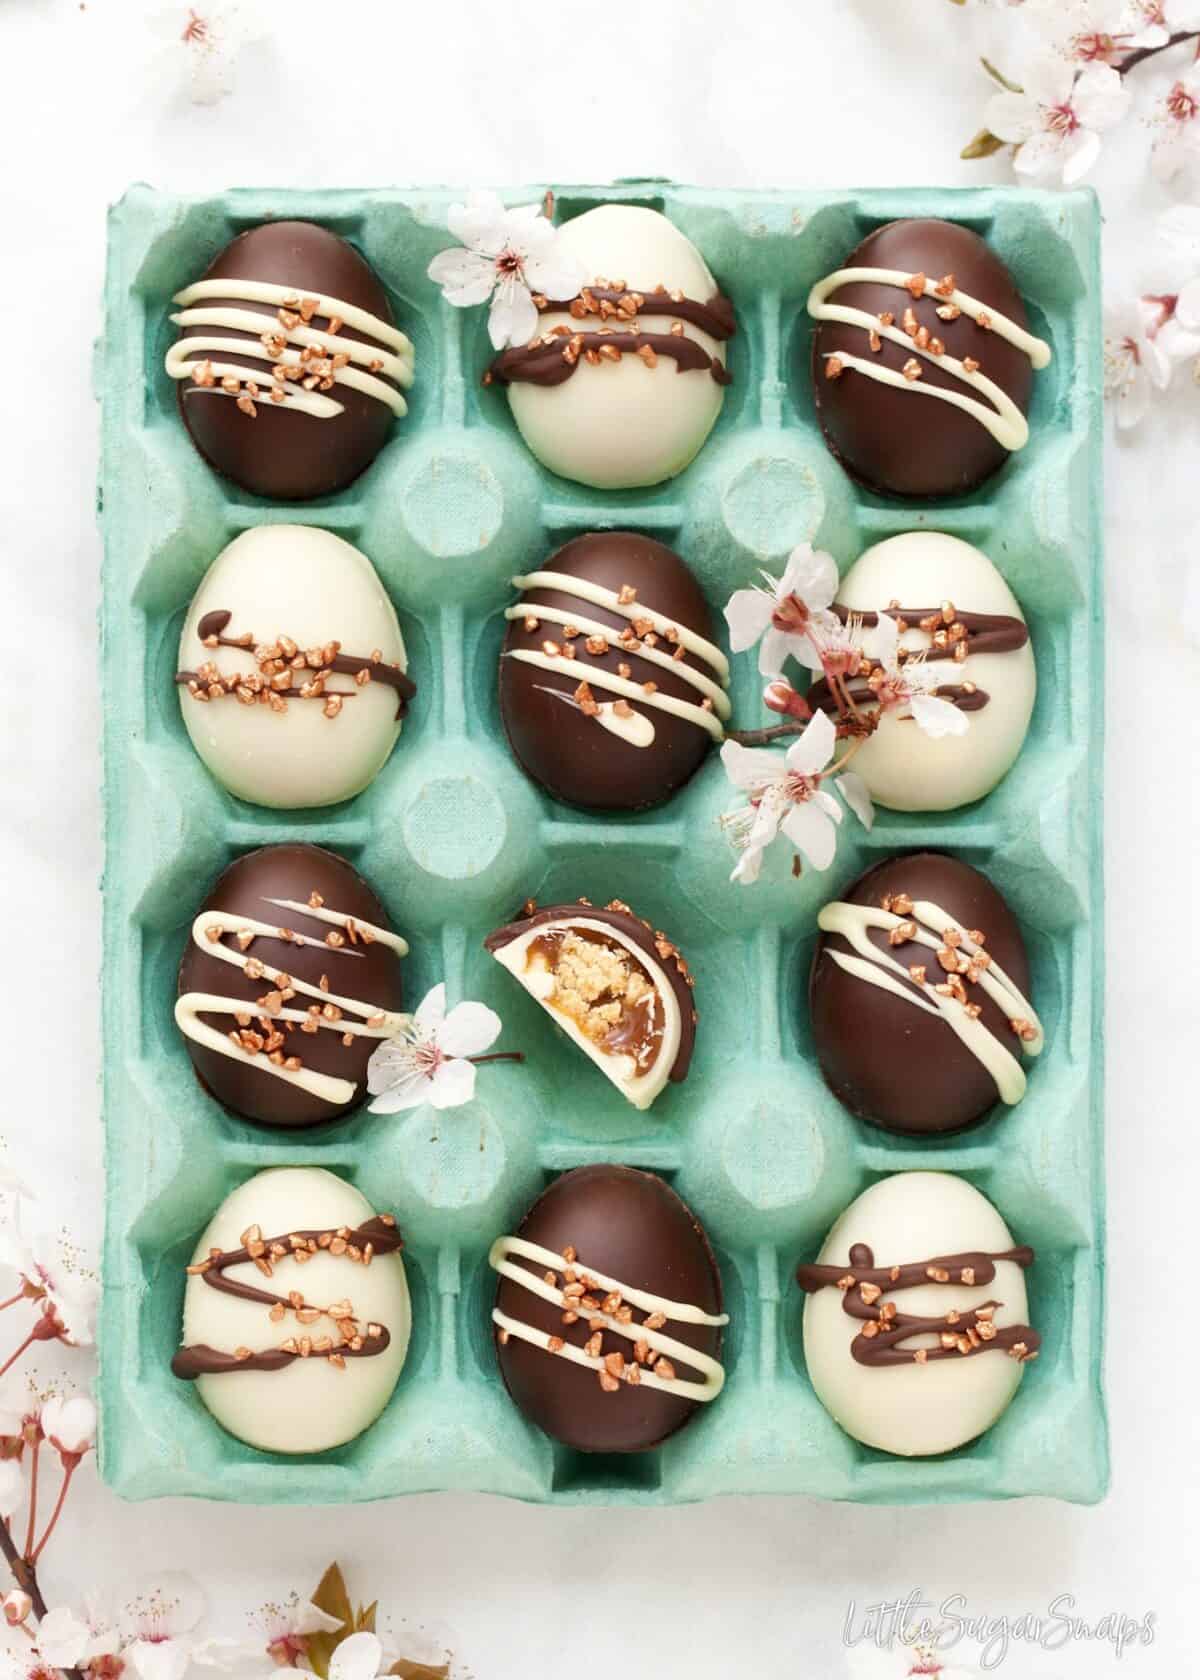
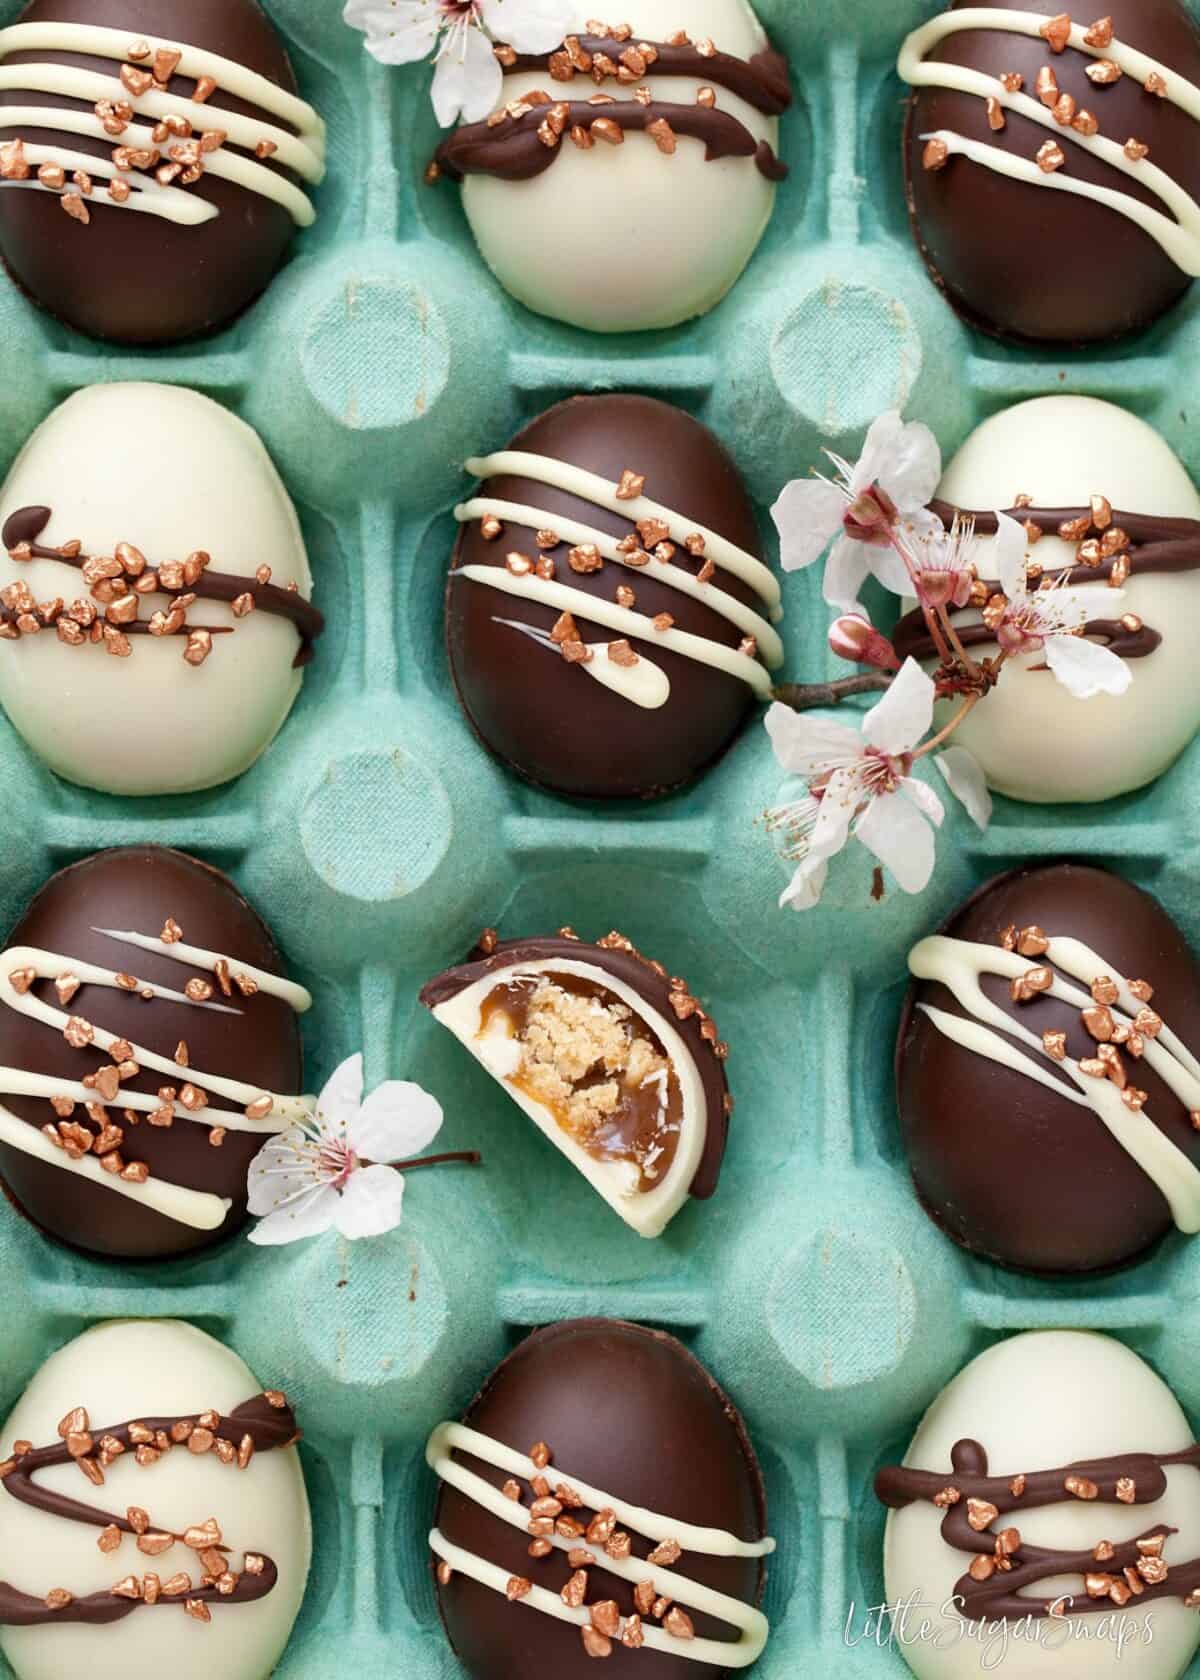
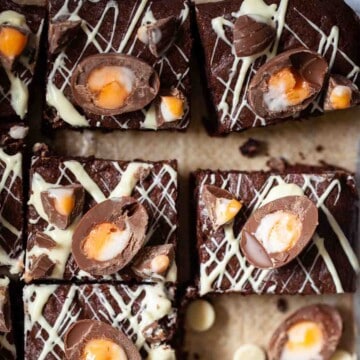
This Easter egg recipe with caramel shortbread filling makes gorgeous 2-bite delights. Learn how to temper chocolate properly in the process of making them.
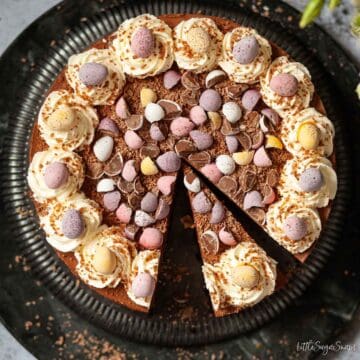
Love caramel shortbread? Try my chocolate caramel shortbread and my Millionaire cake.
This Post is Sponsored by Thermapen
I'm very excited to be sharing this Easter egg recipe today because, in making them, I have mastered a new trick. Well, its an old trick that has always stumped me - tempering chocolate successfully.
Although I have a soft spot for creating homemade chocolates, such as these gin and blackberry truffles, my inability to temper chocolate properly has always let me down. Through the years, I have harumphed my way through serving up dozens of bloomed chocolates to family & friends, inwardly so disappointed in myself for not being able to master this skill.
From now on though, I will be serving up smooth, perfectly tempered chocolates without a hint of bloom about them.
Of course, I'm going to share with you what I have been doing wrong time and time again and how to temper chocolate properly. But before all of that, let's talk about this delectable Easter egg recipe in more detail.
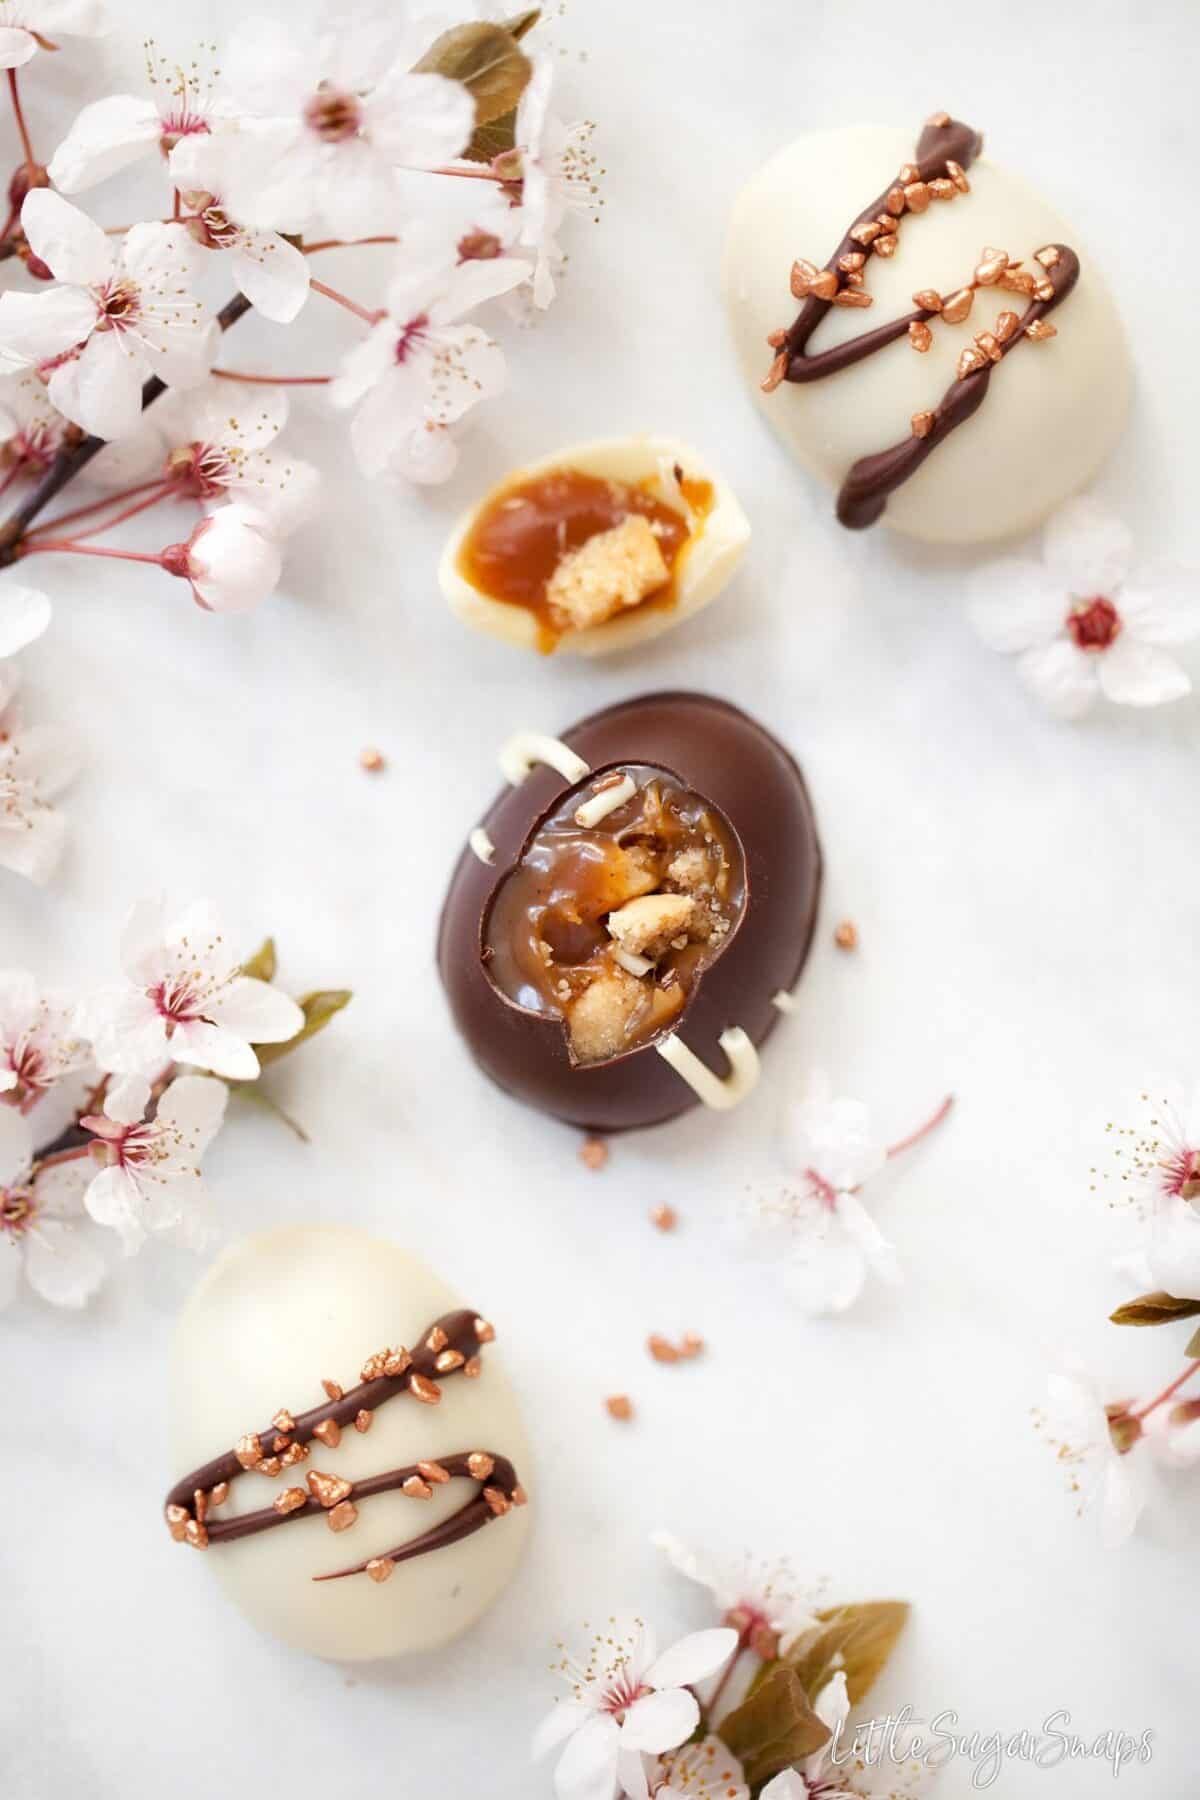
What is inside these eggs?
If I tell you that the inspiration behind this Easter egg recipe was the UK's much-loved bake, millionaire's shortbread, you don't have to be Einstein to calculate that I've included caramel and shortbread inside of them.
They sound so good, don't they?
And, rather unsurprisingly, they are utterly delicious and hard to stop eating.
Once made, these eggs have many uses. They do, of course, make wonderful gifts for loved ones. But they can also be served with coffee at the end of a meal or used to garnish desserts or cake.
And of course, these millionaire's shortbread homemade Easter eggs can and should be made at least once just for yourself and, at a push, your nearest & dearest. If you can handle sharing...
I've used homemade caramel and flavoured it with vanilla to add a lovely creamy flavour to the caramel itself. As an alternative, salted caramel also works well, so I've included instructions for this in my recipe notes.
Although my Easter egg recipe uses homemade caramel, it does use storebought shortbread. If you have extra time and feel inclined to make your own shortbread, all the better.
Conversely, if time is not on your side, concentrate on getting the chocolate perfectly tempered and use good quality storebought caramel and shortbread instead.
These eggs can be made in any chocolate you prefer - dark, milk or (my personal favourite) white. Use the best chocolate that you can afford and pick contrasting chocolate to add a splash of simple style to the decoration.
But whatever chocolate you plump for, it must be tempered before using to mold these homemade chocolate eggs.
Before getting to the technique, it's important to understand why we need to temper chocolate. The reason is cocoa butter:
Cocoa butter is fat that is composed of three to four glycerides of fatty acids - each of these different fatty acids solidifies at a different temperature.
Once chocolate is melted, the fatty acid crystals separate
Tempering melted chocolate pulls the different fatty acid crystals of cocoa butter back into one stable form, doing away with those whitish streaks or spots of cocoa butter apparent on unsuccessfully tempered chocolate.
As promised, before I tell you how to temper chocolate, I'm going to reveal what I was doing wrong for so many years.
How Not to Temper Chocolate
Hands up if, in your quest to master chocolate tempering, you have followed advice to melt ⅔ of the chocolate and then add the remaining third?
Sounds simple, doesn't it? And I can't tell you how many times I have come across this seemingly straightforward recommendation as I've tried to work out what I have been doing wrong.
I can, however, tell you, that although this technique may result in the occasional batch of perfectly tempered chocolate, it is hit and miss. Perfectly tempered chocolate must be heated and cooled to certain temperatures. Precision is vital.
There are a number of ways to temper chocolate properly, but tempering by seeding is the technique I am describing today, because it is relatively quick and easy.
How to Temper Chocolate
Earlier, when I said precision is vital, I really do mean it. For starters, dark, milk and white chocolate must be heated and cooled to different temperatures to temper chocolate successfully. So it really is not enough to work by the two thirds : one third approach and hope for the best.
You will need the following equipment:
- Good quality chocolate
- Microwave (or double boiler)
- Heatproof bowl (microwave-safe) bowl
- Spatula for stirring
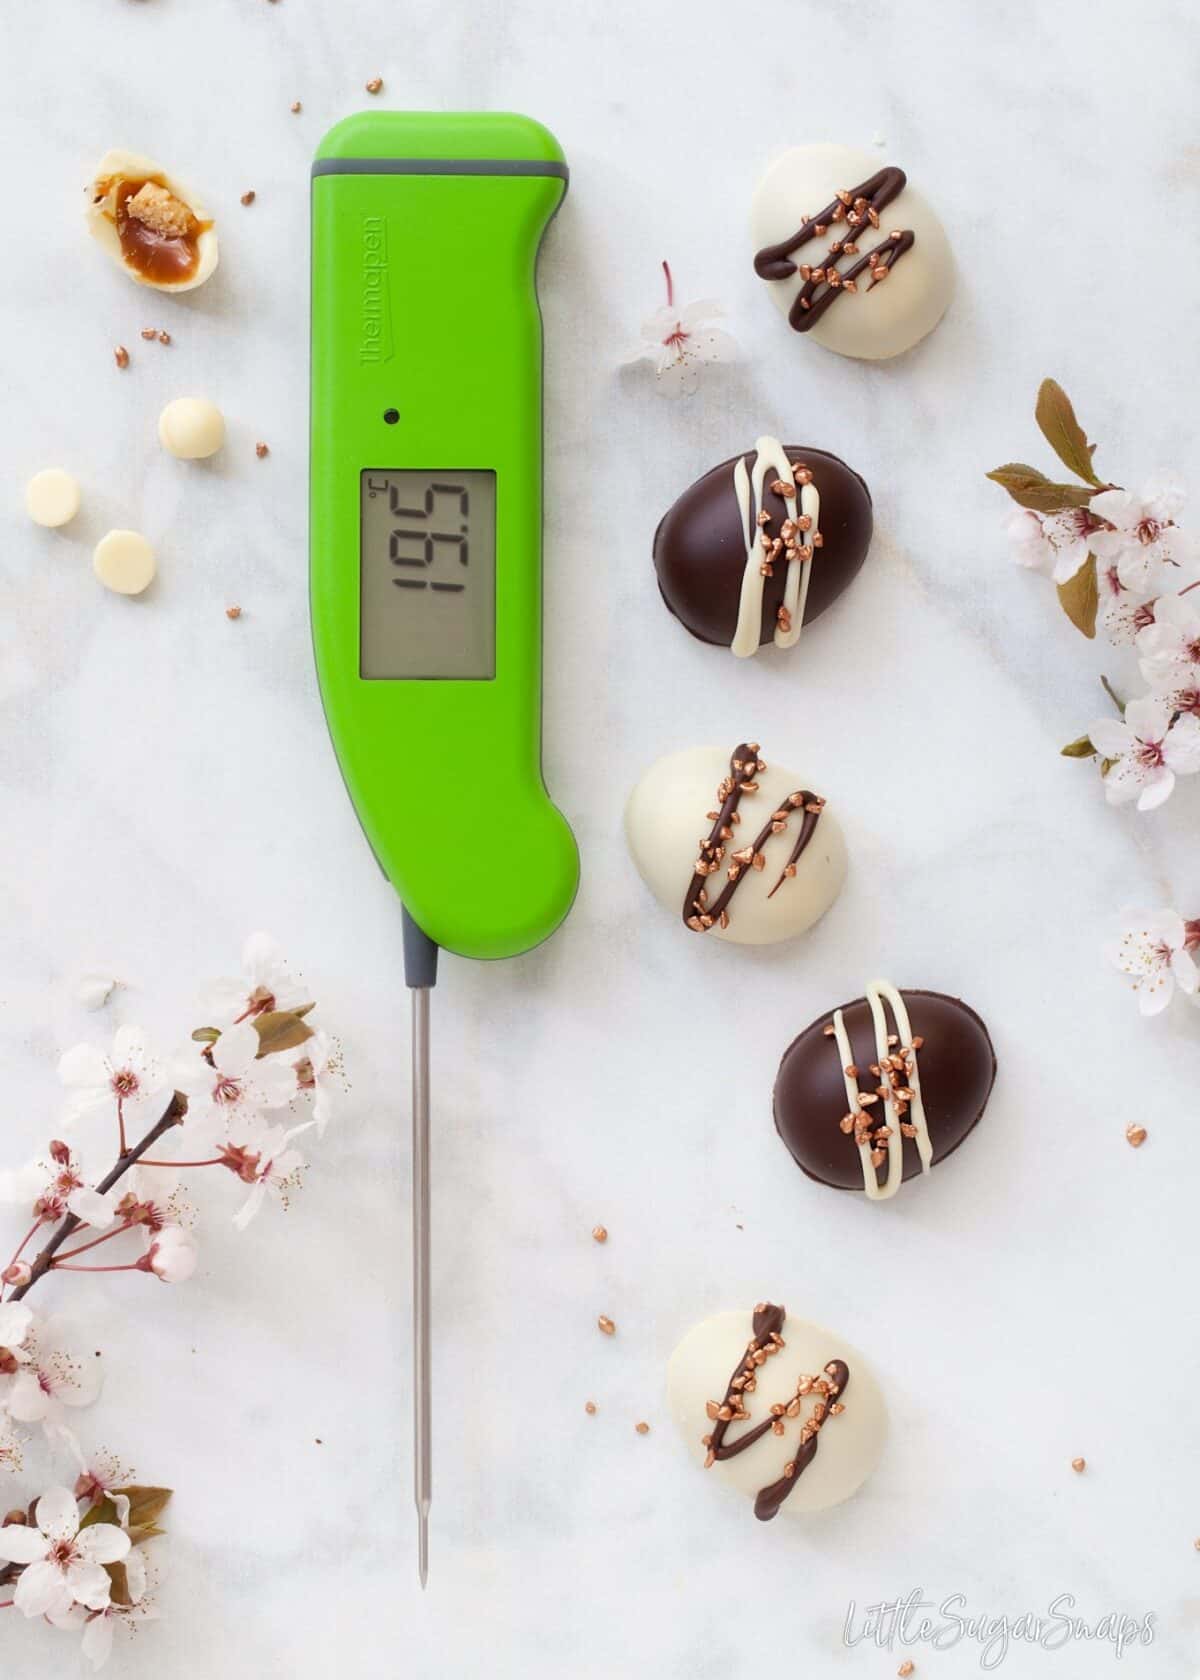
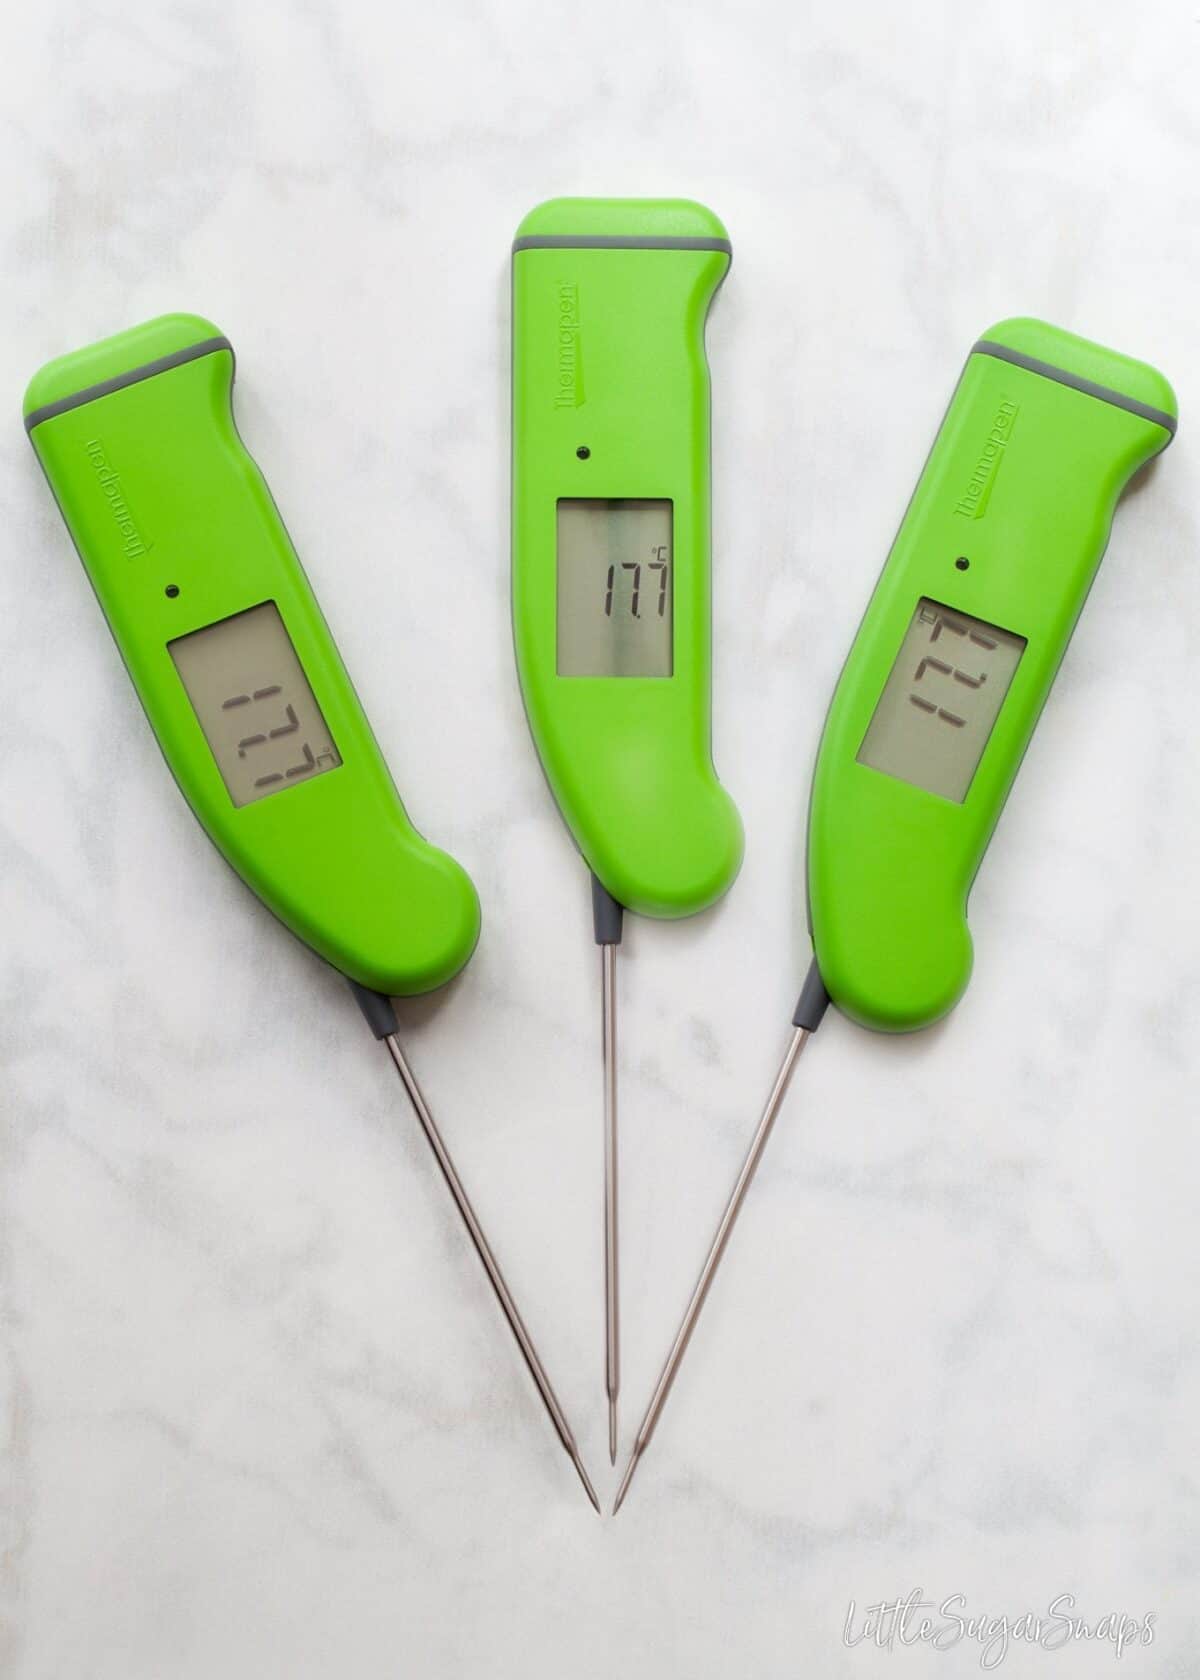
- A reliable probe style food thermometer such as a Thermapen
There are really 6 stages to tempering chocolate using the seeding technique:
- Chop or grate the chocolate - the smaller it is the better since the quicker the chocolate will melt and temper
- Set aside 25-30% of the chocolate
- Heat the rest of the chocolate by microwaving it on half-power, stirring the mixture every minute until it is almost completely melted. This will take approximately five minutes
- Remove the bowl of chocolate from the microwave and stir to cool it slightly. Those remaining lumps of chocolate will melt as you stir. Using a thermometer, check the temperature of the melted chocolate. It should within the following ranges:
- Dark Chocolate: 45 - 48°C (113 - 118°F)
- Milk Chocolate: 40 - 43°C (104 - 109°F )
- White Chocolate: 37 - 40°C (99 - 104°F)
- If the chocolate temperature falls short of this range heat it gently in 15-second bursts until it is there and stir again
- Next, add spoonfuls of the grated chocolate you set aside (the seeding chocolate). Stir in the seeding chocolate bits continuously until the desired temperature (see below) is reached and the bits have melted completely. You may not need to add all of the chocolate
- Dark chocolate should be 31 - 32° C (88 - 90°F)
- Milk chocolates should be 30 - 31°C (86- 88°F)
- White chocolates should be 29 - 30°C (84 - 86°F)
Don't be surprised if this process takes up to 15 minutes - your beautiful tempered chocolate will be your reward.
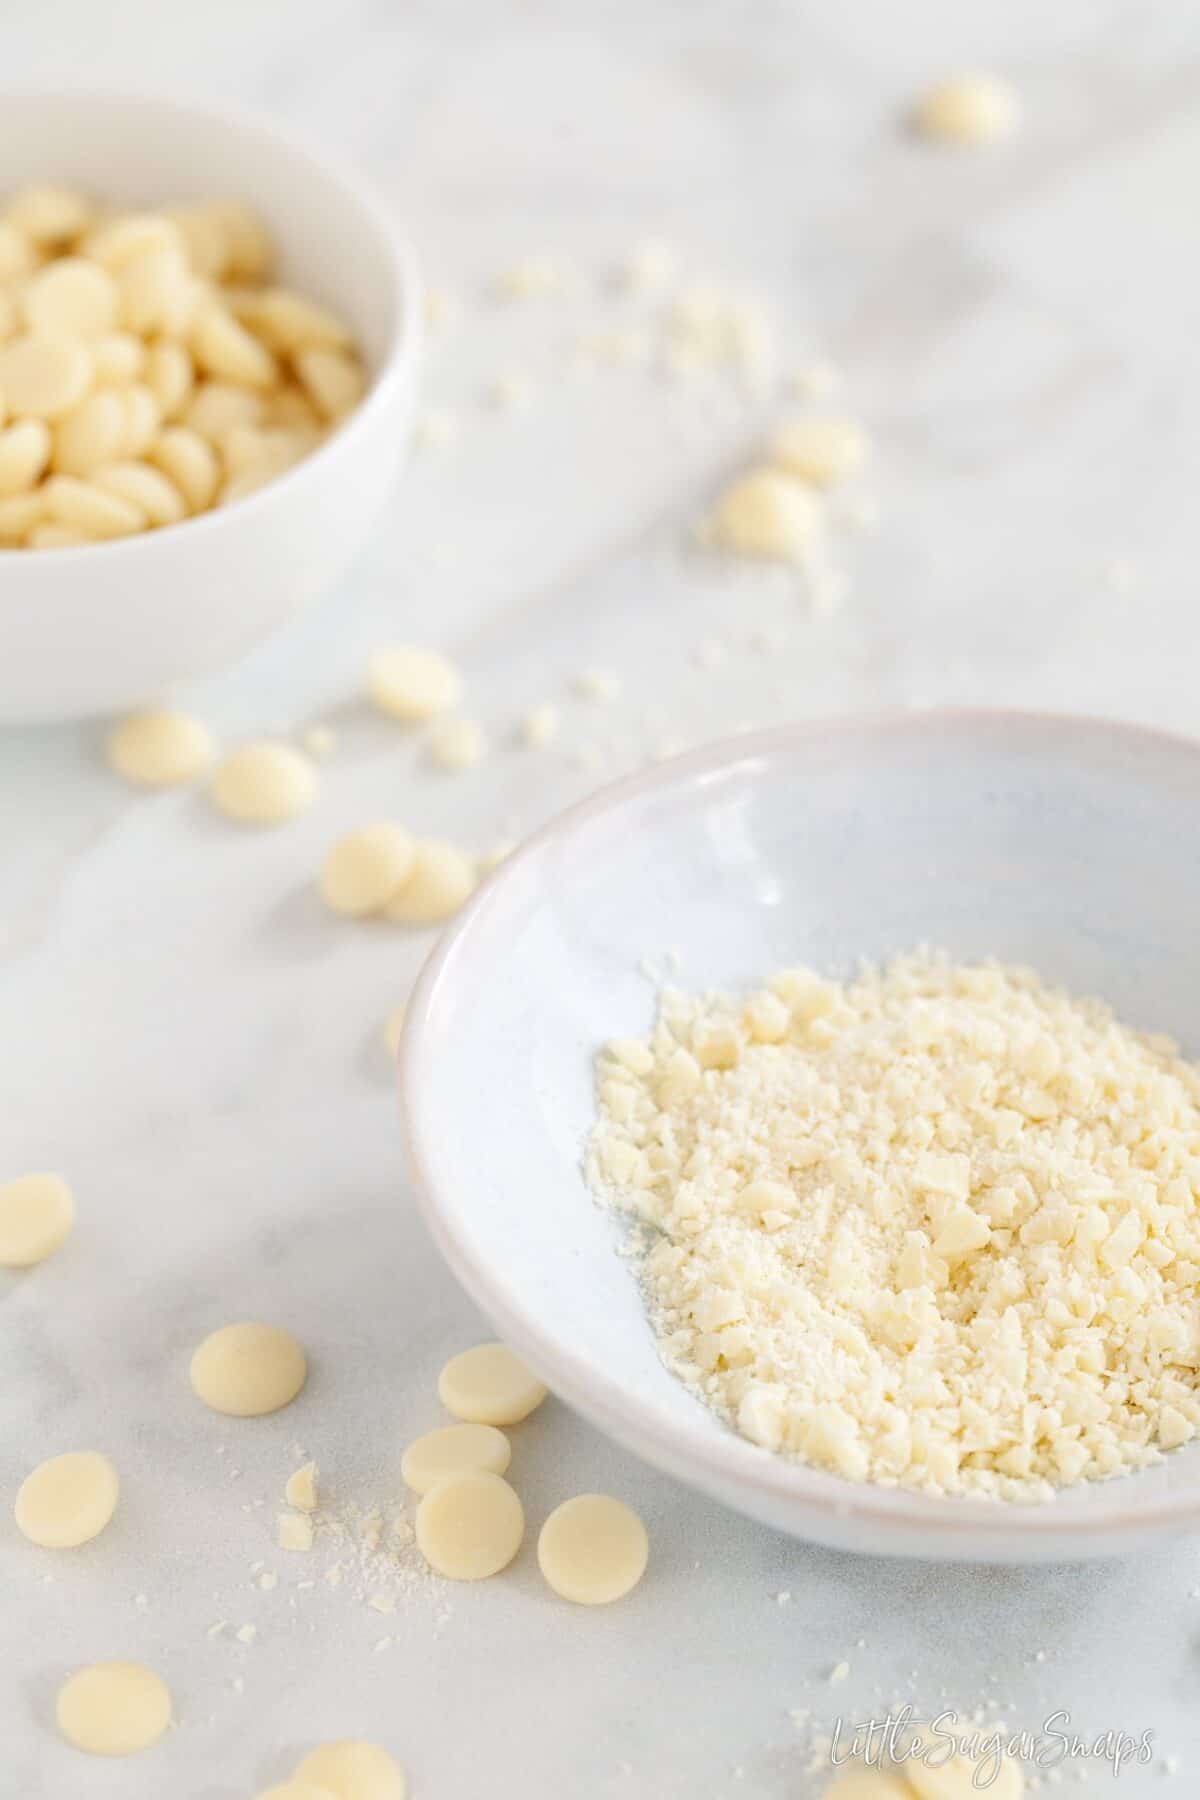
Finely chop the chocolate.
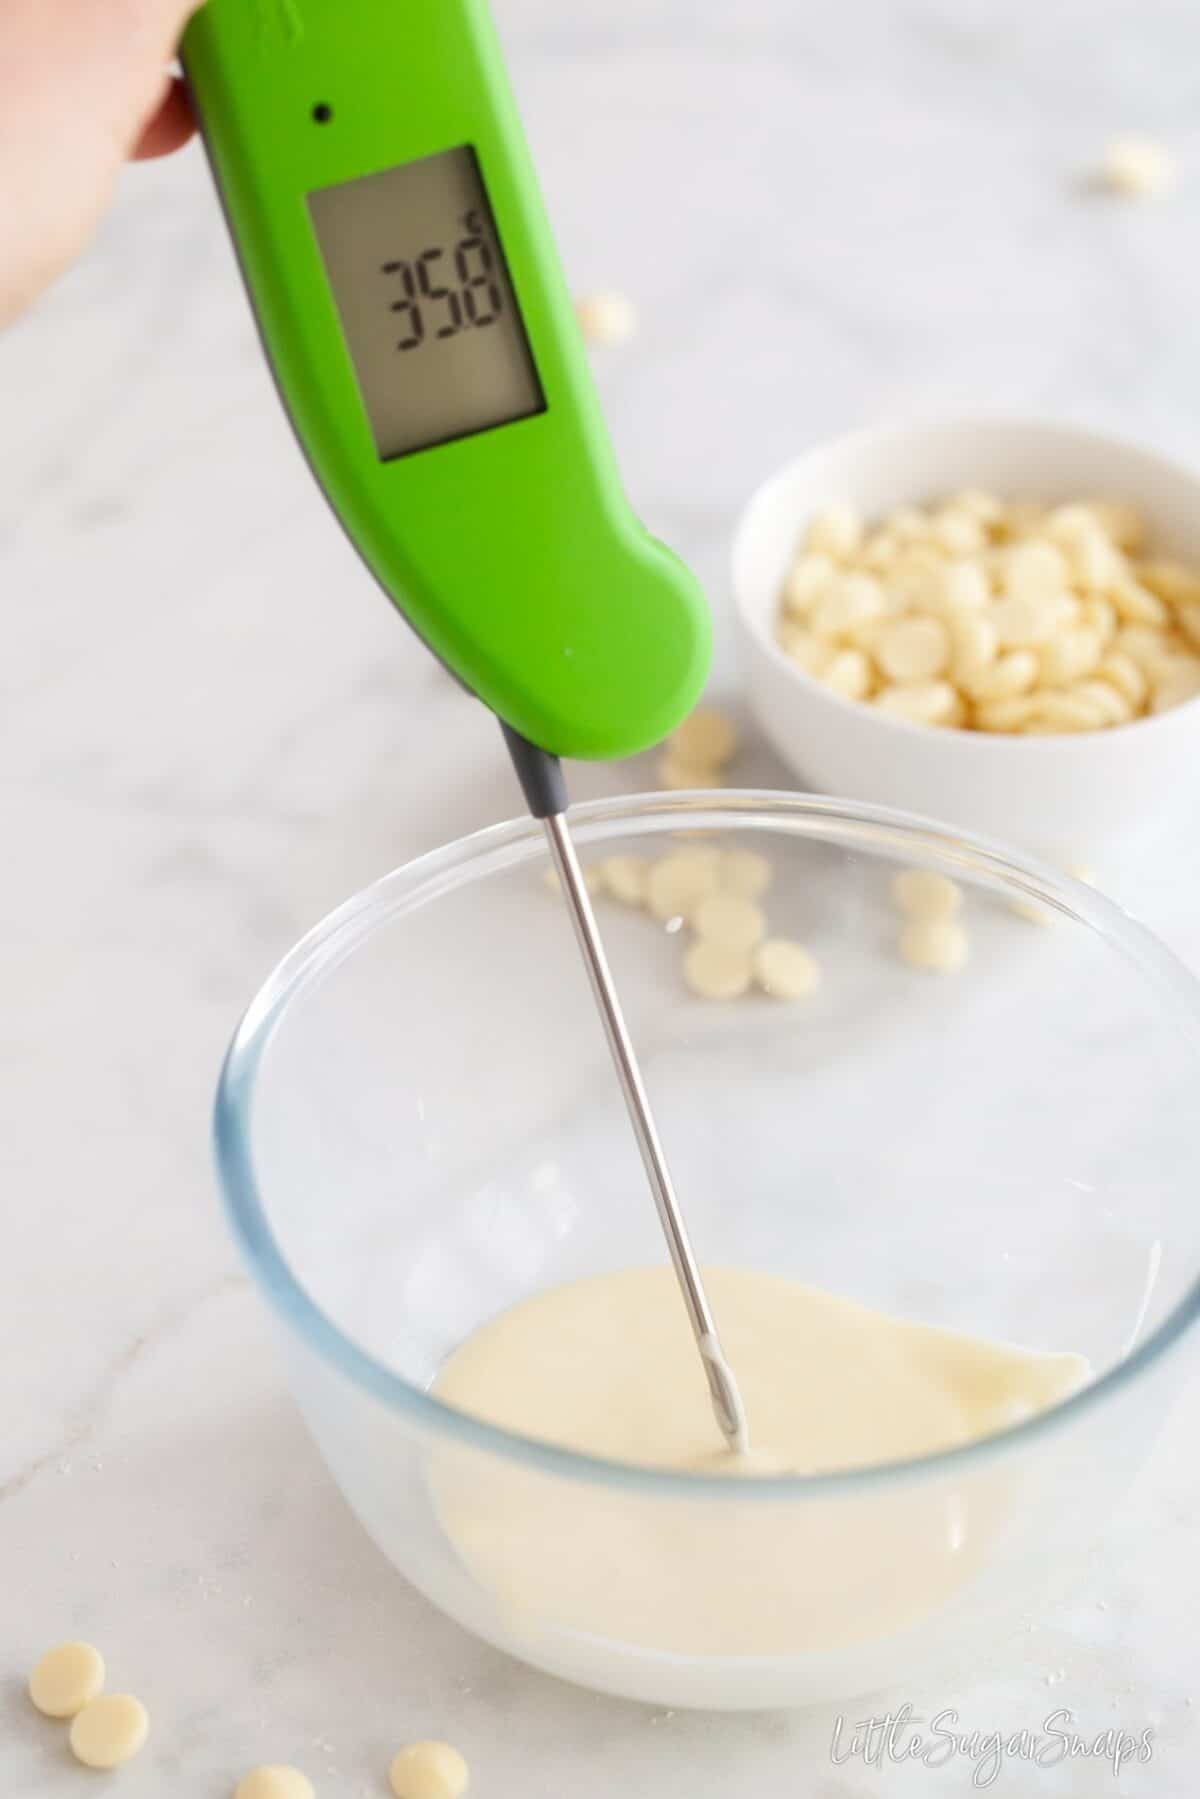
Check the temperature of the melted chocolate.
Once tempered the chocolate is ready to use for dipping and molding. Wrap the bowl in a dry tea towel to retain the heat. If it starts to stiffen before your work is complete, gently reheat in the microwave in 15 second bursts. Take care to not allow the temperature to go above the ranges listed above or the tempering will be lost. Any leftover chocolate can be stored and either used in hot chocolate drinks or re-tempered at a later stage.
If you are new to working with chocolate molds or, like me, wishing to improve, I came across a great video, giving lots of tips and advice. I found it very helpful and you might too.
I used my new Thermapen Pro when making these chocolate Easter eggs. Using a quality piece of equipment like this does take the guesswork out of tasks like tempering chocolate, since it can accurately read the temperature in less than 3 seconds. I'm particularly enjoying my new Thermapen since it has an auto-rotating display that can be used in any position, in either hand. I'm left-handed and it's not often I find kitchen equipment tailored to my requirements.
And that's it. Perhaps this guide to tempering chocolate sounds slightly precise and time-consuming. It is - there is no denying it. But it is also a reliable way to temper chocolate.
My advice is to not attempt this Easter egg recipe when time is short. Chocolate tempering should not be rushed. But do put some of your favourite tunes on to help while away the time whilst you stir.
And remember, the end result will be worth it. In this case, those delectable millionaire's shortbread themed chocolate Easter eggs.
More Easter Recipes:


New here? Why not sign up to receive LittleSugarSnaps newsletters. You'll hear first-hand when new recipes are published. You're welcome to stay in touch on Facebook, Instagram and Pinterest too.
📖 Recipe

Millionaire's Shortbread Caramel Easter Eggs
Ingredients
I used Wilton Silicon Egg molds for these chocolates. Each cavity measured 3 x 4.5cm
For the Vanilla Caramel
- 50 g/ ¼ cup Caster sugar
- 25 g/ ⅛ cup Light muscovado sugar
- 15 g/ 1 tbsp Butter
- 90 ml/ 6 tbsp Double (heavy) cream
- ½ teaspoon Vanilla extract
- ⅛ teaspoon Salt
For the Eggs
- 300 g/ 2 cups Chocolate chips (your choice of dark, milk or white)
- 1-2 Shortbread biscuits
- 30 g/ 1 oz Contrasting chocolate (for decoration)
- 1 tablespoon Sprinkles
Instructions
Make the Vanilla Caramel
- Put the caster sugar into a small heavy-based saucepan and cook (without stirring) over a medium heat until it turns to a mid amber liquid
- Add the muscovado sugar, butter and cream (taking care as the caramel may bubble up and spit. Stir to dissolve all ingredients and let cook on a low heat for 3 minutes, stirring to ensure it is smooth
- Take off the heat and add the vanilla extract and salt
- Let cool to room temperature but do not refrigerate
Temper the Chocolate
- Chop or grate the chocolate - the smaller it is the better since the quicker the chocolate will melt and temper. Set aside 25-30% of the chocolate
- Heat the rest of the chocolate by microwaving it on half-power, stirring the mixture every minute until it is almost completely melted. This will take approximately five minutes
- Remove the bowl of chocolate from the microwave and stir to cool it slightly. Those remaining lumps of chocolate will melt as you stir. Using a reliable food thermometer, such as a Thermapen, check the temperature of the melted chocolate. For Dark Chocolate it should be between 45 - 48°C (113 - 118°F). For Milk Chocolate, the range is 40 - 43°C (104 - 109°F ). For White Chocolate it should reach 37 - 40°C (99 - 104°F). If the chocolate temperature falls short of this range heat it gently in 15-second bursts until it is there and stir again
- Next, add spoonfuls of the grated chocolate set aside earlier (the seeding chocolate). Stir until melted and smooth, then add more seeding chocolate, continuously in this fashion. Stop when the desired temperature is reached and the chocolate is smooth. (Dark chocolate should be 31 - 32° C (88 - 90°F. Milk chocolate should be 30 - 31°C (86- 88°F) and white chocolates should be 29 - 30°C (84 - 86°F)). You may not need to add all of the chocolate. Don't be surprised if this part takes up to 15 minutes
Making the eggs
Please read the instructions fully before you begin
- Take the chill off a small bowl by standing in warm water for a minute. Dry thoroughly. It should be lukewarm. Place ⅓ of the tempered chocolate into this bowl, wrap it in a dry tea towel to keep warm and set aside
- Pour the remaining tempered chocolate into the mold cavities. Use a metal kitchen scraper to remove the excess (collect it on a bowl). Shake the mold tray a few times and tap it on a worktop to help remove air bubbles (as my mold was flexible, I put it onto a chopping board to do this). Next, turn the mold tray over the bowl and allow the excess chocolate to fall into it. Turn the tray back over and use the scraper to remove the excess chocolate, so a clean edge forms around the chocolate egg. Lay face down on greaseproof paper - leave for 2 minutes
- After 2 minutes turn the mold back over and scrape off any excess chocolate that has dripped down. Leave to set at room temperature for approx 5 minutes (or in the fridge for 2 minutes)
- Meanwhile chop the shortbread into small pieces and stir the caramel to ensure it is smooth
- When the chocolate has set, place 4-5 pieces of shortbread into each cavity and divide the caramel between the eggs, leaving free 3 mm below the rim of the chocolate
- Use the reserved tempered chocolate (check it's temperature and warm gently if required) to carefully cover the filling. This part can be messy. I recommend spooning it onto the caramel and gently spreading it out with a small palette knife before wiping off any excess with the scraper. If any holes appear, just touch up with a little more chocolate. Leave to set
- Once the chocolate is fully set, unmold and decorate as desired. Chocolate of a contrasting colour to the shell works well - just pipe onto each shell, then cover in pretty sprinkles. Leave to set


Shannon says
Lovely!!
Linda says
It's like a candy bar inside an Easter egg! What a delicious treat this would make for Easter and so pretty too. What a great tutorial on how to temper chocolate too. Thanks for all the tips!
Jane Saunders says
My pleasure, Linda.
Maria says
Hi, can I make them ahead and freeze them?
Jane Saunders says
Hi Maria, I haven't tried to freeze them to be honest, so wouldn't like to say for certain. If you do go ahead, make sure you wrap them well to avoid freezer burn then, when you take them out, remove from the wrappings so no wetness damages them.
Amanda Finks says
These little chocolate eggs are the perfect gift! Love them!
Jane Saunders says
Thanks Amanda. They are delicious.
Beth says
Gorgeous! Simply gorgeous! I am going to make these for Easter! Such a beautiful presentation!
Jane Saunders says
Thanks Beth - have fun and... maybe don't share too many 😉
Shiho says
How beautiful all photographs!! remind me of my native country(Japan) 😀 And thank you for the detailed tempering chocolate instructions.
Jane Saunders says
How kind of you to say that. Maybe it's the blossom in the pics making you think of home.