

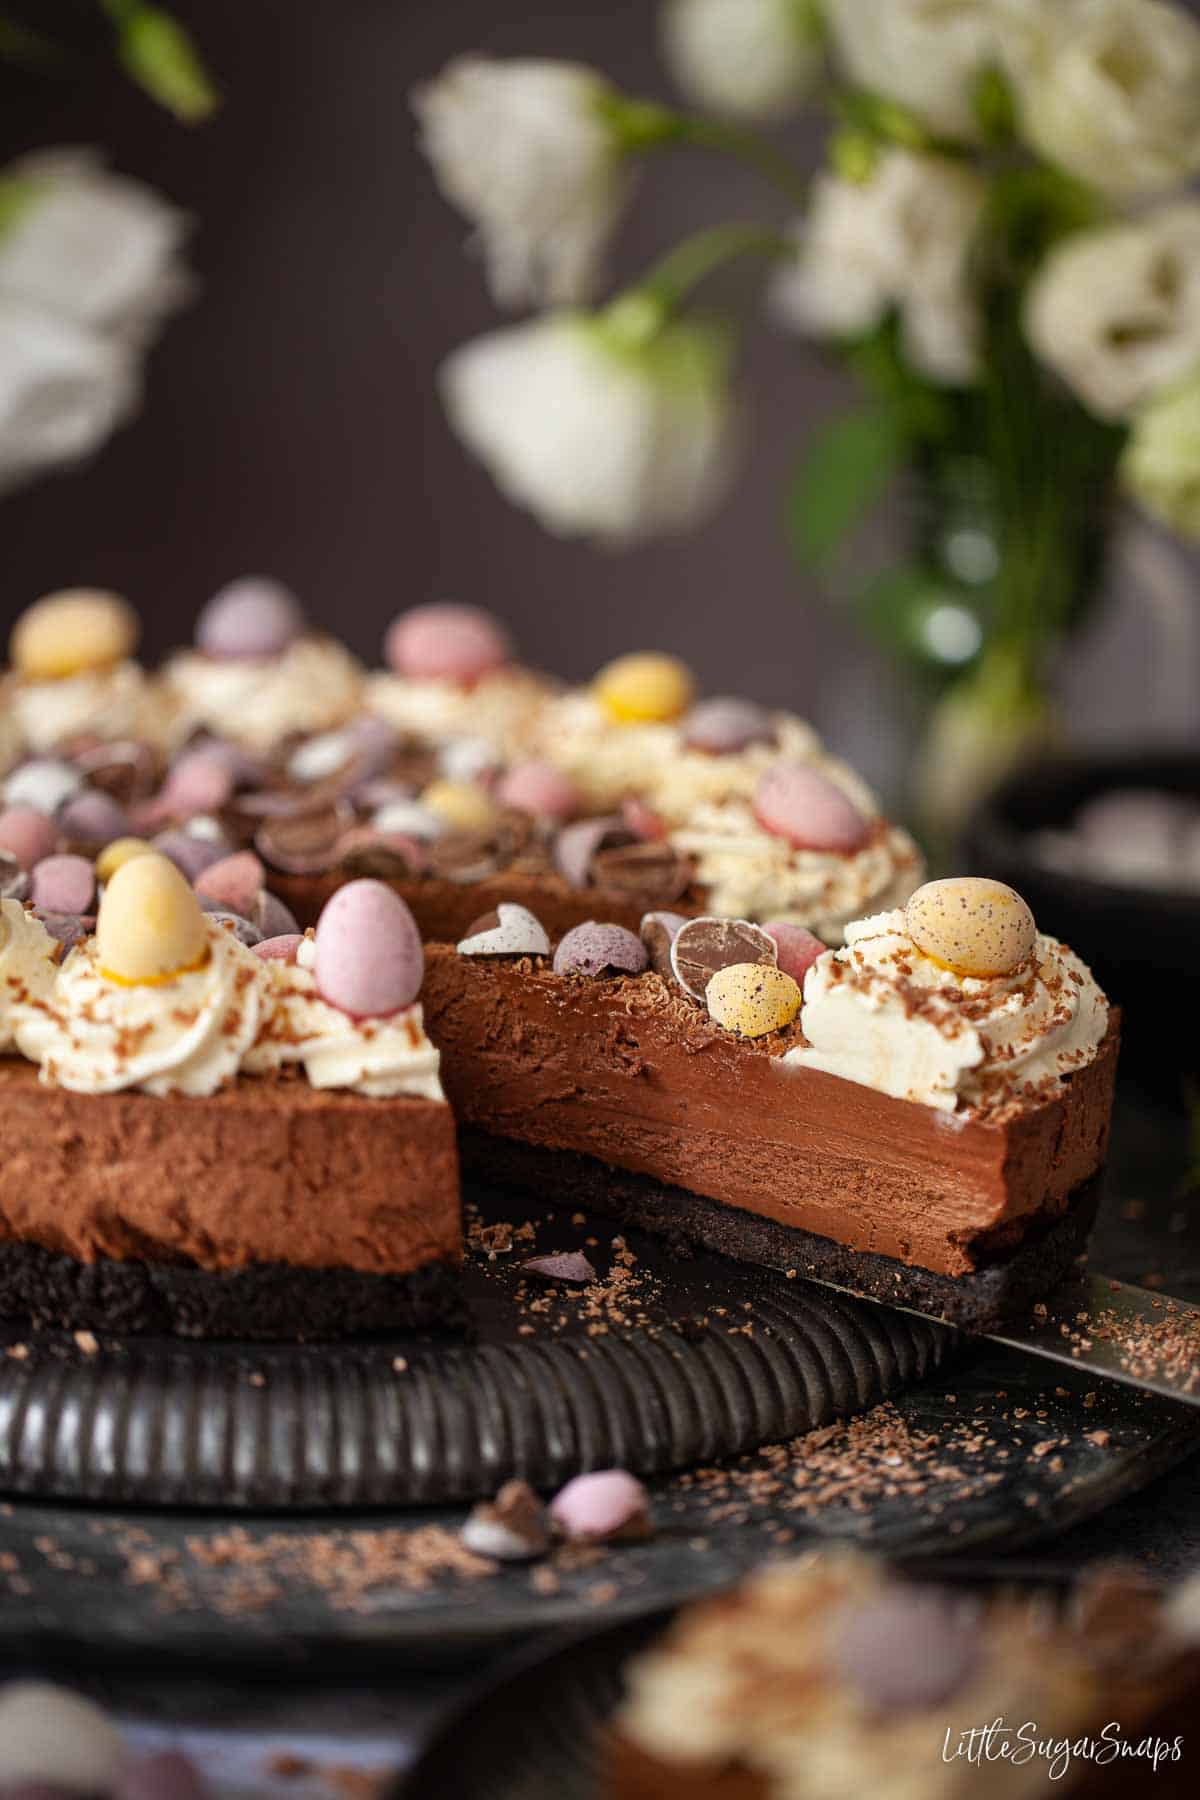
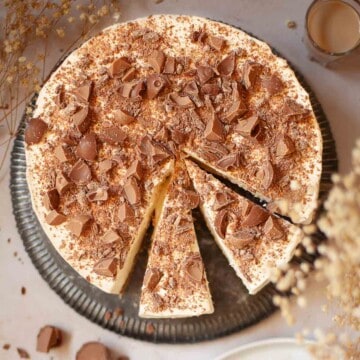
This Mini Egg cheesecake recipe is quick and easy to make and gives impressive results. A decadent no-bake chocolate cheesecake filling sits on top of a dark Oreo cookie base and Mini Eggs are used as the finishing touch.
It's a lovely dessert to serve after Easter lunch - perhaps with a cheeky Easter cocktail on the side.
Jump to:
I got swayed recently by the notion of no-bake cheesecakes, after years of not particularly rating them. However, I'm happy to report that I was wrong. I do actually relish them and this Mini Egg cheesecake recipe has emerged as a result of my newfound love for them.
Of course, toppings on this no bake Mini Egg cheesecake can be adapted, depending on your preferences - try creme eggs or caramel eggs for variation.
And don't overlook the fact that simply adapting the decorations away from the Easter theme transforms this into a no-bake chocolate cheesecake that is suitable for any time of the year. Oh sweet joy.
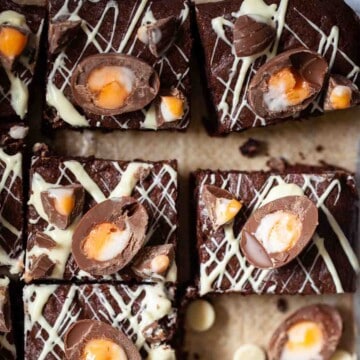
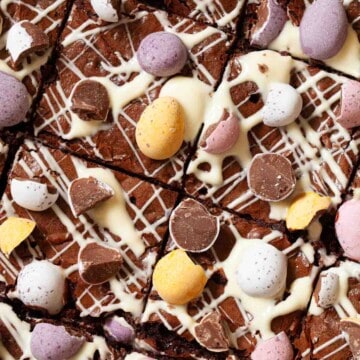
Prefer a fruity dessert? You'll find plenty of options in my cheesecake section including a no-bake passionfruit cheesecake recipe - it's like a ray of tropical sunshine on a plate. Or, if you fancy an entirely different way to make use of your lovely Easter chocolates, then give my fudgy Mini Egg brownies and Mini Egg cookies a go.
Reasons to love this dessert
What I always missed in many a no-bake cheesecake rendition was that notorious tang that a decent cheesecake should always possess. That's why I've always favoured baked cheesecakes - up until now.
With a little research and plenty of recipe testing, I've been able to ensure that this Cadbury Mini Egg cheesecake lives up to my taste expectations by encompassing this characteristic. It's this zesty edge, provided by soured cream and lemon juice, that transports this Cadbury Mini Egg cheesecake recipe to another level of irresistible decadence.
Aside from the mandatory tanginess, this recipe has a great many other merits too:
- It's large - this dessert can feed up to 12.
- It's 100% no-bake.
- And takes less than 30 minutes to make.
- It has a wickedly deep chocolate flavour.
- There's an Oreo biscuit base.
- And Mini Eggs on top (need I say more), making it very pretty.
- It can be customised according to the season and enjoyed throughout the year, not just Easter (see variations below).
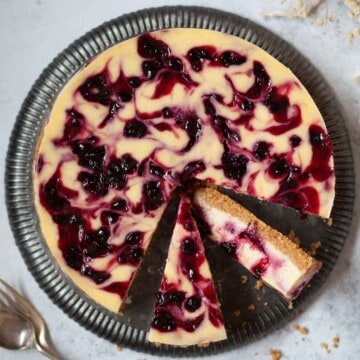
If you are a diehard baked cheesecake fan then try out my baked blackberry cheesecake, blackcurrant ripple cheesecake or my Italian ricotta baked cheesecake recipes instead. They will all impress you.
And if you're looking for other chocolate-themed cheesecakes I've got Ferrero Rocher cheesecake and Raffaello cheesecake. Pure indulgence.
Ingredients notes
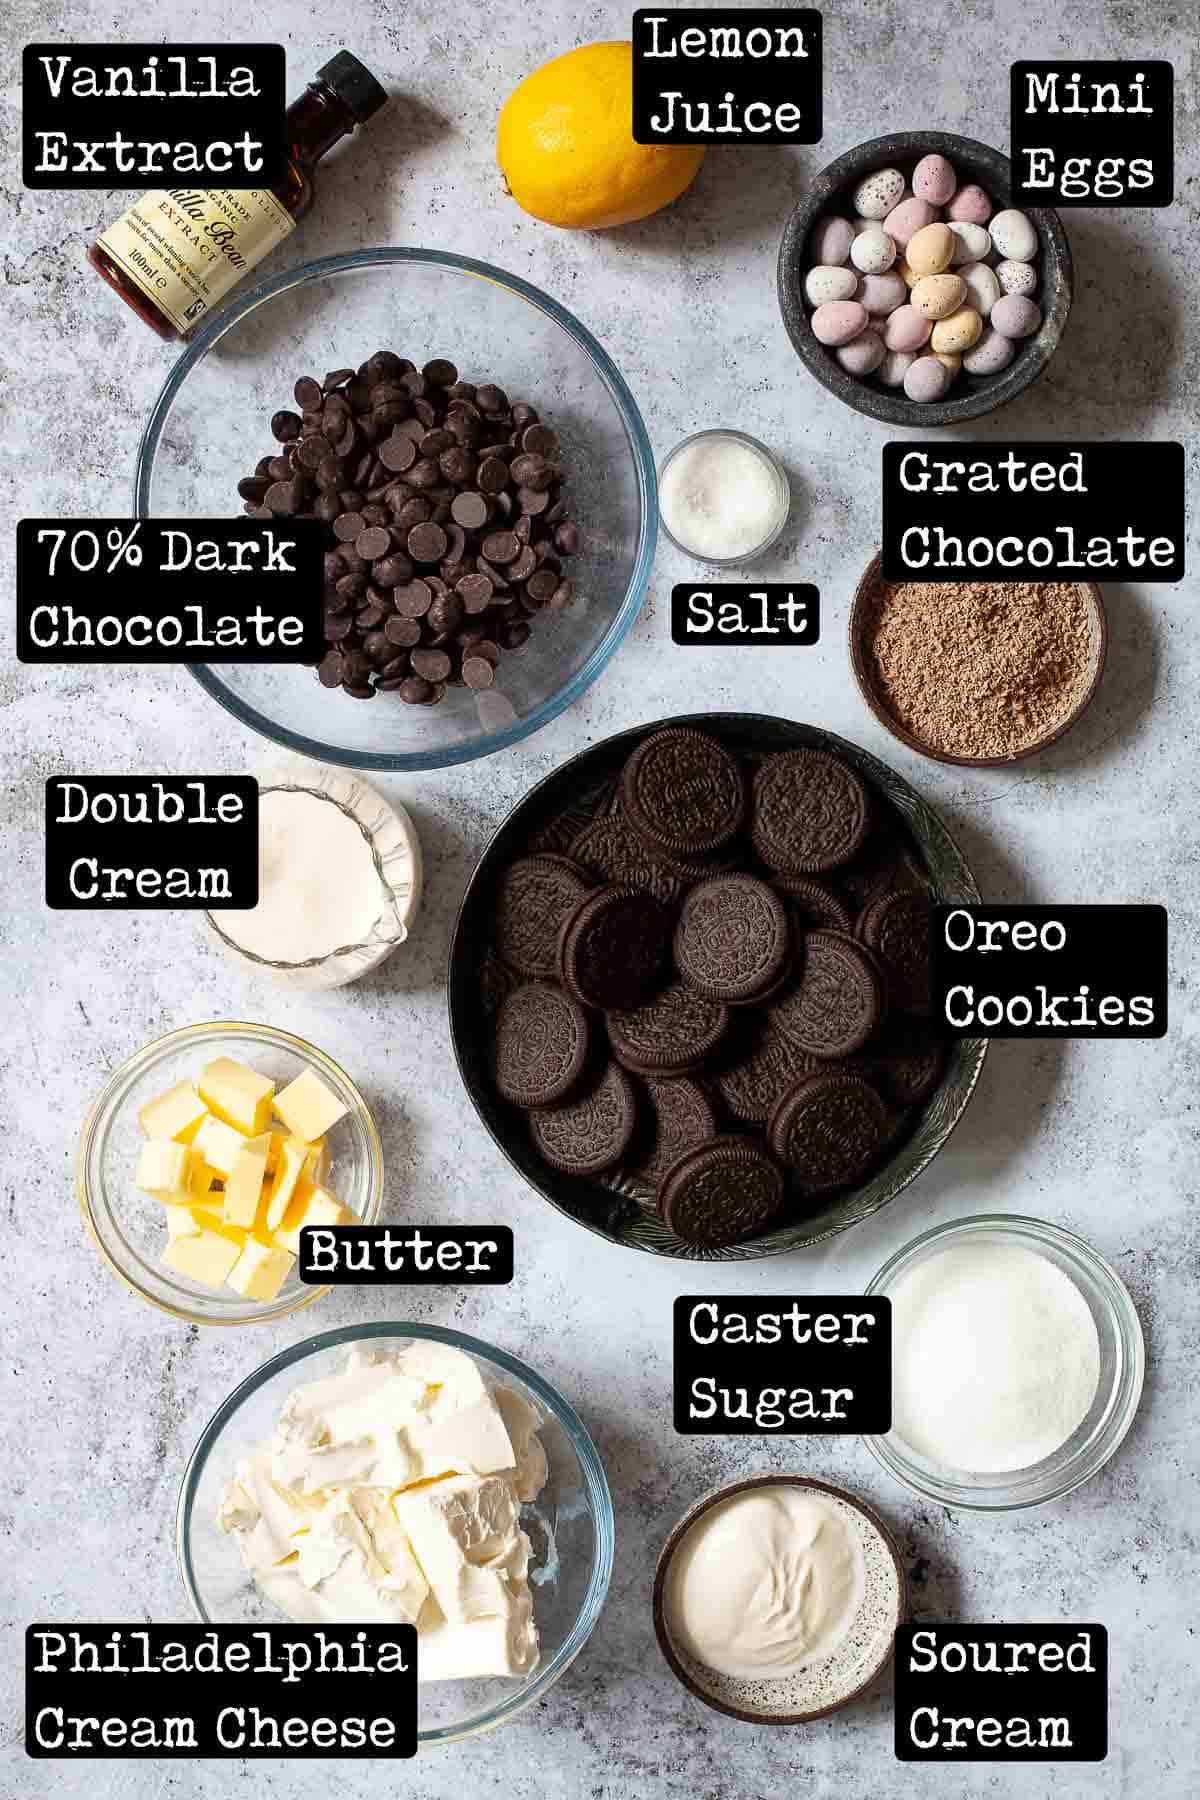
Biscuits: I selected Oreos because I wanted a dark-coloured base to visually amplify the notion that this Mini Egg cheesecake is a deeply decadent chocolate dessert. Alternative biscuits - such as Digestives, Chocolate Digestive or Graham Crackers - could be used instead.
Cream cheese: I use full-fat Philadelphia cream cheese as it has a rich flavour and can be relied upon to have a thick consistency. Other brands and low-fat cream cheese can have a much looser consistency that does not provide the best set, making the cheesecake harder to serve in neat slices.
Chocolate: use the best quality dark chocolate that you can. I selected chocolate with 70% cocoa solids for a rich taste and fantastic colour.
I've developed this cheesecake recipe using this kind of chocolate, sweetening the cheesecake batter accordingly. Swapping it for a different type of chocolate will affect the overall sweetness of this cheesecake.
Cream: this must be double cream as it whips well once added to the batter, helping to achieve a firm set on the cheesecake. Double cream has a fat content of around 48% compared to 36% for whipping cream.
Soured cream and lemon juice: these are the (no longer) secret ingredients I use to incorporate classic cheesecake tanginess into a no-bake version. A smidge of each notches this no-bake Mini Egg cheesecake recipe up to perfection.
Step by step instructions
Full instructions and measurements are given in the printable recipe card at the end of this post.
There are three separate stages to making this easy Mini Egg cheesecake recipe:
- Make the base
- Mix the filling
- Decorate it
The first 2 stages can be finished in around 20 minutes and decorating is no more than a five-minute job. So this mini egg cheesecake is yours for the taking in exchange for 25 minutes of hands-on time.
Here are the details:
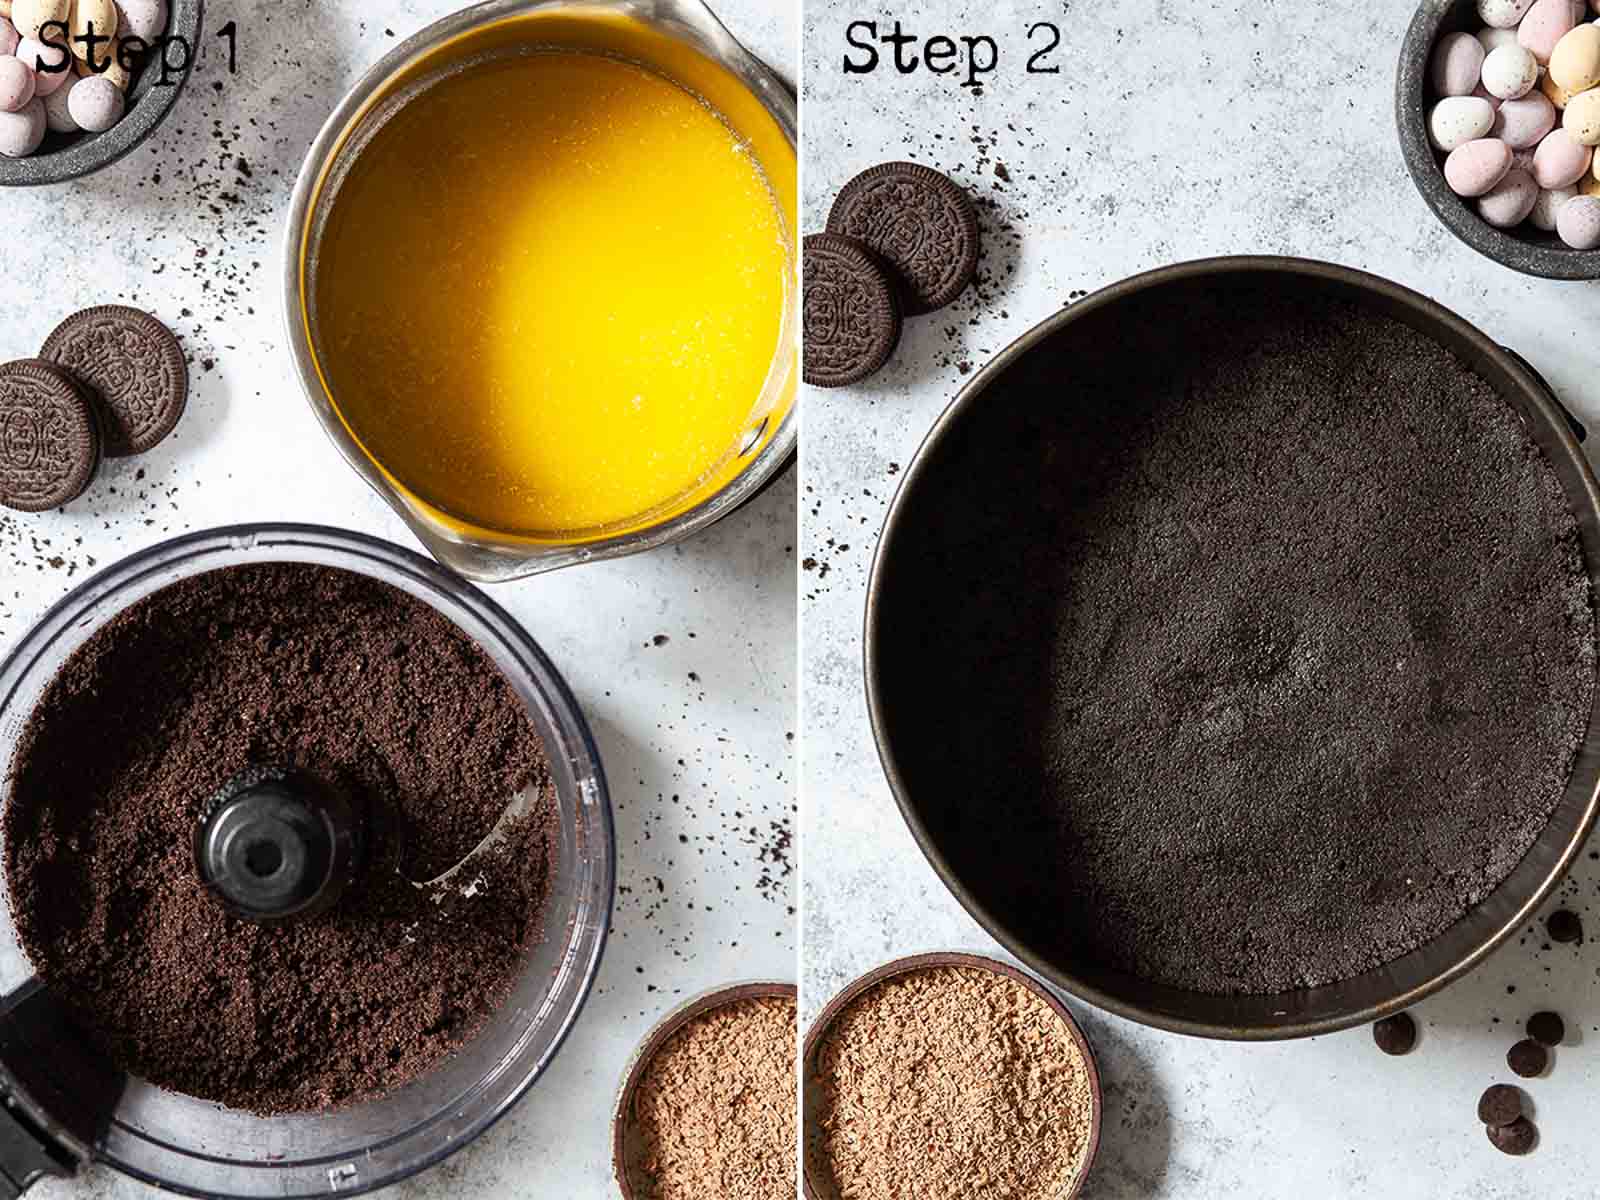
- Put the whole Oreos into the bowl of a food processor. Blitz and stir melted butter into the cookie crumbs.
- Spoon the biscuit base into the tin. Spread it around and press it down firmly using the back of a spoon.
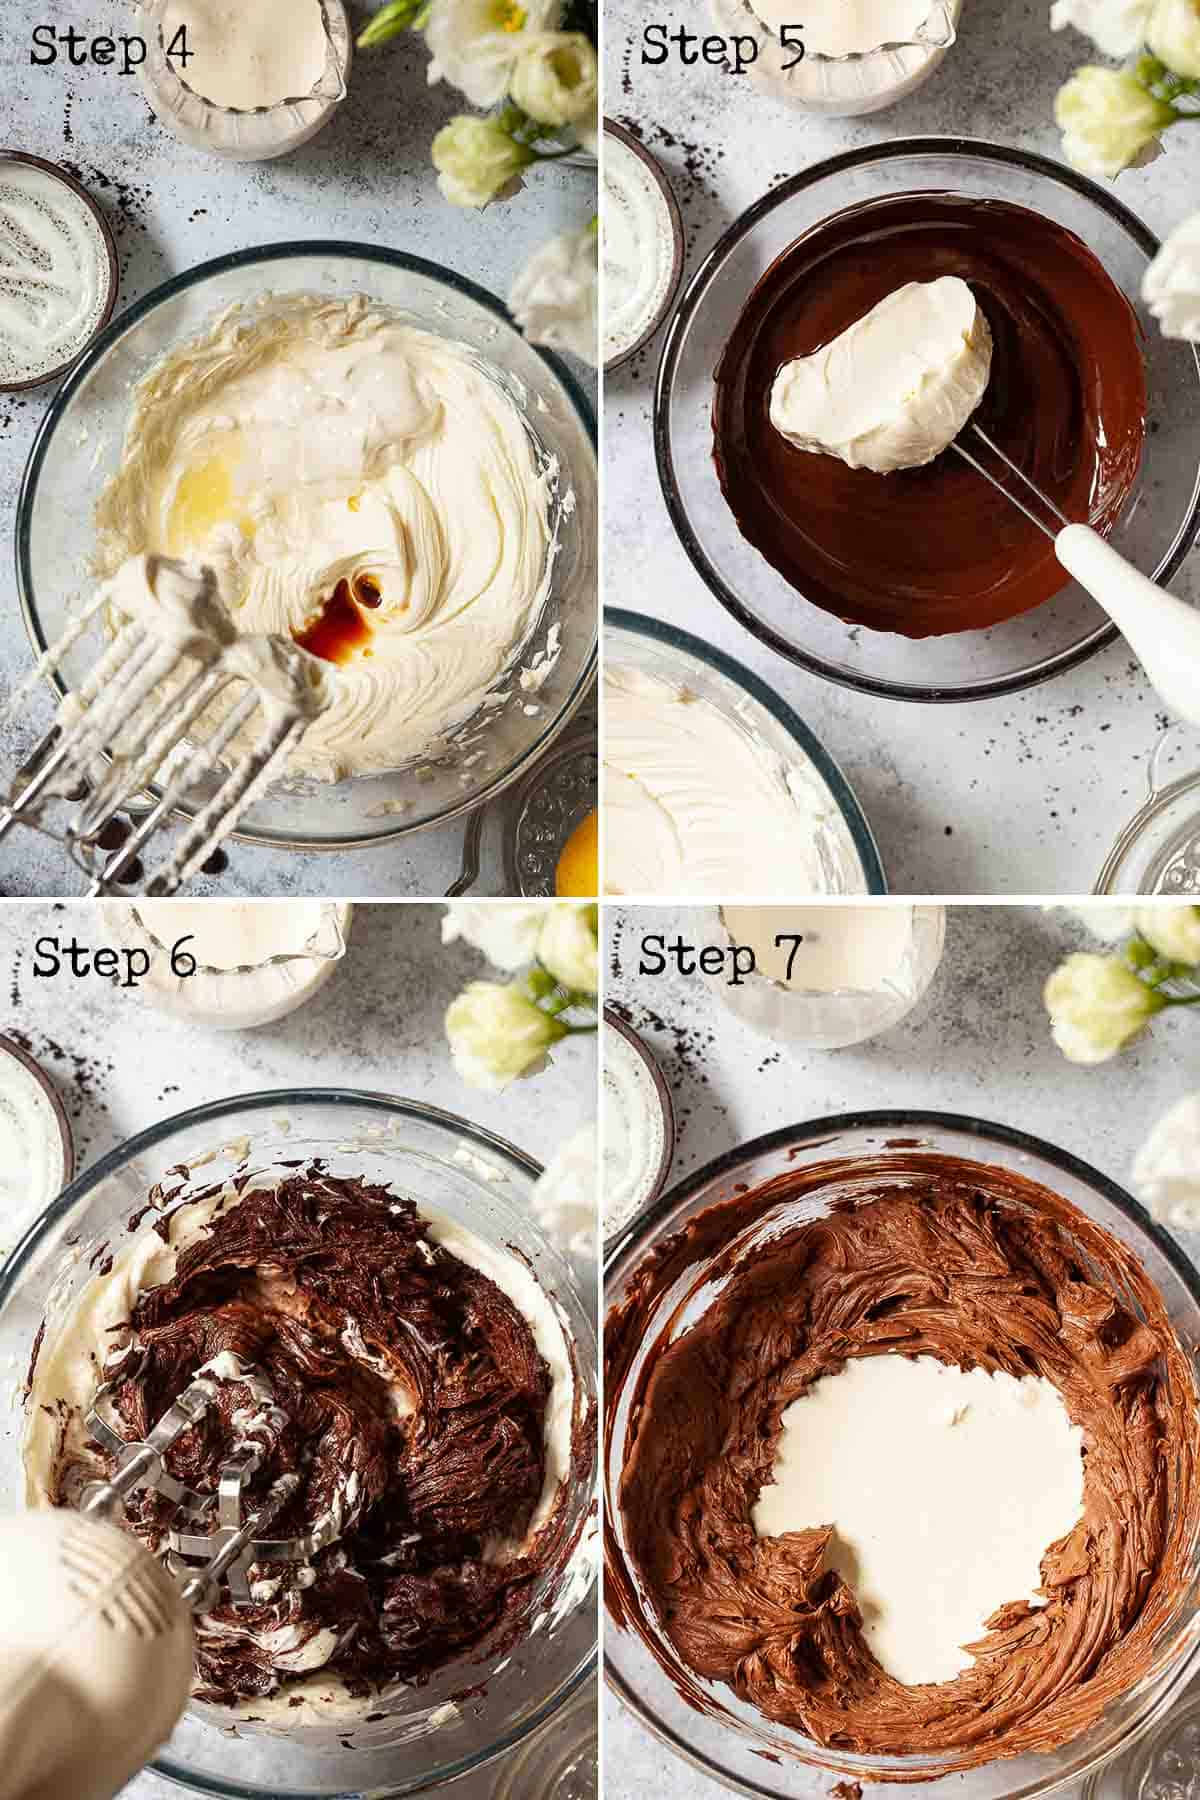
- Melt the chocolate then set aside to cool (for no more than 5 minutes).
- Beat the cream cheese, caster sugar and salt together with electric beaters until smooth. Beat in the vanilla extract, lemon juice and soured cream.
- Briskly stir a heaped spoonful of the cheesecake batter into the melted chocolate until smooth.
- Beat this chocolate mixture into the remaining cheesecake batter.
- Pour the double cream into the batter and beat until the cream is mixed in and the batter is firm.
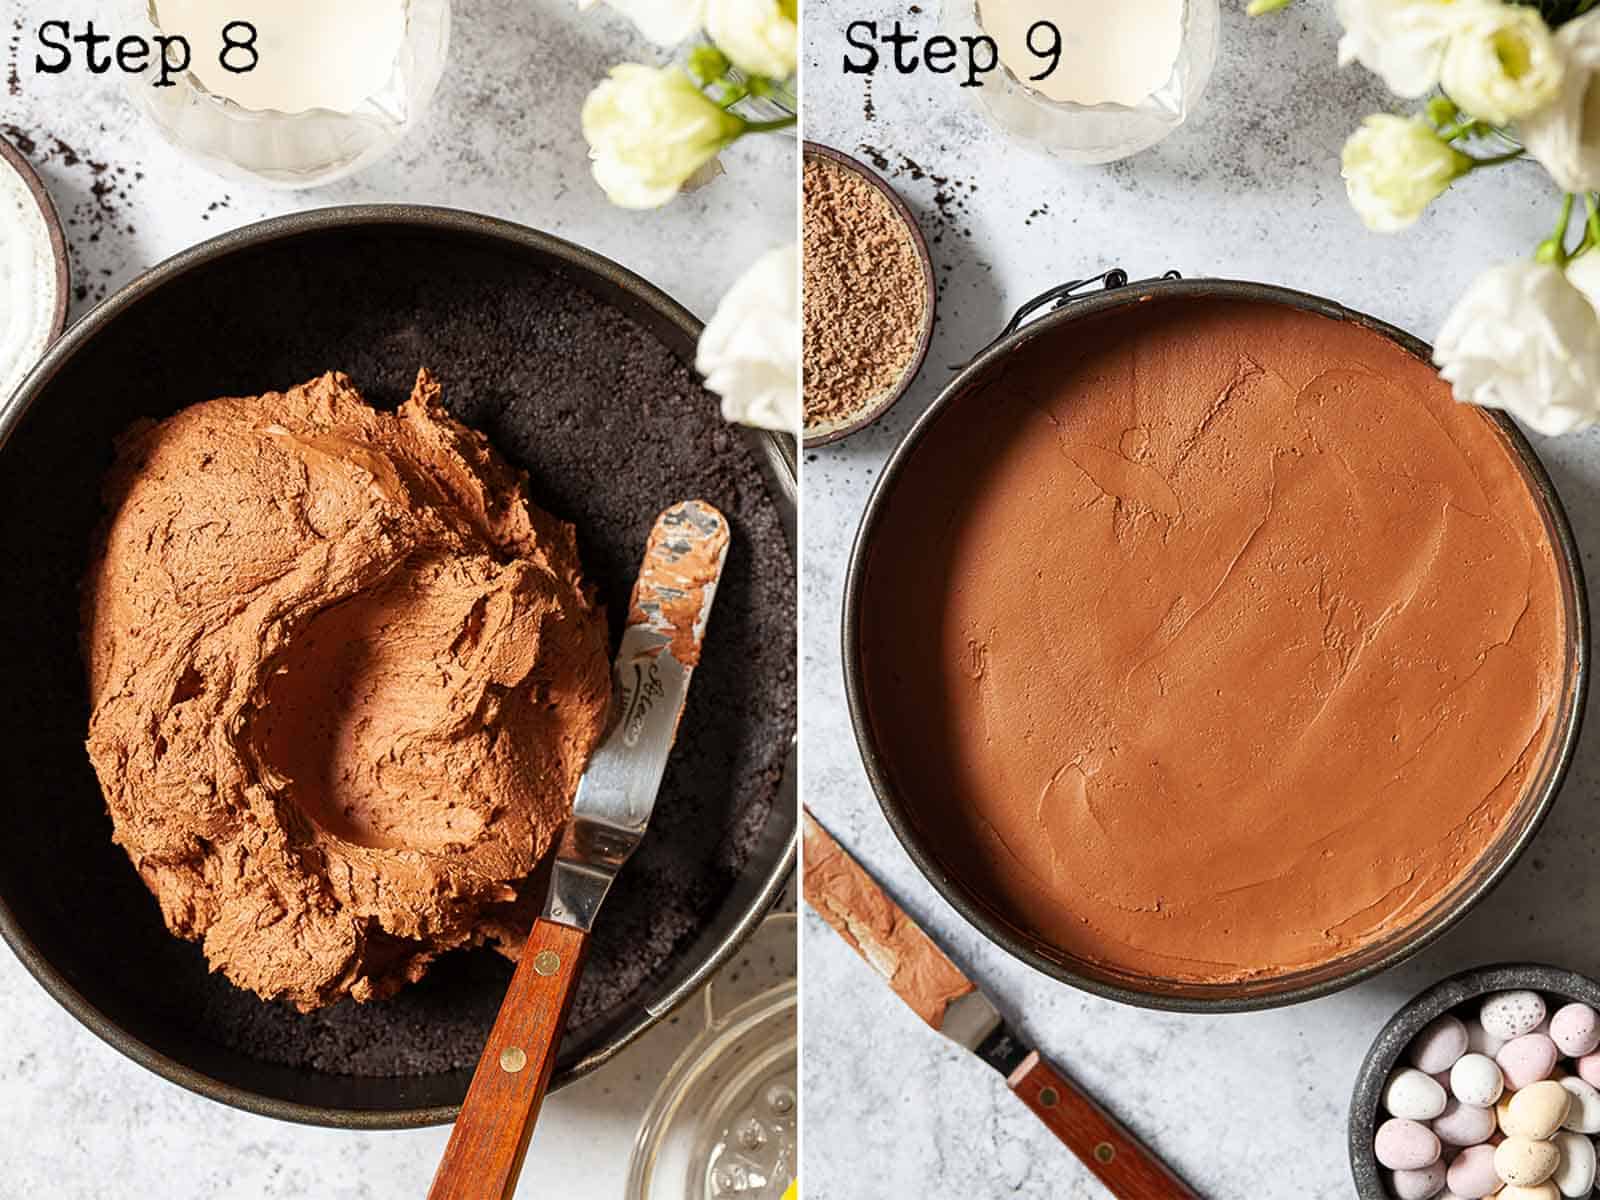
- Spoon ½ of the cheesecake filling onto the base and spread it out well, ensuring it reaches the sides of the pan. Level, using a palette knife, then repeat with the remaining filling.
- Smooth the top, cover and refrigerate for at least 6 hours.
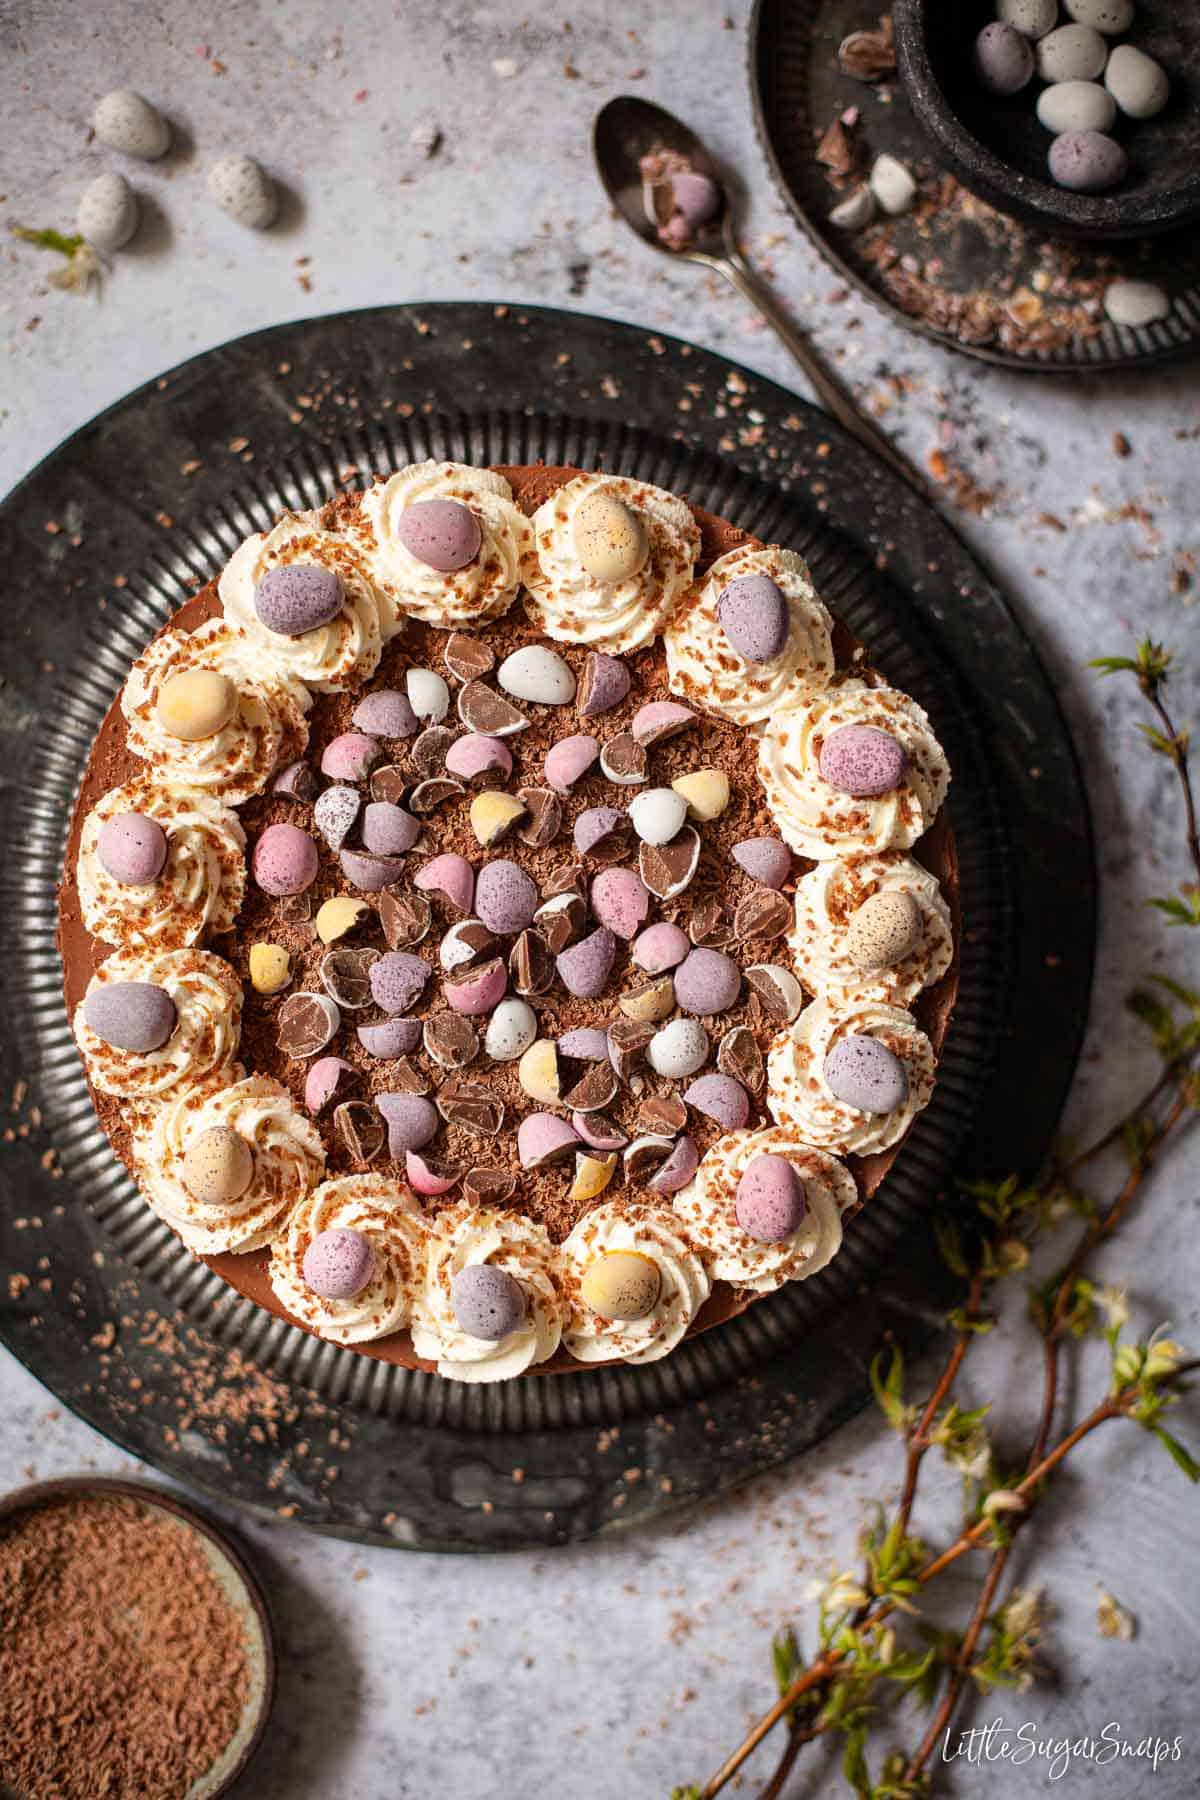
- Pipe whipped cream around the edge of the cheesecake and scatter grated chocolate over the top.
Either chill for later or proceed to garnish if serving this Easter egg cheesecake straight away.
- When ready to serve - and not before (see note below) - add the mini eggs: top each cream rosette with an egg then chop the rest roughly and pile into the centre. Serve straight away.
Note: Do not add mini eggs or other sweets with a crispy shell to the cheesecake ahead of time. The colours will bleed and, if refrigerated, the shells will soften. Add them at the point of serving to avoid this issue.
Expert tips
Top tip: This recipe has been created using full-fat Philadelphia cream cheese. It is reliably full-flavoured and it has a thick consistency. Sometimes own brand and reduced-fat versions can be much softer and due to this, I cannot recommend them as substitutions. Using them may mean that the cheesecake does not set sufficiently.
- There is no need to remove the cream from the Oreo cookies.
- The easiest way to crumble these cream-filled cookies is in a food processor.
- Press the biscuits down firmly to create a well-packed and firm base on which to spread the cheesecake.
- This recipe uses 70% cocoa chocolate, which, when mixed with the other ingredients creates a rich and full-flavoured dessert. For a slightly less intense chocolate flavour replace up to half of the 70% chocolate with milk chocolate. The finished cheesecake will be a little sweeter and lighter in colour too.
- I don't recommend using entirely milk chocolate. The end result will lack that deep chocolate taste and likely be very sweet - possibly too sweet.
- Remember to mix a generous spoonful of cheesecake batter into the melted chocolate and then add this into the rest of the batter. The chocolate is less likely to seize if this step is taken.
- Once the cream has been added take care not to overmix/ overbeat the batter. Keep on mixing until everything is well mixed and firm enough for a spoon to stand up in it without falling over.
- Use a deep-sided springform cake tin - it will be easy to remove the set cheesecake from this. There is no need to line or grease the tin (but you can if you wish to).
- If the base of your tin has a lip around the edge, flip it over and secure in place before using. A flat base makes unmoulding the cheesecake easier.
- To get a well-filled tin without gaps around the edges add ½ of the cheesecake batter, smooth it down and press it to the edges of the tin. Then repeat with the remaining batter.
- Give this no-bake chocolate cheesecake at least 6 hours in the fridge to set.
- To release the cheesecake run a sharp knife between the cheesecake and the edge of the tin before popping the springform mechanism open. Poke a sharp knife between the tin base and the biscuit base. Run the knife around until you feel the entire cheesecake loosen.
- Remember not to add the finishing touches such as mini eggs until the point of serving. This is the best way to avoid colour bleed from the candy shells.
Frequently asked questions
I'm afraid not. This no bake Mini Egg cheesecake needs around 6 hours (or overnight) in the fridge to fully firm up, especially on a hot day.
The downside of using candy-coated eggs (or similar sweets) as a garnish is that they do 'bleed' their colour when in contact with cream. The shells will also go soft if refrigerated. I'm afraid it's just what this kind of sweet does.
It's for this reason that I suggest adding the mini eggs right before serving. Every other aspect of this mini egg cheesecake can be made ahead of time, but just refrain from garnishing with the eggs until serving time. It's the only way to avoid this problem.
This chocolate and Oreo Mini Egg cheesecake is high in dairy so leftovers must be refrigerated quickly. Cover or wrap the remains and transfer to the fridge for up to 3 days.
Note: I like to remove the mini eggs before refrigerating leftovers and simply replace them with fresh ones when it's time to serve what's left. It's the only way to avoid those pesky soft shells.
I do not recommend freezing this chocolate Mini Egg cheesecake. Although it will still be safe to eat once defrosted, I do find that the texture of no bake cheesecakes is compromised significantly once they have been frozen (they can be slightly crumbly).
If you do freeze it, expect the colourful shells on the Cadbury Mini Eggs to be affected. Again, you may prefer to remove them beforehand and replace before serving it.
Variations (Easter themed)
- Vanilla Mini Egg cheesecake - use the batter recipe from my Biscoff cheesecake and swap the Oreos for Digestive biscuits.
- Double Cadbury Mini Egg cheesecake - crush 150g of Mini Eggs and fold them directly into the cheesecake batter.
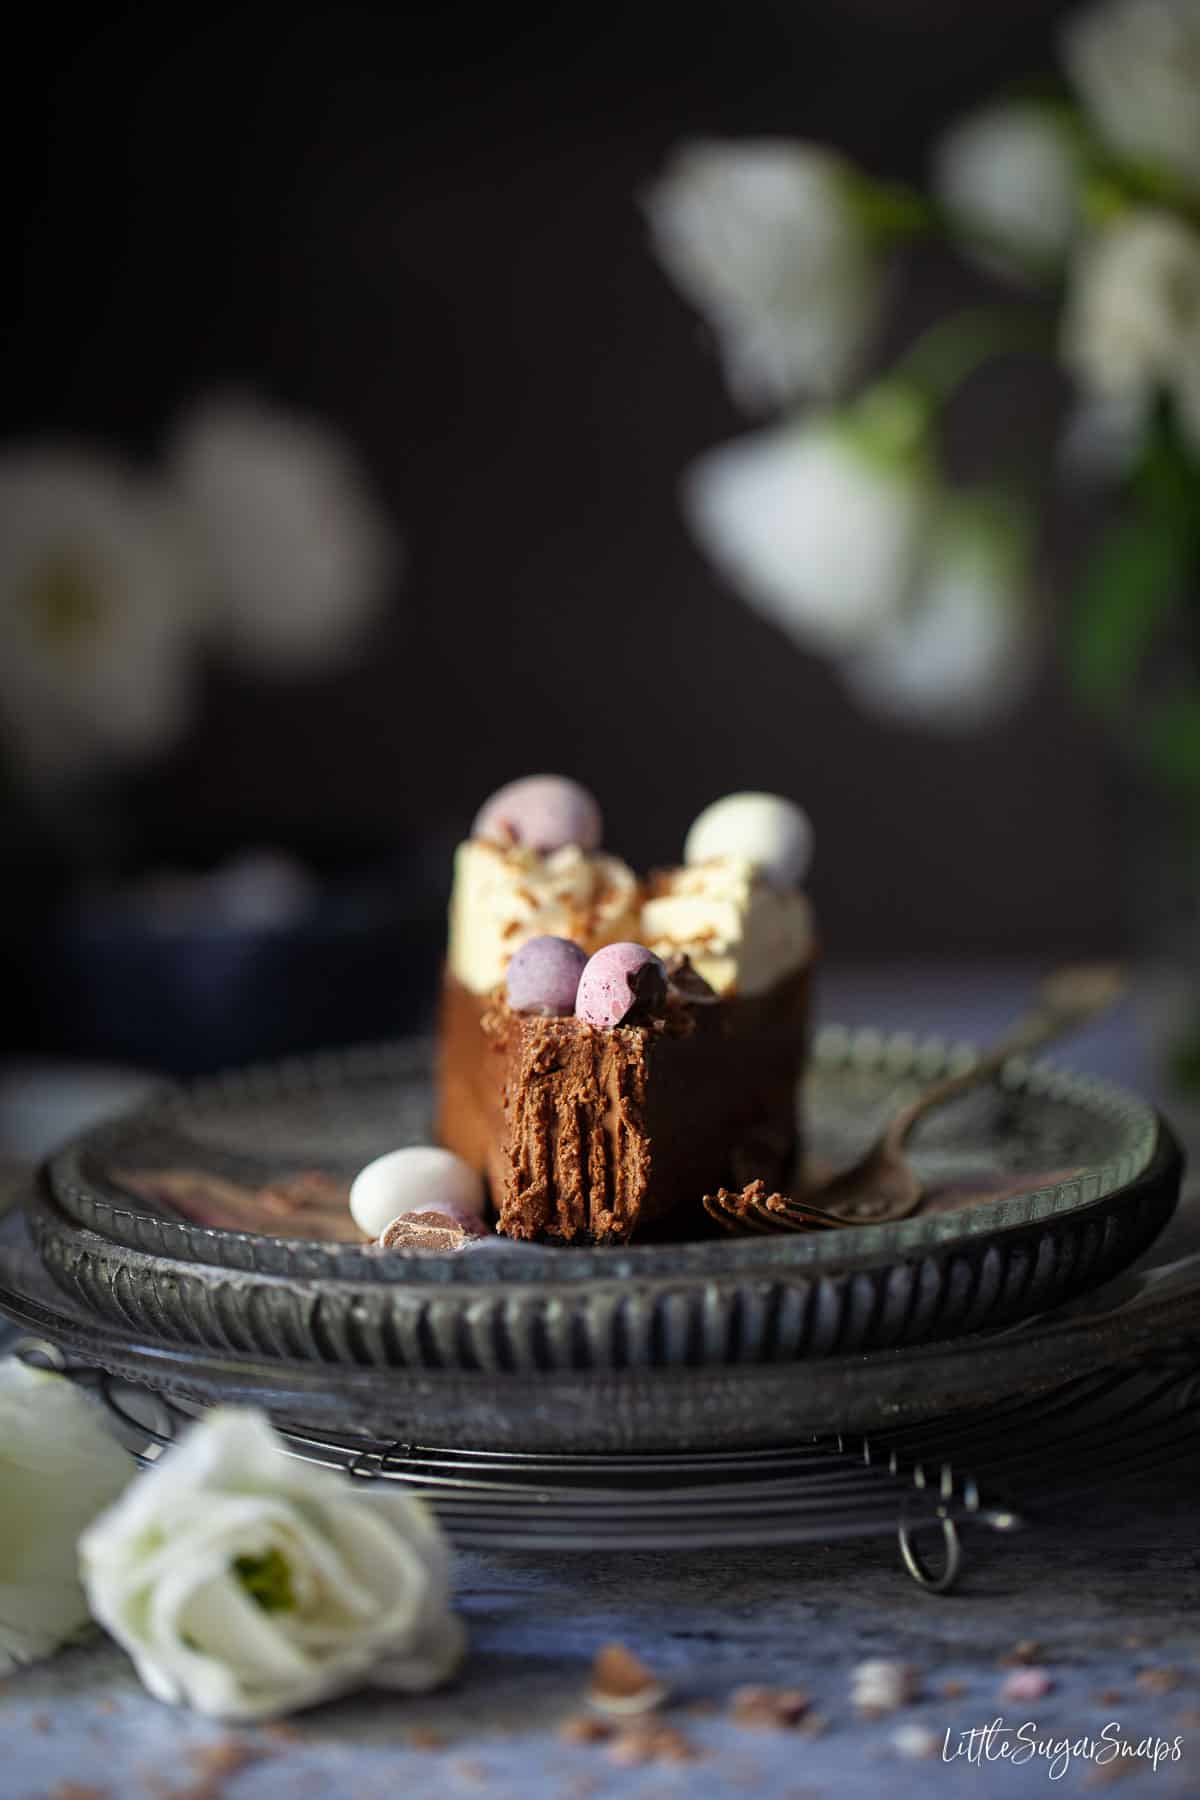
- Individual Mini Egg cheesecakes - make individual servings and present them in pretty glasses. The exact number made will depend on the size of the glasses or dishes used.
- Creme Egg cheesecake - replace the Mini Eggs with Cadbury Creme Eggs or mini Creme Eggs.
- Alternative Easter decorations - swap those Mini Eggs for boldy coloured Smarties Mini Eggs, Chocolate Orange Mini Eggs, Milky Bar Mini Eggs, Malteser Chocolate Bunnies or whatever other seasonal chocolate and candy shapes you can lay your hands on. Have some fun.
Decorations for other times of the year
It wasn't until one of my taste testers reported back with suggestions for alternative finishing touches that I realised this no-bake chocolate cheesecake really should be made at any time of the year:
- Christmas - garnish with miniature candy canes, foil-wrapped chocolate Brussels sprouts or any other festive treats you think would look good on top.
- Valentine's Day - how about using Love Heart Sweets or foil-wrapped heart-shaped chocolates?
- Anytime - think along the lines of Rolos, fudge pieces, mint Aero balls, Maltesers, honeycomb etc, etc...
- Oreo theme - an entire Oreo cookie pressed into the cream makes a particularly indulgent garnish, turning it into an Oreo chocolate cheesecake.
- Cadbury's Flake theme - My taste-tester suggested including Cadbury's Flake, which I think would work a treat. Use 2-3 and chop them into pieces approx 1.5 cm long, which can then take the place of the whole mini eggs on the cream. Any leftover Flake can be crumbled and scattered over the top.
More Easter treats


Have you tried this no bake Mini Egg cheesecake recipe? If so please leave a comment or rating below - I love to hear how you got along. Don't forget to share your creations with me on Instagram too - use #littlesugarsnaps or tag me @jane_littlesugarsnaps.
Stay in touch: sign up to receive LittleSugarSnaps newsletters to hear when new recipes are published. Or follow me on social media:
📖 Recipe

Mini Egg Cheesecake
Equipment
- 1 x 8-inch (20cm) deep-sided springform cake tin
Ingredients
For the Base
- 200 g Oreo cookies
- 75 g Butter
For the Cheesecake
- 400 g Philadelpia cream cheese full-fat
- 200 g Dark chocolate 70% cocoa solids
- 200 ml Double cream (38% fat) heavy cream
- 75 g Caster sugar
- 30 g Soured cream
- 1 teaspoon Vanilla extract
- 1 teaspoon Lemon juice
- ⅛ tsp Salt
Decoration
- 150 ml Double cream (38% fat) heavy cream
- 15 g Grated chocolate chocolate flakes
- 175 g Mini eggs
Instructions
Make the Base
- Blitz the Oreos in a food processor until they resemble fine breadcrumbs (there is no need to scrape out the creamy centre)
- Melt the butter and stir in the cookie crumbs
- If the removable base of your cake tin has a lip around the edge (many do) then flip it over and use the flatter side. Secure in place with the springform mechanism then press the biscuit base into the tin. Spread it around and press it down firmly using the back of a spoon. Set aside
Make the Cheesecake Filling
- Melt the chocolate using a bain-marie or in short bursts in a microwave. Once melted set aside to cool (for no more than 5 minutes)
- In a medium bowl beat the cream cheese, caster sugar and salt together with electric beaters until smooth
- Next beat in the vanilla extract, lemon juice and soured cream
- Take a heaped spoonful of the cheesecake batter and briskly stir it into the melted chocolate until smooth (it will be quite thick)
- Next, add this chocolate mixture into the remaining cheesecake batter and beat until smooth and well combined
- Pour the double cream into the batter and, using a large spoon or a handheld balloon whisk stir until the cream is mixed in. It should thicken well but if it seems loose continue to mix until it firms up
- Spoon ⅓ of the cheesecake filling onto the base and spread it out well, ensuring it reaches the sides of the pan (take your time to avoid leaving gaps close to the biscuit base). Level, using a palette knife, then repeat twice more with the remaining filling
- Level the top, cover and refrigerate for at least 6 hours
Remove from the Baking Tin
- Run a sharp knife between the cheesecake and the side of the tin to loosen, then release the springform mechanism and lift off the tin
- Carefully poke a knife between the base of the tin and the cheesecake crust, running it right around the cheesecake until you feel them release from each other. Carefully slide the cheesecake onto a plate or serving board
Decoration
- Whip the cream and use to pipe rosettes around the edge of the cheesecake
- Scatter the grated chocolate into the centre of the cheesecake (a little sprinkled over the cream looks good too). If not serving striaght away then return to the fridge at this point
- When ready to serve add the mini eggs. Top each cream rosette with an egg then chop the rest roughly and pile into the centre (do not refrigerate the mini eggs as the shells will go soft
Notes
Cooking Tips
- There is no need to remove the cream from the Oreo cookies
- The easiest way to crumble these cream-filled cookies is in a food processor
- Use real butter for a fuller flavoured biscuit base
- Press the biscuits down firmly to create a well packed and firm base on which to spread the cheesecake
- This recipe has been created using full-fat Philadelphia cream cheese as it is reliably full-flavoured and it has a thick consistency. Sometimes own brand and reduced-fat versions can be much softer and due to this, I cannot recommend them as substitutions. Using them may mean that the cheesecake does not set sufficiently
- This recipe uses 70% cocoa chocolate, which, when mixed with the other ingredients creates a rich and full-flavoured dessert. For a slightly less intense chocolate flavour replace half of the 70% chocolate with milk chocolate, but expect it to be sweeter
- I don't recommend using entirely milk chocolate - the end result will lack that deep chocolate taste and likely be very (possibly too) sweet
- Remember to mix a generous spoonful of cheesecake batter into the melted chocolate and then add this into the rest of the batter. The chocolate is less likely to seize if this step is taken
- Once the cream has been added take care not to overmix/ overbeat the batter. Keep on mixing until everything is well mixed and no longer runny, then transfer to the tin
- Use a deep-sided springform cake tin - it will be easy to remove the set cheesecake from this. There is no need to line or grease the tin
- If the base has a lip around the edge, flip it over and secure in place before using. A flat base makes unmoulding the cheesecake easier
- To get a well-filled tin without gaps around the edges add ½ of the cheesecake batter, smooth it down and press it to the edges of the tin. Then repeat with the remaining batter
- To release the cheesecake run a sharp knife between the cheesecake and the edge of the tin before popping the springform mechanism open. Next use a knife to release the biscuit base from the tin - once inserted, run the knife around until you feel the entire cheesecake loosen

Jenny says
Is a good cheesecake if you like dark chocolate. I don't. I thought the other ingredients would've toned the bitterness out. But it didn't.
Jane Saunders says
Hi Jenny, sorry you don't like the taste of the dark chocolate in this cheesecake. How dark was the dark chocolate you used? I developed this recipe using chocolate with 70% cocoa solids which is as dark as I like to go generally. If you used one with a higher percentage of cocoa solids then this could explain why it was too bitter for your tastes. You could always pick a less intense dark chocolate - try one around 55-60% cocoa solids and see how you get along. It might just make a difference for you.