
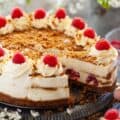

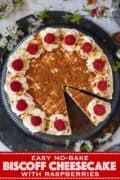
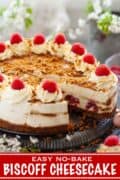

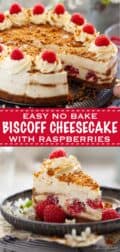
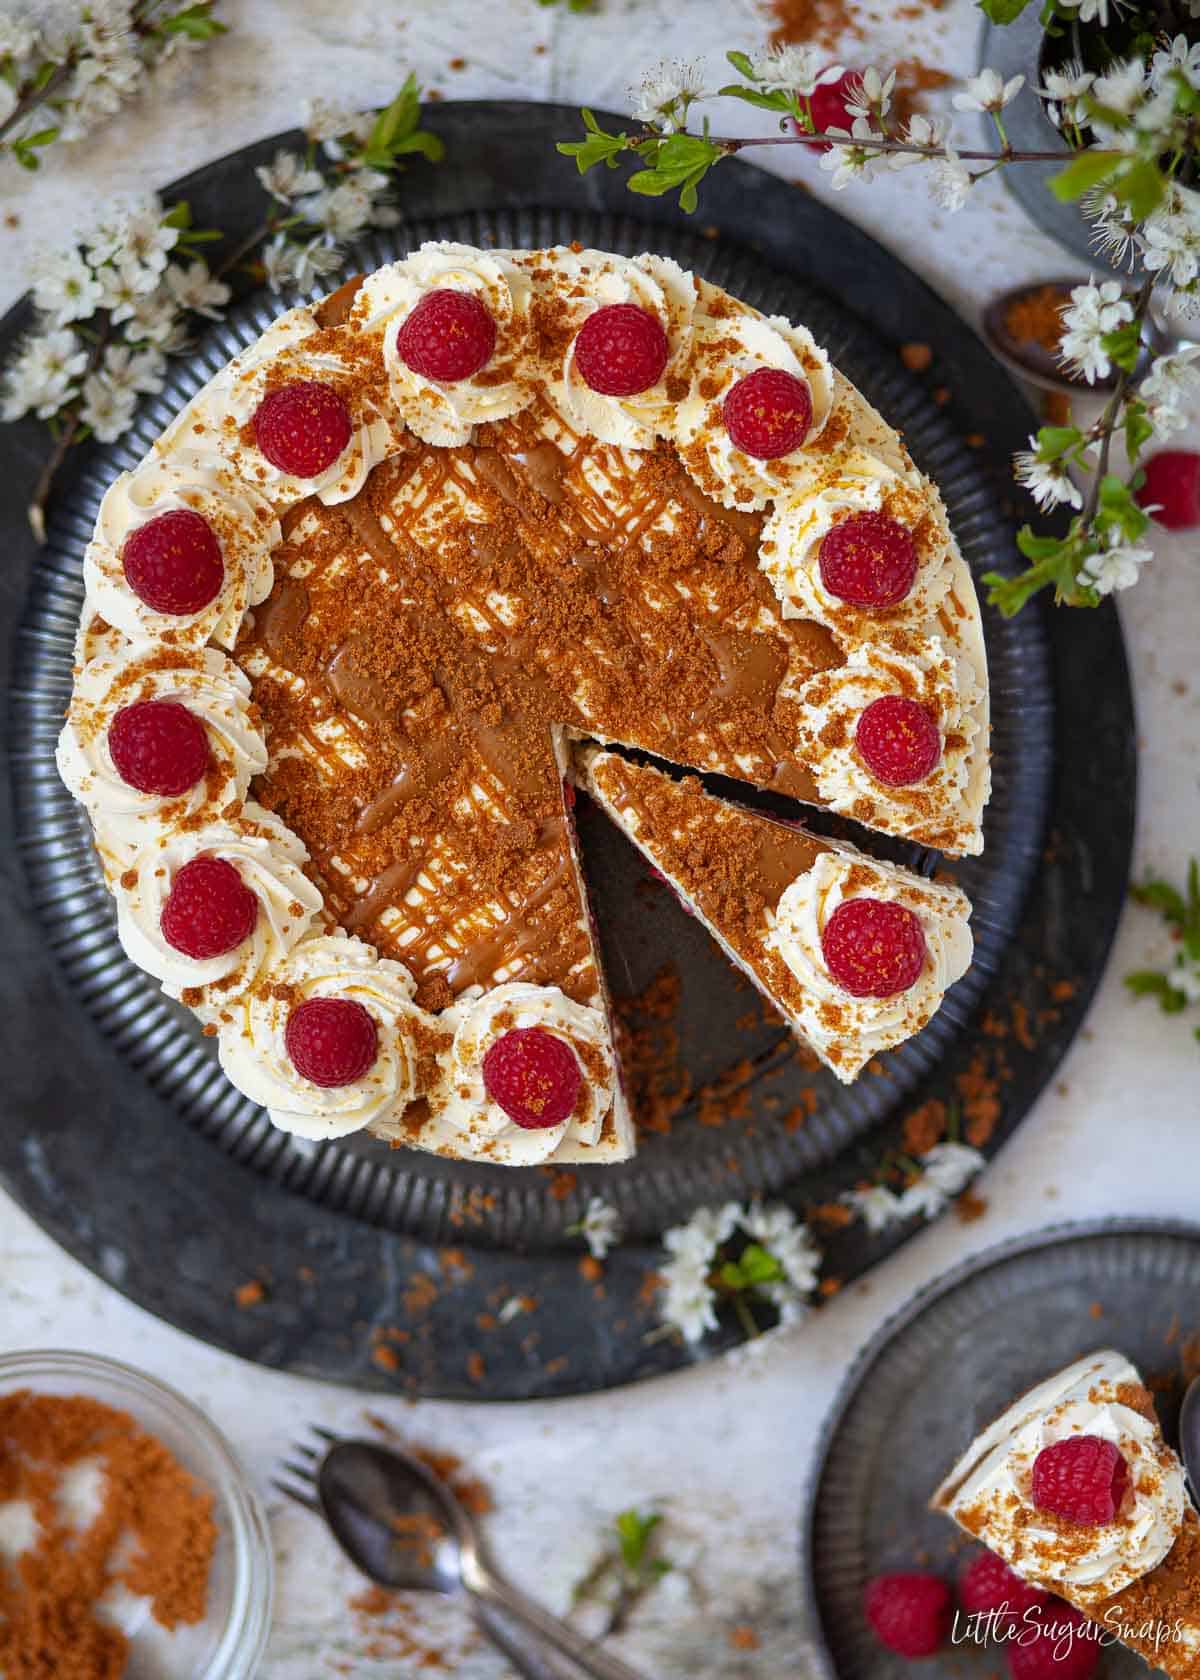
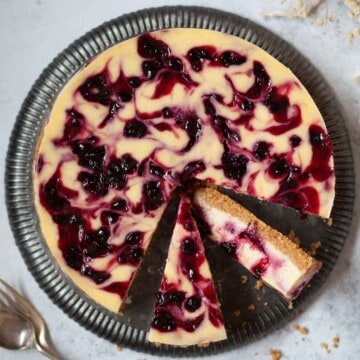
Lotus Biscoff Cheesecake is a must for Biscoff lovers! This no bake recipe comprises a biscoff cookie crust, creamy vanilla cheesecake rippled & topped with cookie butter and a scattering of raspberries thrown in food good measure. It's like no other Lotus cheesecake.
Try it with a Biscoff latte (or turn it into an iced Biscoff latte).
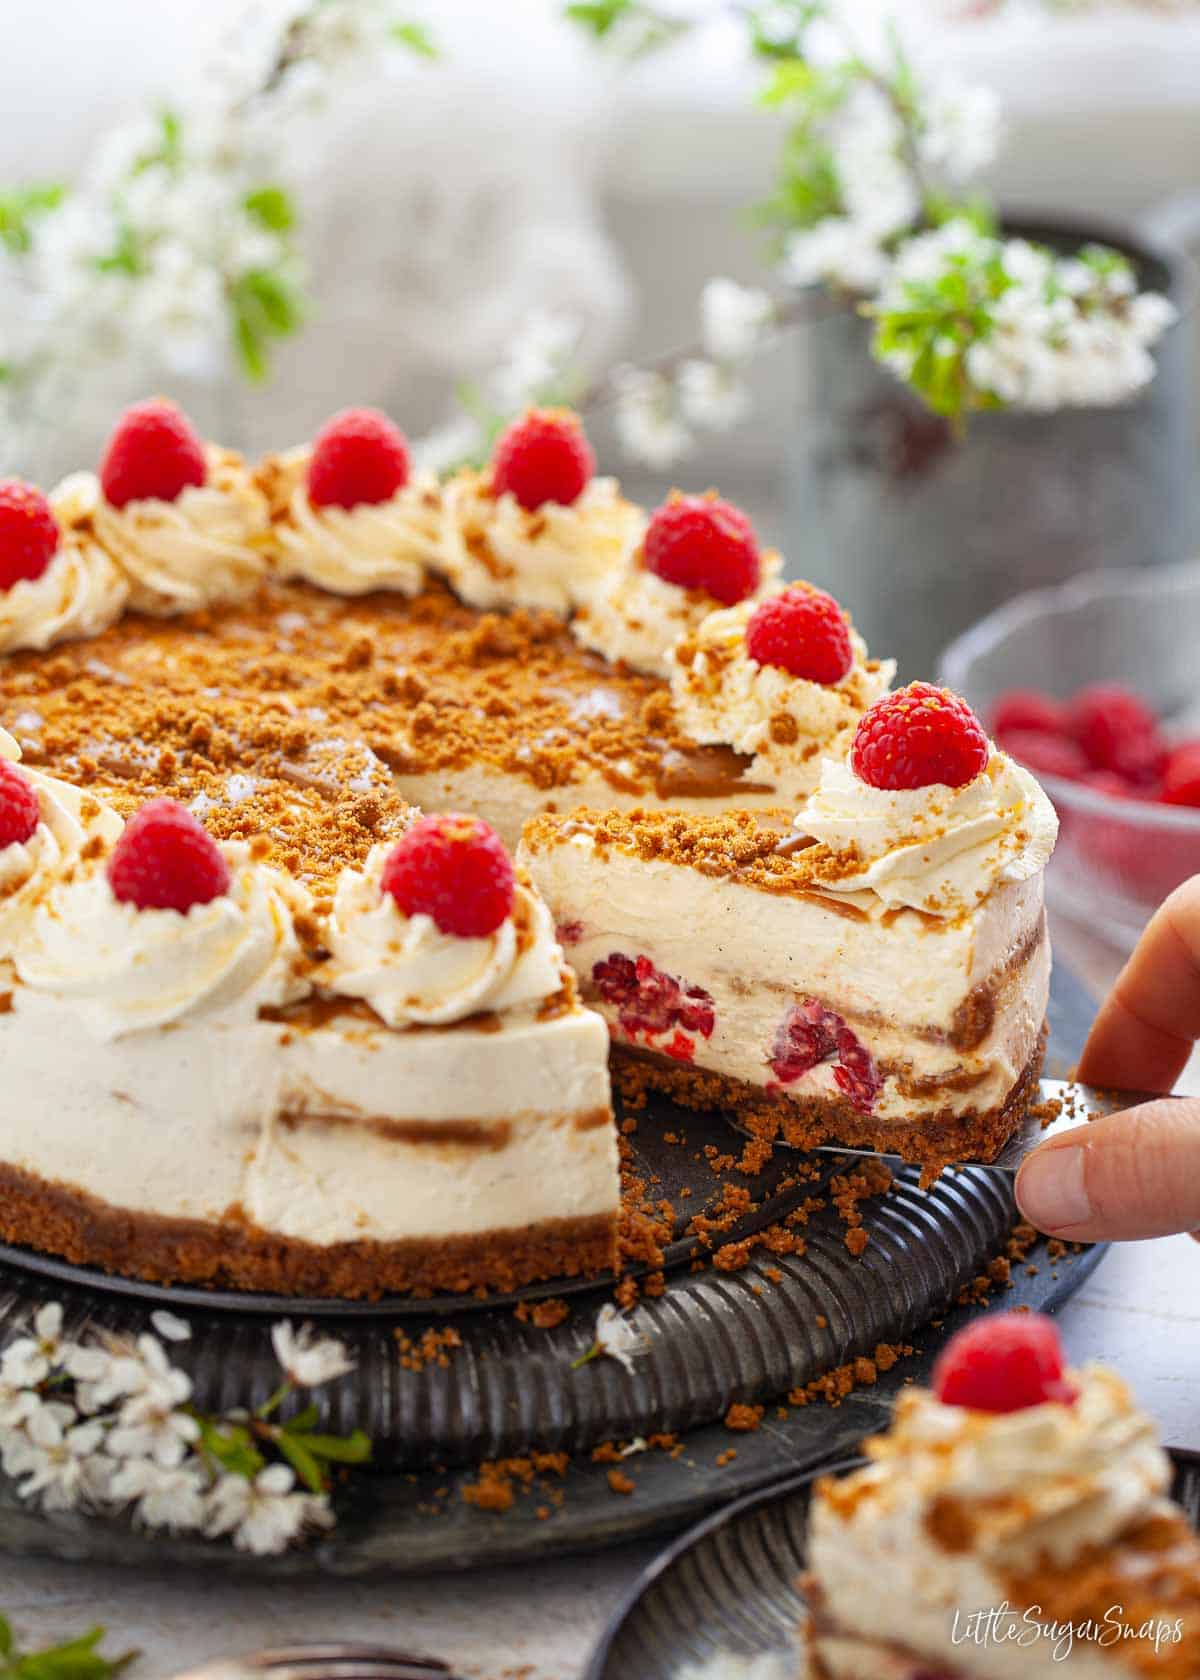
If you are looking for a Lotus Biscoff cheesecake that is like no other, you've found it.
I thought long and hard about how I wanted my no bake Biscoff cheesecake to turn out and eventually decided that the sweetly-spiced caramel notes of the Biscoff cookies and spread needed to be enhanced with sweet, heady vanilla and lifted with the cutting tang of fresh raspberries.
I also wanted to shy away from the typical presentation of a Lotus Biscoff cheesecake. The inclusion of fresh raspberries throughout this Biscoff cookie cheesecake and using the spread rippled through it makes one incredibly pretty dessert.
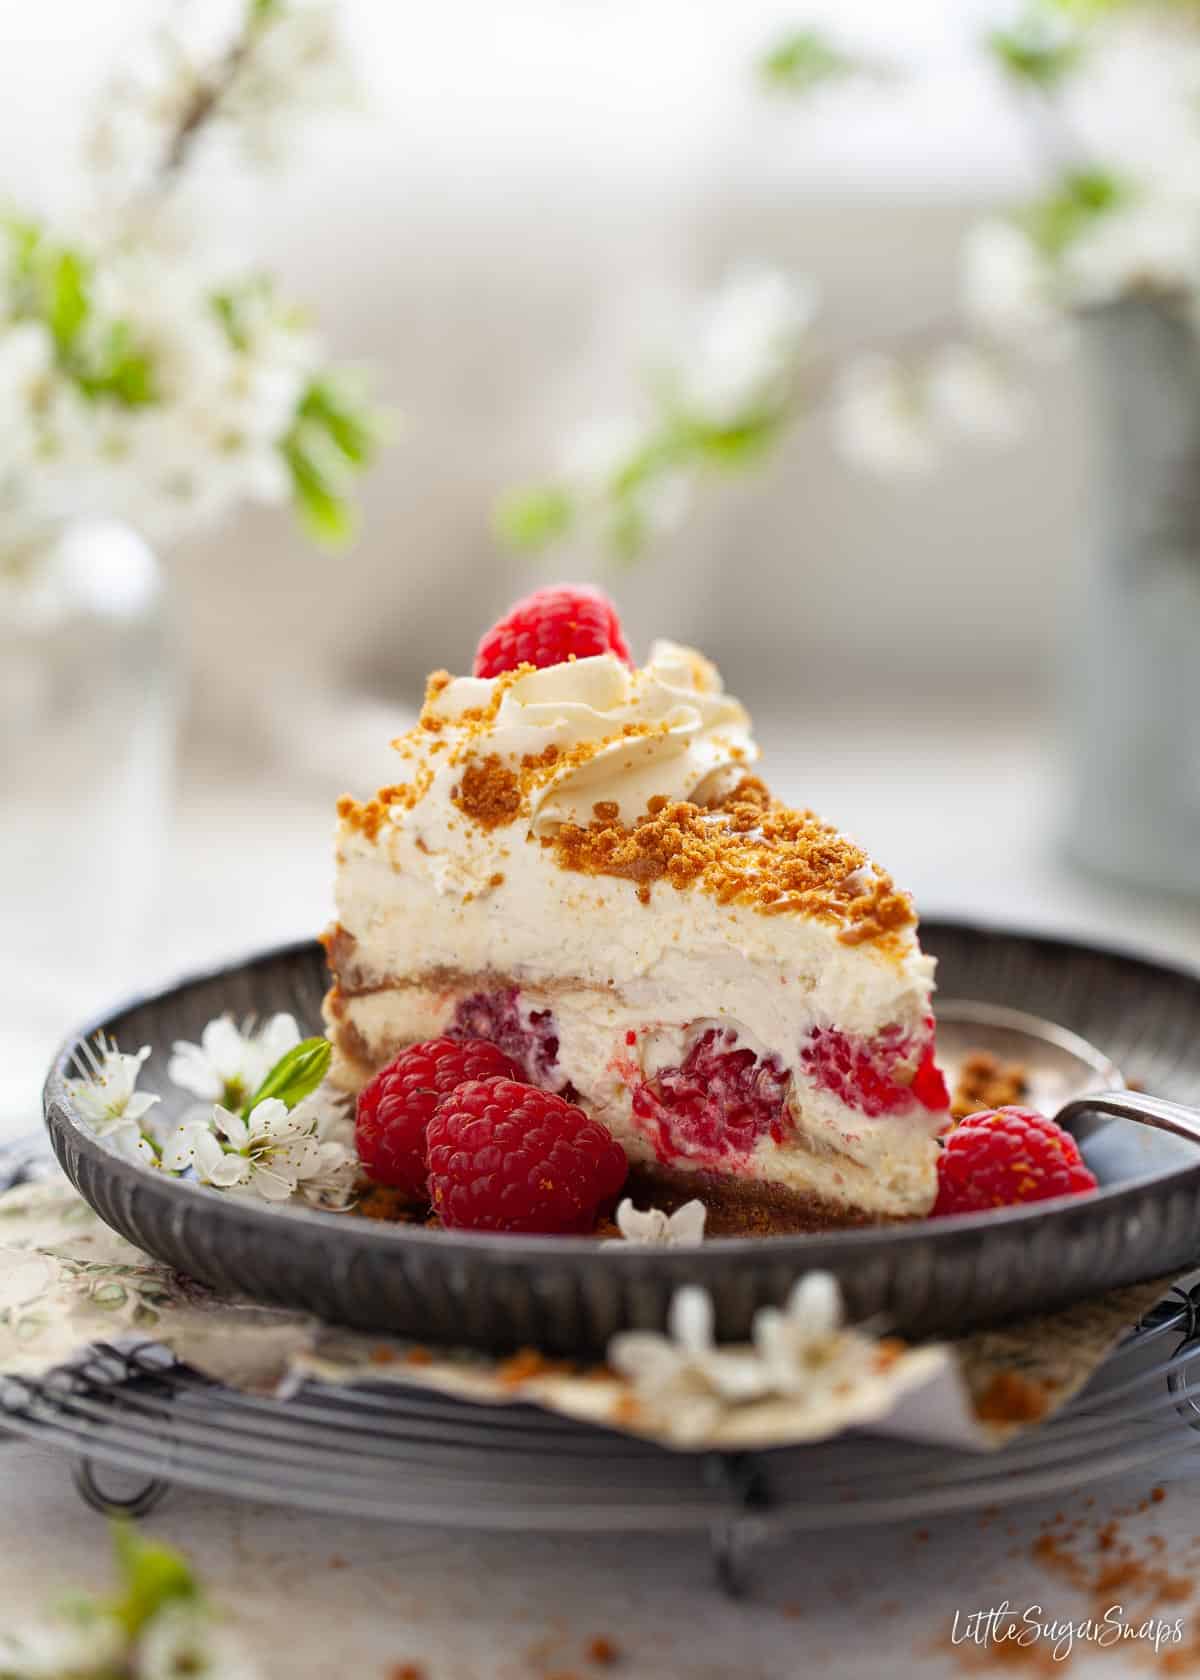
Trust me, this Biscoff cookie crust cheesecake is one delicious mouthful... and it is truly unique. Guests will be impressed.
If you're on the lookout for more Biscoff recipes try my Biscoff tiramisu, Biscoff Rocky Road, Biscoff cake and my Biscoff flapjack. They are all sure to please.
Why you'll love this dessert
I'm halfway convinced that whoever invented Biscoff cookies did so just to ensure the world could enjoy them in cheesecake form. Their flavours and textures lend themselves so well to making a fun, flavour-packed and stylish dessert.
Here are a few more reasons to make this no bake Biscoff cheesecake:
- It's quick to assemble - about 20 minutes.
- This cheesecake can be made in advance.
- Adults and children will both enjoy it.
- it feeds a crowd (12-14 people to be precise).
- With a Biscoff cookie crust, a generous ripple of Biscoff spread in the centre and plenty of Biscoff goodies on the top. So, this Lotus cheesecake is loaded with the signature Biscoff flavour.
- Although it's sweet, this cheesecake is not too sweet - that's thanks to the raspberries.
Essentially, if you are looking for a fashionable Biscoff cheesecake without delivering overkill on that namesake flavour, this is it.
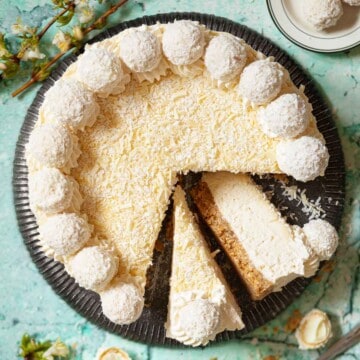
On the subject of no-bake desserts, don't miss my double chocolate cheesecake which can be garnished with any sweets you fancy. There's also my chocolate and hazelnut Ferrero Rocher cheesecake and my Raffaello cheesecake. They're all delicious and very easy to make.
Ingredients notes

Biscoff spread: the Biscoff spread can be crunchy or smooth (your choice).
Biscoff cookies: these are essential to make the Biscoff crust in this cheesecake. Although you can use 'own-brand' versions of these biscuits, I'm afraid that alternatives such as Digestives or Graham crackers are not suitable.
Raspberries: these must be fresh. Choose succulent berries that still have plenty of life left in them, especially if you want this Lotus Biscoff cheesecake to last several days. Frozen and tinned raspberries are too mushy and too laden in liquid to be suitable.
Cream cheese: I recommend using only full-fat Philadelphia cream cheese in this recipe as it is reliably full-flavoured with a thick consistency. Sometimes own brand and reduced-fat versions can be much softer and do not always set the cheesecake well. Due to this, I cannot guarantee they would make suitable substitutes.
Soured cream and lemon juice: these are my secret weapons to add the tang that I think all cheesecakes should possess. It's often missing from no bake versions, but not here. This biscoff cookie cheesecake has that mandatory zesty bite whilst still managing to be rich and creamy.
Cream: this should be double cream or equivalent with a high fat content (at least 48%). Using a lower fat cream means that the cheesecake will not set, which would be a tragic waste of tasty luxury ingredients.
Step by step instructions
Hang on tight, it's a lengthy list of steps but they are all quick & easy and the end result - the Biscoff cookie crust cheesecake of your dreams - makes it all very worthwhile.
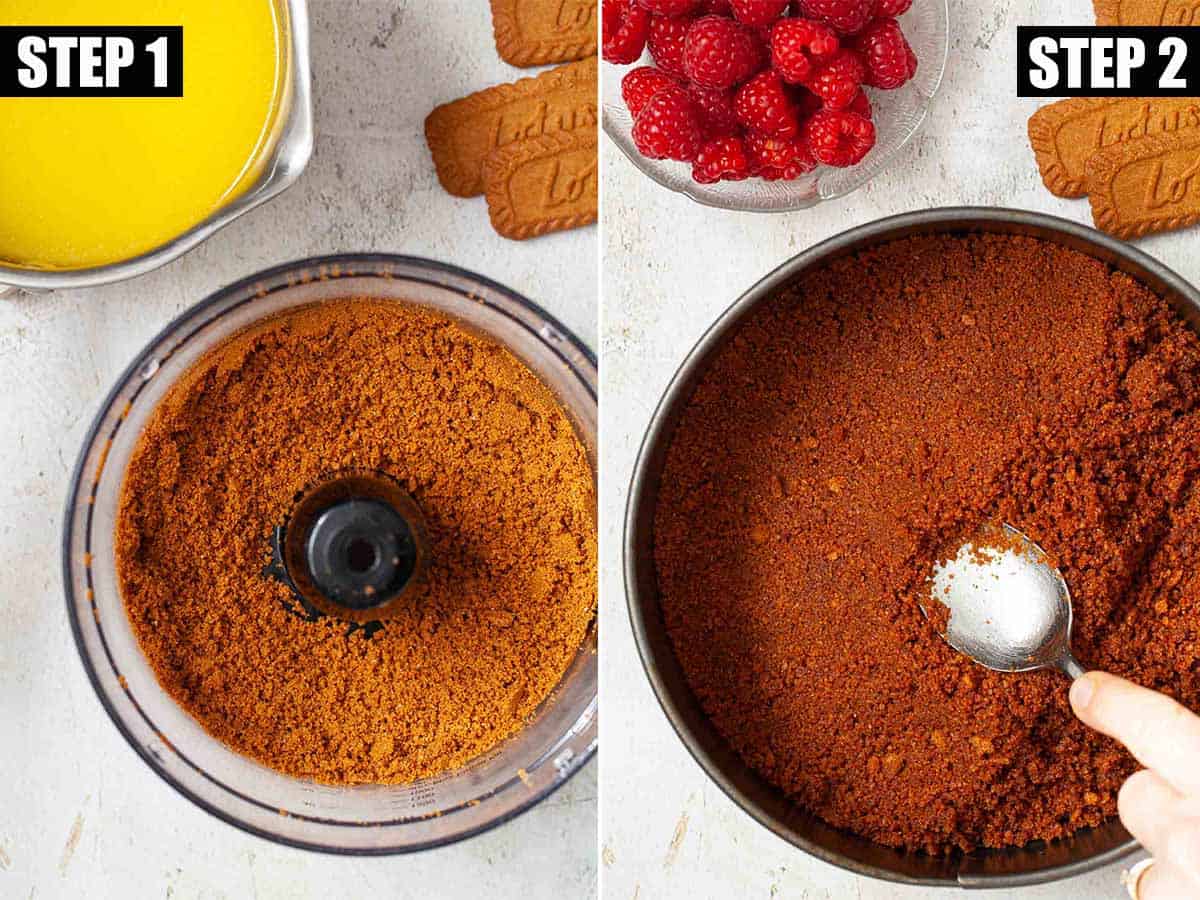
- To make the Biscoff crust blitz the cookies in a food processor and stir in melted butter.
- Spread the crumbs around the base of your springform cake tin and press them down using the back of a spoon. Set aside.
- Now beat the cream cheese, caster sugar and salt together with electric beaters until smooth. Beat in the vanilla extract, lemon juice and soured cream then pour the double cream into the batter
- Beat for 1-2 minutes until it's thick enough for the batter to need encouragement to fall off of a spoon (a firm shake or tapping the spoon on the side of the bowl).

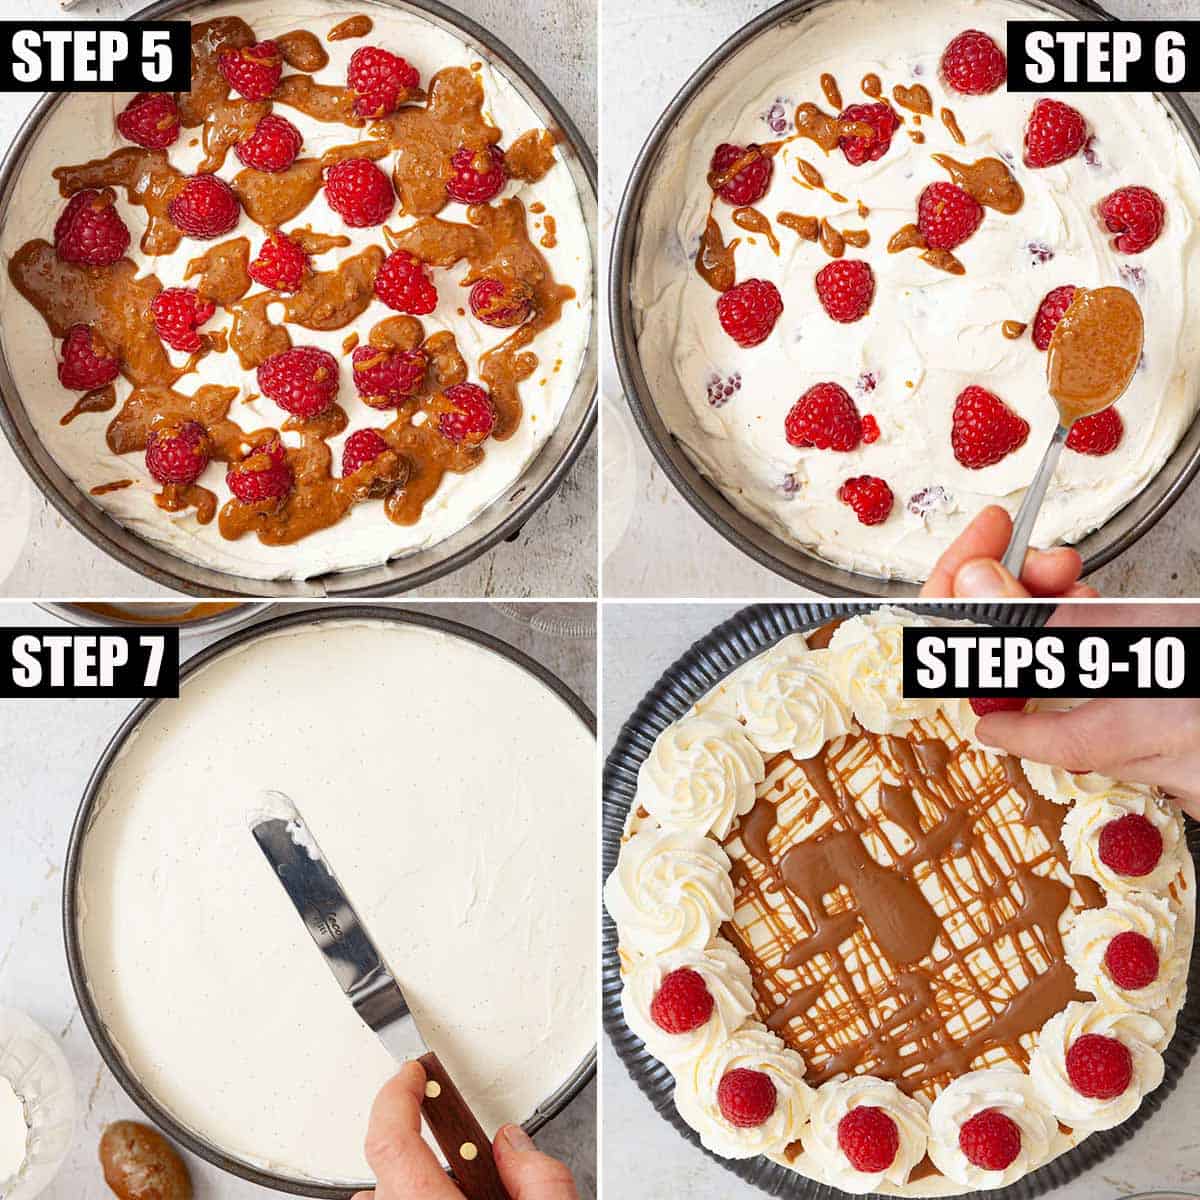
- Spoon ¼ of the cheesecake batter over the base of the Biscoff crust ensuring it reaches to the edges. Scatter ⅔ of the raspberries over the top then melt the Biscoff spread and drizzle half over the top of the cheesecake.
- Spoon ½ of the remaining batter over the top of the cheesecake and spread it out. Top with the remaining raspberries, this time pressing them into the mixture slightly. Drizzle the remaining Biscoff spread over the top.
- Cover with the remaining cheesecake filling and level the top, ensuring all fruit and spread is covered. A small offset spatula is a great tool for achieving a flat top. Cover and transfer to the fridge for at least 6 hours to set.
- Remove the cheesecake from the tin: run a sharp knife between the cheesecake and the side of the tin to loosen (wiping the knife clean if necessary as you go), then release the springform mechanism and lift off the tin. Poke a knife between the base of the tin and the cheesecake crust, running it right around the cheesecake until you feel the cheesecake release. Slide the cheesecake onto a plate or serving board.
- To decorate it, melt the remaining Biscoff spread and use a small spoon to drizzle it over the top of the cheesecake (I find it handy to drizzle half in one direction and then the remainder at 90 degrees to this to create a rough criss-cross effect.
- Whip the cream and use to pipe 12-14 rosettes around the edge of the cheesecake. Press a fresh raspberry into each rosette then crumble the remaining cookies and scatter over the top of the cheesecake.
Expert tips
Although this no-bake Biscoff cheesecake is very simple I do have a set of tips to ensure you get the best out of this recipe:
Top tip: the finishing touches are best added to the cheesecake close to the time of serving to ensure the biscuit crumbs stay crunchy.
- Invest in a set of digital kitchen scales. That way you can weigh ingredients out extremely accurately and get much better results. Think about it - what one person scoops into a "cup" is completely different from what someone else scoops. Go with grams, they are much more accurate.
- The easiest way to turn the biscuits into crumbs is in a food processor. You could alternatively pop them into a bag and crush them with a rolling pin.
- Press the biscuits down firmly to create a firm base on which to spread the cheesecake. But don't pack them solid as the cheesecake will then be difficult to cut.
- Do not under or over-beat the batter once the cream has been added. If it is too runny then the cheesecake will not fully set. But if the batter is over-beaten then it can turn runny and will never set. Mix on a moderate speed until everything holds its shape well and needs encouragement to fall off of a spoon by shaking or tapping it against the side of the bowl.
- Use the right-sized springform baking tin: 20cm (8-inch) with a depth of at least 7cm (2 ¾-inch).
- It's not essential to line or grease the tin, the cheesecake will be easy to remove anyway. But if you do decide to line it do not grease with butter as it will harden in the fridge making the cheesecake difficult to remove from the pan. Instead, opt for cake release spray.
- If the base of your tin has a lip around the edge, flip it over and secure it in place before using. A flat base makes removing the cheesecake easier.
- Give this Biscoff cookie cheesecake at least 6 hours to set fully.
- To release the cheesecake run a sharp knife between the cheesecake and the edge of the tin before popping the springform mechanism open. Next use a knife to release the biscuit base from the tin - once inserted, run the knife around until you feel the entire cheesecake loosen.
Frequently asked questions
I do not recommend using frozen raspberries for this recipe. Frozen berries tend to emit a lot of liquid once they defrost which would interfere with the texture of the cheesecake and the cookie base.
If fresh raspberries are not available it would be better to make a coulis out of the frozen berries and drizzle this inside of the cheesecake instead. It will be slightly sweeter than it would otherwise be, but still utterly delicious.
You can use knock-off Biscoff cookies and cookie butter for this Lotus cheesecake. I've used the Aldi biscuit spread and the Aldi Belmont caramelised biscuits before with great success.
There are a number of possible reasons why your Biscoff cheesecake did not set:
1. The batter was not whipped for long enough. It should be quite firm before spreading into the tin.
2. It wasn't left to set in the fridge for long enough. Put it back in the fridge for longer.
3. The cream cheese was too loose. Use only full-fat cream cheese with a firm consistency. Avoid low-fat versions or any with a sloppy consistency. The cheesecake will never set if made with these products. Though a little pricey I only ever trust Philadephia for my no bake cheesecakes.
Even though the Lotus Biscoff cookies and spread are both vegan this is not a vegan Biscoff cheesecake. I have yet to master a vegan version, so if you are here looking for one, try this recipe from The Veg Space instead. I'm sure you could add in vanilla and raspberries just as I've done here.
This Biscoff cookie crust cheesecake does need to be stored in the fridge due to the high level of dairy products in it. Always cover the cheesecake before putting it into the fridge to stop it drying out and to prevent other food odours from being picked up by the cheesecake.
Store for up to 3 days (assuming the raspberries used were very fresh).
My honest answer is no. The texture of this dessert is significantly compromised if it has been frozen. Instead of being silky smooth it takes on a drier, slightly crumbly texture. And the raspberries will turn mushy once it is defrosted. This seems like a waste of expensive ingredients to me. That said, this Lotus cheesecake is still edible if frozen and defrosted, but I'd only suggest this route if it's going to go to waste otherwise.
Variations
This Biscoff cookie cheesecake is understated in many ways. If you want to egg-up the Biscoff factor in the presentation try the following suggestions:
- Cover the top of the cheesecake entirely in melted Biscoff spread (add before removing from the tin and allow to set before unmolding the cheesecake).
- Push half a Biscoff cookie into each cream rosette along with the raspberry.
- Make extra Biscoff crust and push it up the edge of the tin (try multiplying the quantities by 1½).
And, of course, if you grab a few little glasses or pots you can turn this dessert into individual Biscoff cookie cheesecakes.
More droolworthy cheesecakes
If you have tried this no bake Lotus Biscoff cheesecake, please give it a rating or comment. I love to hear how you get along with my recipes.
Want to keep in touch? Sign up to receive LittleSugarSnaps newsletters to hear when new recipes are published. You'll get a free welcome e-book with my top baking tips and 5 favourite cake recipes. Or stay in touch on Facebook, Instagram and Pinterest.
📖 Recipe

No Bake Biscoff Cheesecake
Equipment
- 1 Deep sided Springform cake tin - 20cm in diameter and at least 7 cm deep (8-inches x 3-inches)
Ingredients
For the Base
- 200 g Biscoff biscuits
- 75 g Butter
For the Cheesecake Batter and Filling
- 600 g Philadelphia cream cheese Full-fat
- 75 g Caster sugar
- ⅛ teaspoon Salt
- 3 tablespoon Soured cream
- 2 teaspoon Vanilla bean paste
- 2 teaspoon Lemon juice
- 275 ml Double cream Heavy cream (48% fat)
- 125 g Biscoff spread Smooth or crunchy
- 150 g Fresh raspberries NOT frozen
Toppings
- 50 g Biscoff spread Smooth or crunchy
- 200 ml Double cream Heavy cream (48% fat)
- 14 Fresh raspberries
- 2 Biscoff biscuits
Instructions
Make the Biscuit Base
- Blitz the Biscoff cookies in a food processor until they resemble fine breadcrumbs
- Melt the butter and stir in the cookie crumbs
- If the removable base of your cake tin has a lip around the edge (many do) then flip it over and use the flatter side. Secure in place with the springform mechanism then press the biscuit base into the tin. Spread it around and press it down firmly using the back of a spoon. Set aside
Make the Cheesecake Filling
- In a medium bowl beat the cream cheese, caster sugar and salt together with electric beaters until smooth
- Next beat in the vanilla extract, lemon juice and soured cream
- Pour the double cream into the batter and beat for 1-2 minutes until the cream is mixed in. It should thicken well but if it seems loose continue to mix until it firms up. It is ready when the batter needs encouragement to fall off of a spoon (a firm shake or tapping the spoon on the side of the bowl)
Assemble the Cheesecake
- Briefly heat the Biscoff spread either in the microwave or in a small pan until it just melts
- Spoon ¼ of the batter over the base of the cheesecake ensuring it reaches to the edges. Scatter ⅔ of the raspberries over the top and drizzle half of the melted Biscoff spread over the top
- Spoon ½ of the remaining batter over the top of the cheesecake and spread it out. Top with the remaining raspberries, this time pressing them into the mixture slightly. Drizzle the remaining Biscoff spread over the top
- Cover with the remaining cheesecake filling and level the top, ensuring all fruit and spread is covered. A small offset spatula is a great tool for achieving a flat top
- Cover carefully and transfer to the fridge for at least 6 hours to set fully
Remove from the Baking Tin
- Carefully run a sharp knife between the cheesecake and the side of the tin to loosen (wiping the knife clean if necessary as you go), then release the springform mechanism and lift off the tin
- Poke a knife between the base of the tin and the cheesecake crust, running it right around the cheesecake until you feel the cheesecake release. Slide the cheesecake onto a plate or serving board
Decoration
- Melt the Biscoff spread and use a small spoon to drizzle it over the top of the cheesecake (I find it handy to drizzle half in one direction and then the remainder at 90 degrees to this to create a rough criss-cross effect
- Whip the cream and use to pipe 12-14 rosettes around the edge of the cheesecake
- Press a fresh raspberry into each rosette
- Crumble the cookies and scatter over the top of the cheesecake
Notes
Cooking Tips
- As always, my top tip is to invest in a set of digital kitchen scales. That way you can weigh ingredients out extremely accurately and get much better results. Think about it -what one person scoops into a "cup" is completely different from what someone else scoops. Go with grams, they are much more accurate
- The easiest way to turn the biscuits into crumbs is in a food processor although you could alternatively pop them into a bag and crush with a rolling pin
- Use real butter for a fuller flavoured biscuit base
- Press the biscuits down firmly to create a well packed and firm base on which to spread the cheesecake
- I recommend using only full-fat Philadelphia cream cheese in this recipe as it is reliably full-flavoured and it has a thick consistency. Sometimes own brand and reduced-fat versions can be much softer and due to this, I cannot guarantee they would make suitable substitutes. Using them may mean that the cheesecake does not set sufficiently
- I do not recommend using frozen raspberries for this recipe. Frozen berries tend to emit a lot of liquid once they defrost which would interfere with the texture of the cheesecake and the cookie base
- If fresh raspberries are not available it would be better to make a coulis out of the frozen berries and drizzle this inside of the cheesecake instead. It will be slightly sweeter than it would otherwise be, but still utterly delicious
- Once the cream has been added take care not to over or under beat the batter. If it is too runny then the cheesecake will not fully set, but if it is too stiff the cheesecake will be less pleasant to eat. Keep on mixing until everything holds its shape well and needs encouragement to fall off of a spoon by shaking or tapping it against the side of the bowl
- Use a suitably large deep-sided springform cake tin - the quantities stated in the recipe card will fill a 20cm (8-inch) diameter tin to a depth of 7cm (2 ¾-inch)
- There is no need to line or grease the tin, the cheesecake will be easy to remove but if you do decide to line it do not grease with butter as it will harden in the fridge making the cheesecake difficult to remove from the pan. Instead, opt for cake release spray
- If the base has a lip around the edge, flip it over and secure in place before using. A flat base makes unmoulding the cheesecake easier
- Layer up this dessert carefully. Spread each layer of cheesecake filling out carefully to the edges to ensure no gaps are left and allow plenty of cheesecake filling for the final layer to ensure all raspberries and Biscoff spread are covered up
- Give this no-bake speculoos cheesecake at least 6 hours to set fully
- To release the cheesecake run a sharp knife between the cheesecake and the edge of the tin before popping the springform mechanism open. Next use a knife to release the biscuit base from the tin - once inserted, run the knife around until you feel the entire cheesecake loosen
- The finishing touches are best added to the cheesecake close to the time of serving to ensure the biscuit crumbs stay crunchy

Ana Sha says
So I listened to the comments and definitely you should use 2 thirds of this recipe and it will fit perfectly in the given tin size.
I only made one layer of biscoff - I think also you can add more biscoff because the layer was very thin for my liking.
On top I made a strawberry/raspberry cooli - i boiled some rasperries and strawberries together on a stove top, added sugar and water, cooked a little bit - topped it on the cheesecake and left in the fridge to cool.
Was a wonderful treat - thinking of doing it as a Summer business perhaps?
🙂
Jane Coupland says
Hey they Ana, pleased you enjoyed it. Love the idea of adding fruit coulis on the top in which case, yes, definitely include more Biscoff in the centre to keep the flavour there (the original recipe includes it in the middle and on the top. Cutting down to 2/3 of the recipe will give a thinner cheesecake which will serve fewer, but that's fine provided that fits your requirements (or you don't have a deep tin).
Hazel says
I made this for party of 45 people. Two 9 inch tins and it all turned out absolutely delicious. I had to 1.5x the recipe and it worked beautifully. Highly recommend it. Thanks for this recipe its a keeper
Jane Coupland says
Oh Hazel, that is a lot of cheesecake 🙂 - I'm so pleased it was a success at mass scale (hoping you got a generous slice yourself) - thanks for your lovely feedback 🙂
Maureen says
Really worked again, this time 2/3 quantity in 8 inch tin.
Jane Saunders says
Excellent - thanks so much for the feedback. Glad you're enjoying this recipe - it's a bit of a favourite with my family!
Maureen says
I did freeze this and even managed to cut in half whilst still frozen to use on 2 occasions. It was absolutely delicious!
Enjoyed it so much I’m making another this weekend for more company but will try your suggestion to halve recipe. Many thanks.
Maureen says
Can this cheesecake be frozen as it rather large for my requirements
Jane Saunders says
Hi Maureen, great question and I know the exact answer from experience. I made this cheesecake for Boxing Day just gone, expecting 15 people to be dining, but then my brother caught the dreaded c-19 and Christmas came to an abrupt end, with all other guests departing at rapid speed, including 3 who had only arrived 15 minutes before, after a 3-hour journey! My poor brother got stuck feeling rough, having to isolate in our spare room for quite some time...
Anyway, the cheesecake went into the freezer for a few weeks... it was edible, but the texture wasn't a patch on how it is before freezing - somewhat drier and a little crumbly. It was also harder to remove from the tin without breaking it. I'd suggest halving the recipe and using a 6 or 7-inch tin rather than freezing it. Or make full size and give everybody an extra portion to take home with them/ share with a neighbour or friend...
PS By some stroke of luck, all 14 of my family managed to stay healthy - even me, despite being my brother's makeshift nurse 🙂
Maureen says
Thanks. I’ve decided to have a go at freezing the completed whole cheesecake and will let you know the results.
Jane Saunders says
Hi Maureen - if you can, serve some before putting the rest in the freezer - I'd hate for you to miss out on the best texture of the cheesecake completely. Personally, having frozen it once, I wouldn't do it again unless I had leftovers that would otherwise go to waste.
Cynthia | What A Girl Eats says
Thank you for including me in this delicious dessert! Raspberry coulis will make it absolutely decadent! Pinned and tweeted.
Jane Saunders says
That's my pleasure. Hopefully your coulis will help a few people out.