
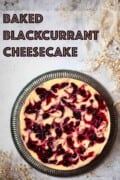
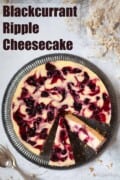
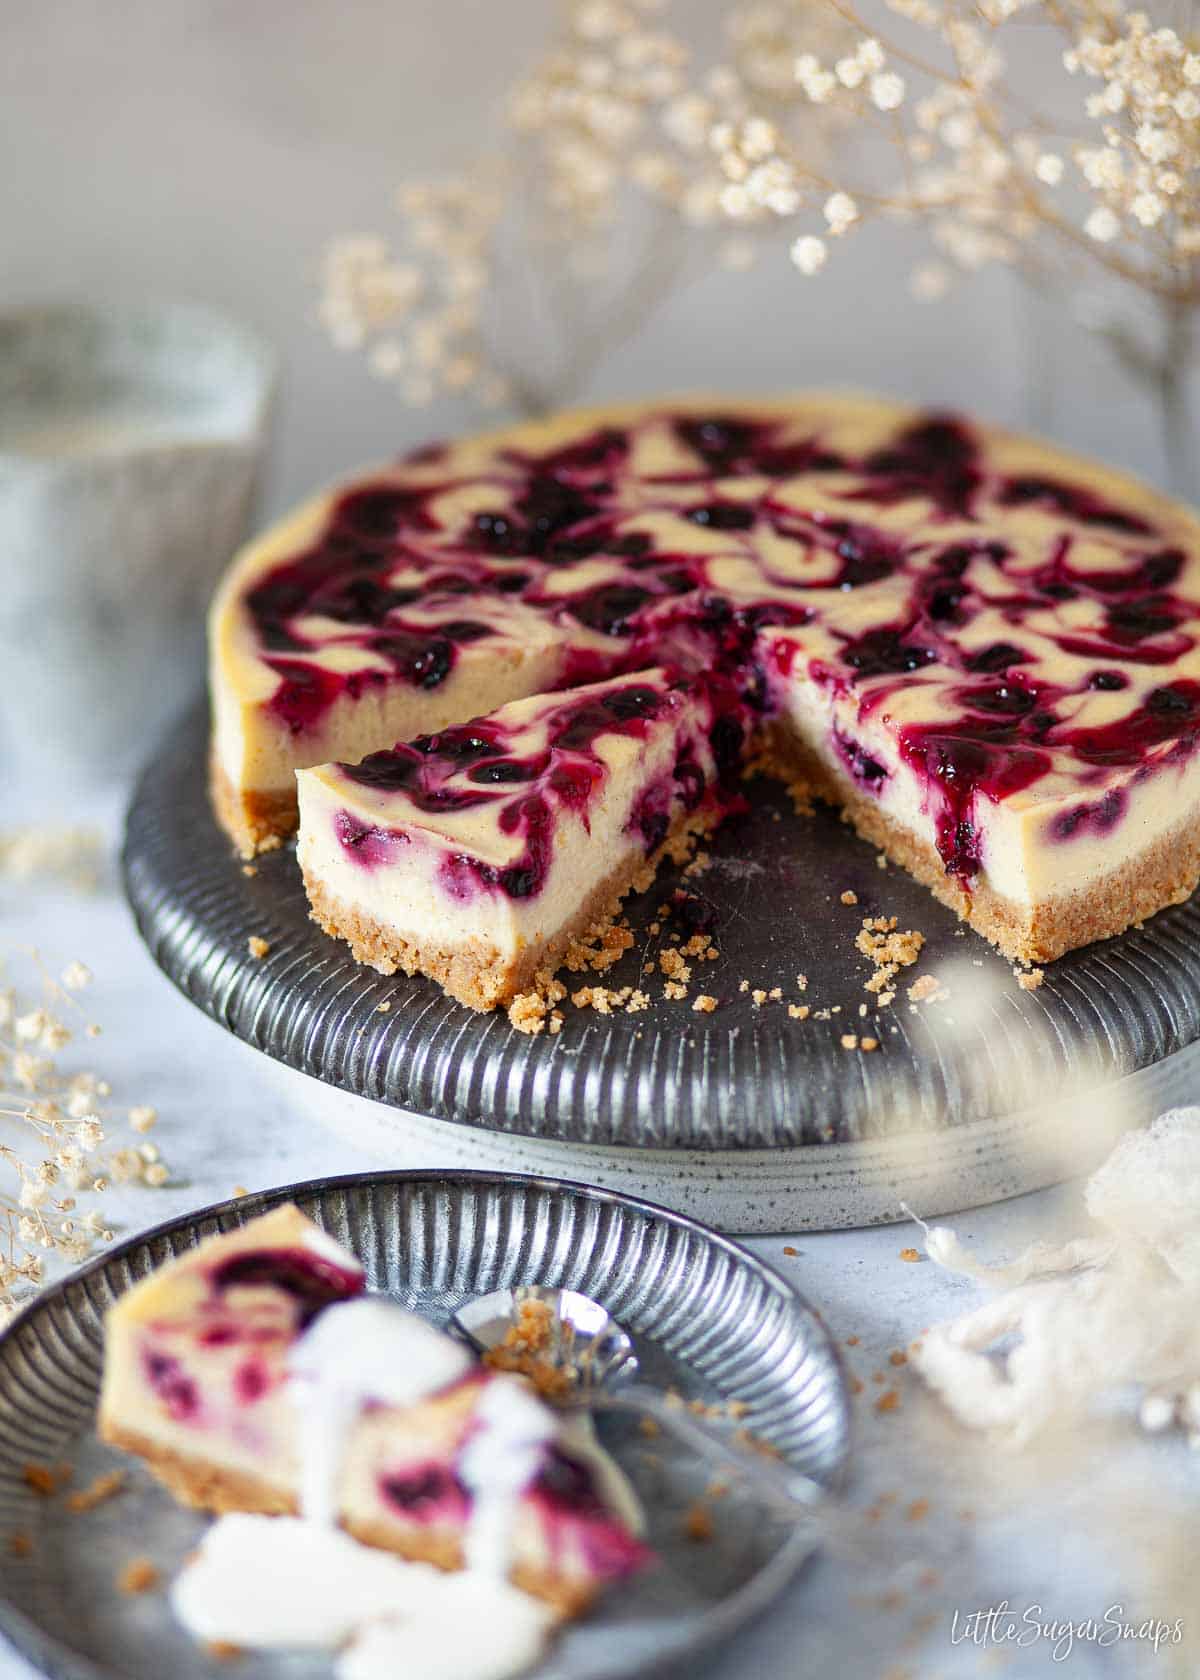
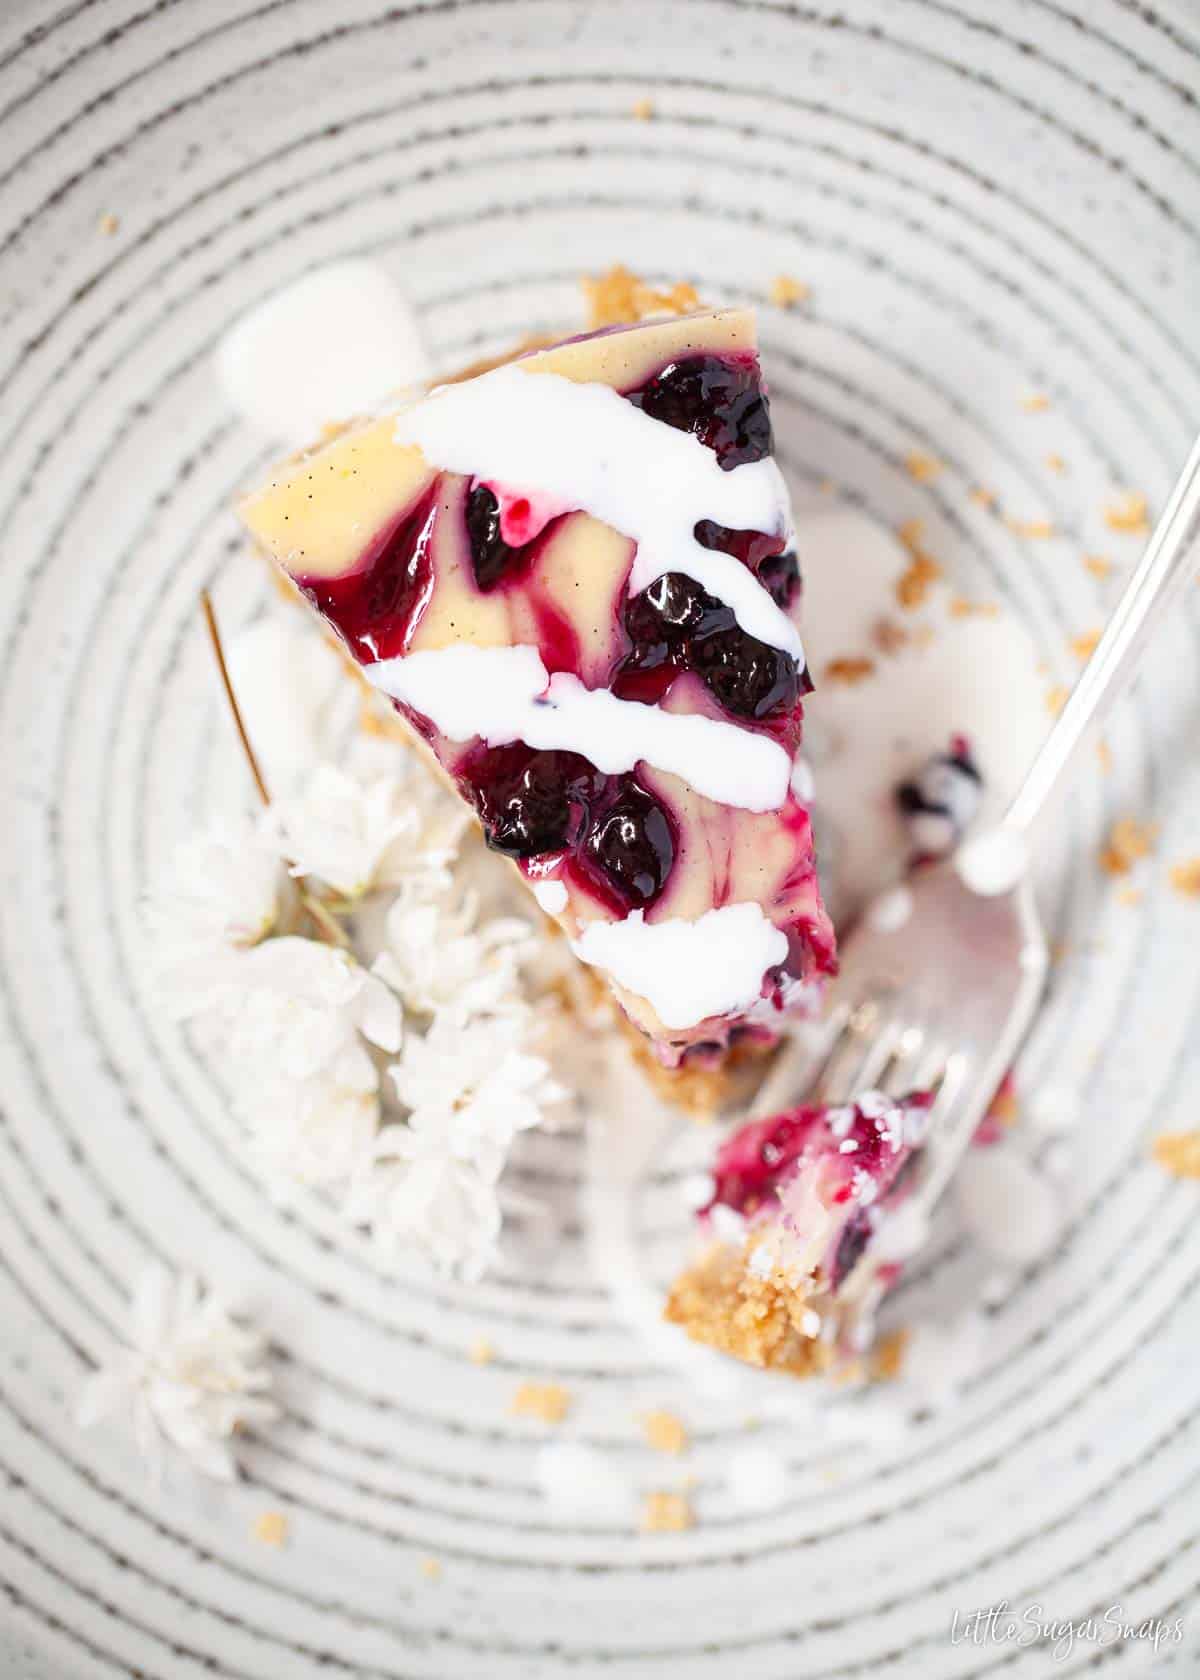
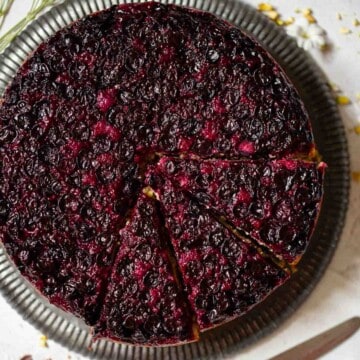
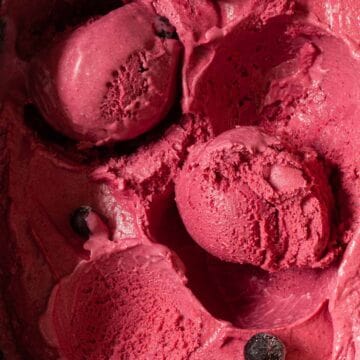
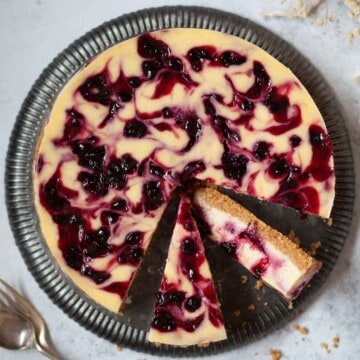
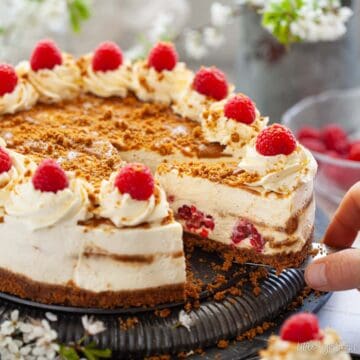
This recipe for blackcurrant cheesecake recipe features smooth and creamy vanilla cheesecake filling rippled with tangy blackcurrant compote. This marbled cheesecake is pretty to look at and extremely tasty.
If you enjoy fruity cheesecakes take note of my blackberry cheesecake too.
Why you'll love this cheesecake
- Easy: Follow my water bath method and this cheesecake is surprisingly simple to make.
- Beautiful: The marbled blackcurrant swirl creates a striking, elegant look with no need for extra decoration.
- Bold flavour: Tangy blackcurrant compote is the perfect partner to the sweet and creamy vanilla filling.
- Dreamy texture: Baked in a water bath, the result is silky smooth with a luxuriously soft bite. Pure bliss.
Jump to:
This marbled baked blackcurrant cheesecake pairs a lusciously creamy vanilla filling with tangy blackcurrant compote swirled throughout. The partnership is magical. Set on a classic biscuit base, it's easy to assemble, visually stunning, and needs no extra decoration. Just add a drizzle of cream to serve.
If you want more recipes with blackcurrants try my homemade blackcurrant cordial with the option to infuse it with sweet, fragrant vanilla. Use it to whip up a refreshing blackcurrant mojito cocktail. And don't miss my blackcurrant sorbet - it's another fantastic blackcurrant dessert.
Ingredients notes
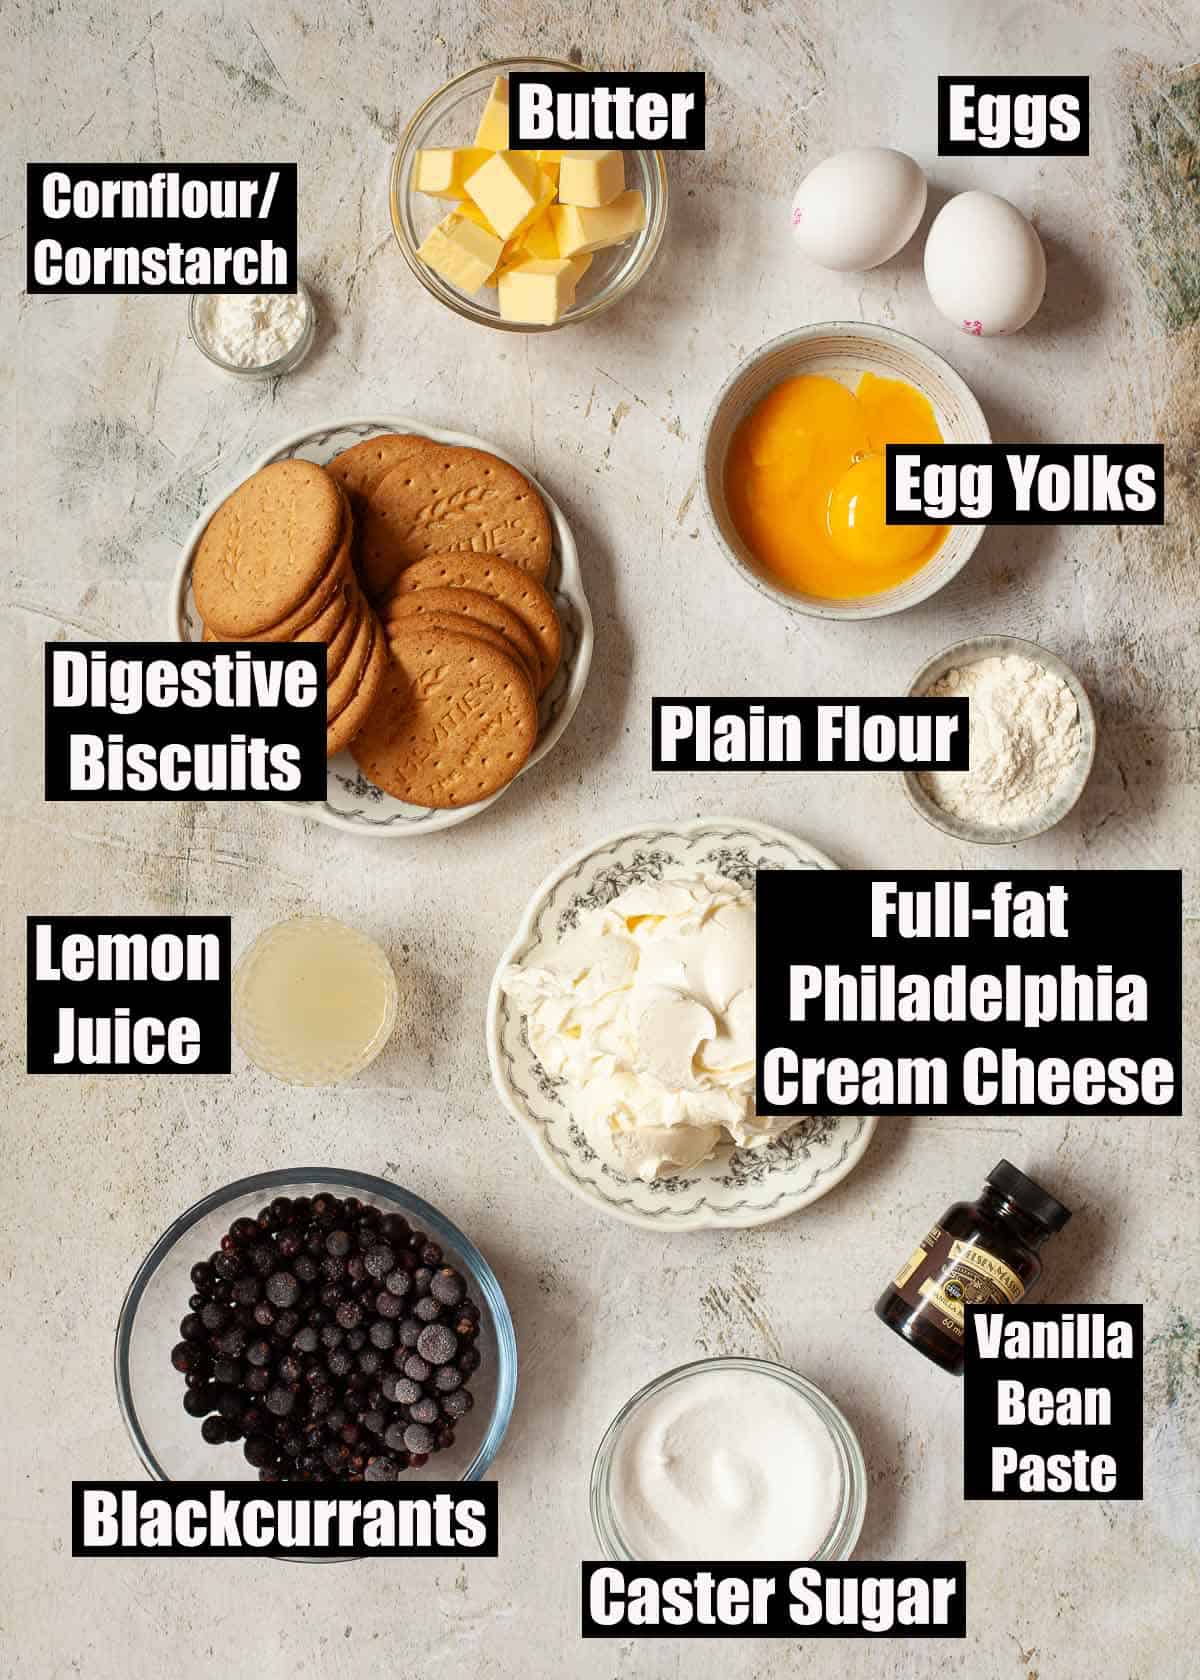
Blackcurrants: Fresh or frozen both work well - no need to defrost frozen berries.
Cream cheese: Use full-fat Philadelphia for the best texture and flavour . I do not particularly recommend using own-brand labels. And I solemnly warn you against using low-fat cream cheese - it won't set properly and may ruin the bake.
Eggs and egg yolks: This recipe for blackcurrant cheesecake uses 2 whole eggs and 2 extra yolks. The whole eggs thicken the batter, while the yolks give it that ultra-smooth, creamy texture.
Flour: Just a little is added to help bind the filling and minimise cracking during baking.
Step by step instructions
Full instructions and measurements are given in the printable recipe card at the end of this post.
This is an easy baked blackcurrant dessert recipe that can be broken down into 4 separate stages:
- Prepare the biscuit base.
- Making the blackcurrant compote.
- Mixing the cheesecake batter.
- Assembling and baking the cheesecake.
The details for each stage are given below and I've also included a dedicated section on how to bake a cheesecake in a water bath.
1. Prepare the biscuit base
Before starting this recipe, prepare the baking tin for the water bath (details are given in the next section).
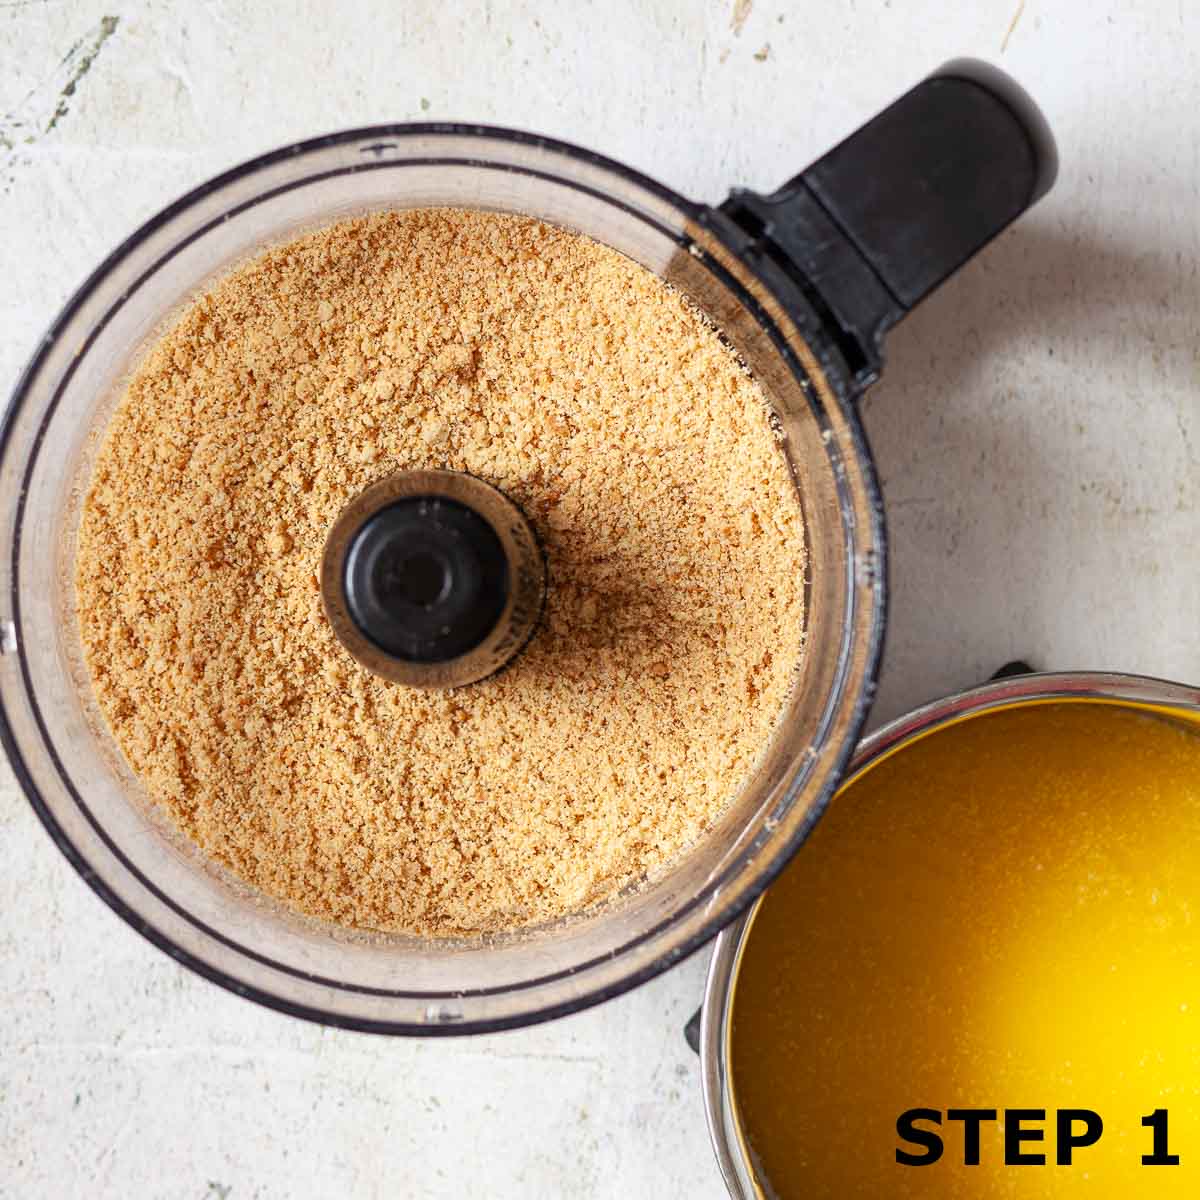
- Step 1: Crush the biscuits until they look like breadcrumbs (either in a food processor or using a rolling pin) and melt the butter.
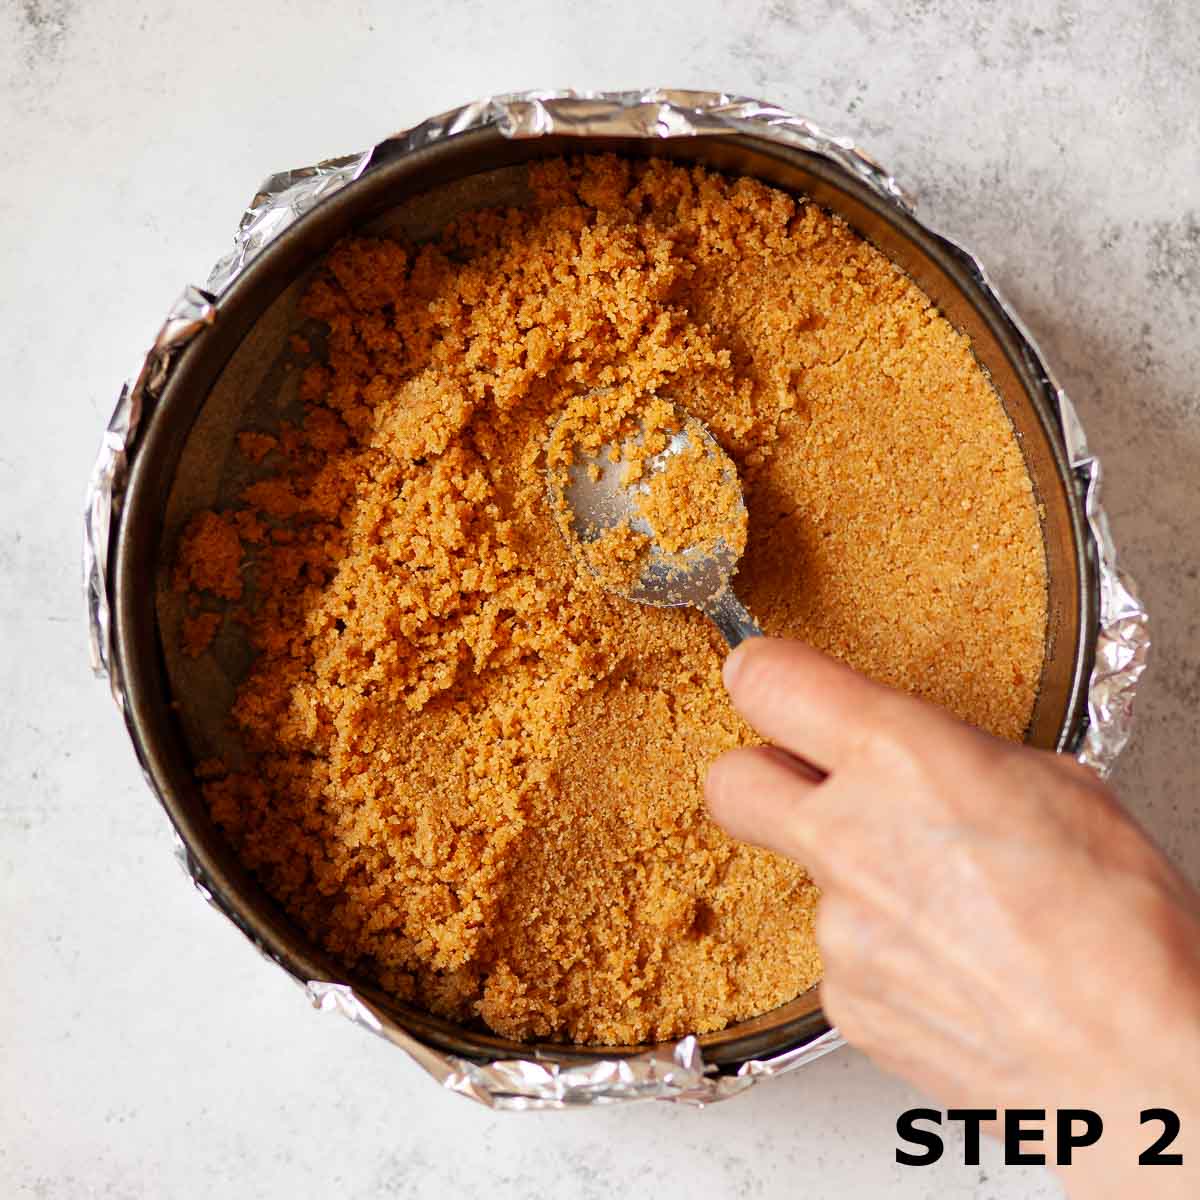
- Step 2: Stir the butter into the biscuit crumbs and press the mixture into the base of the prepared baking tin. Bake for 15 minutes then set aside.
2. Make the blackcurrant compote
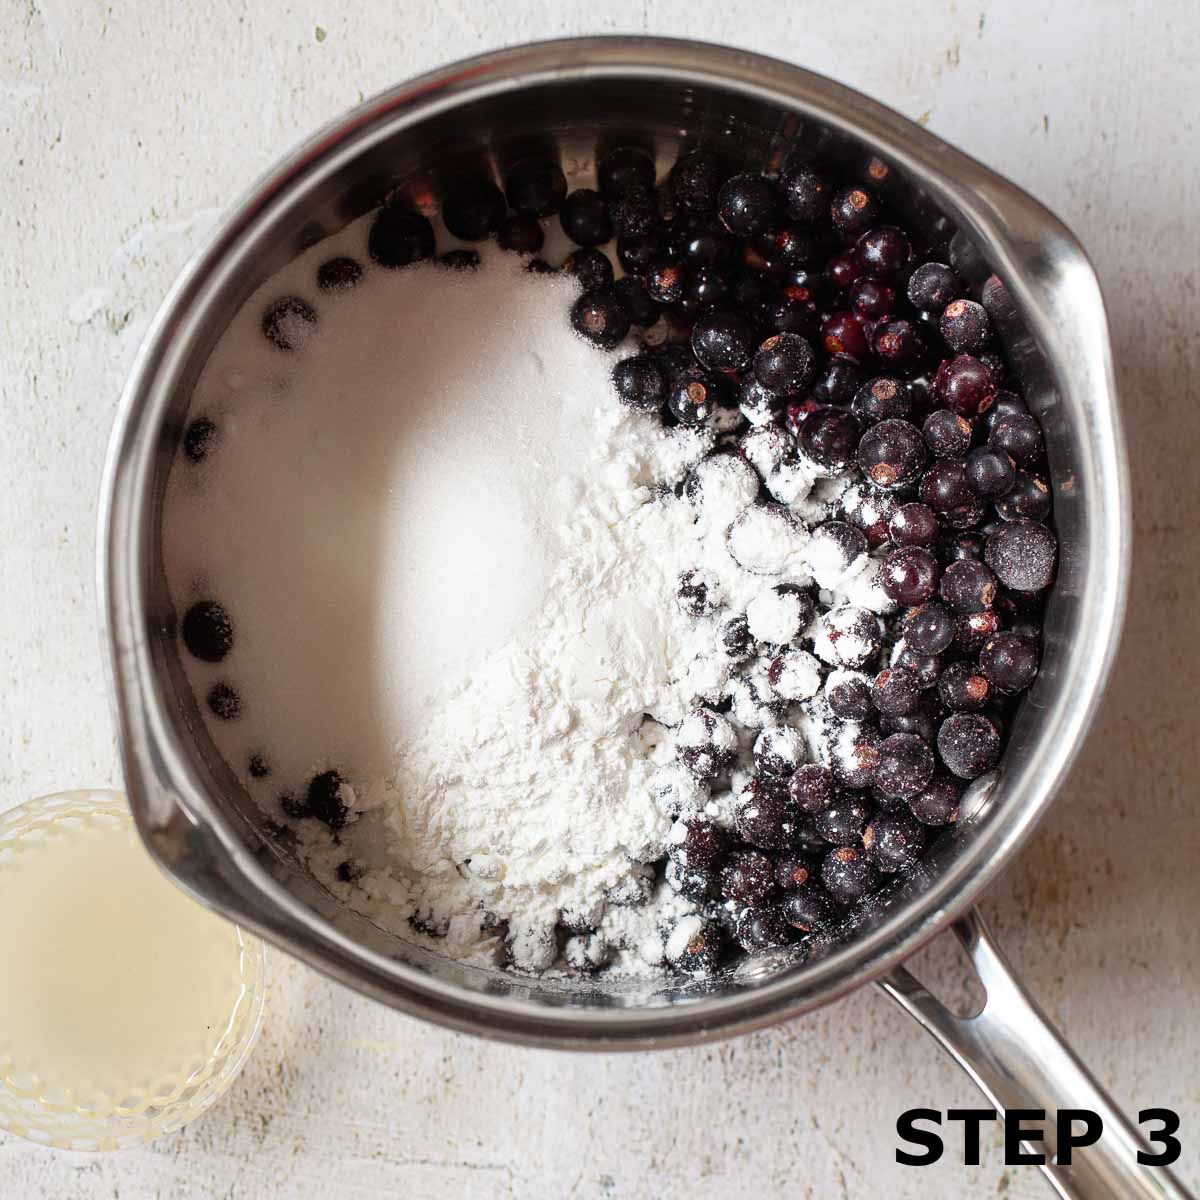
- Step 3: Put the blackcurrants into a medium-sized pan with the sugar, lemon juice and cornflour.
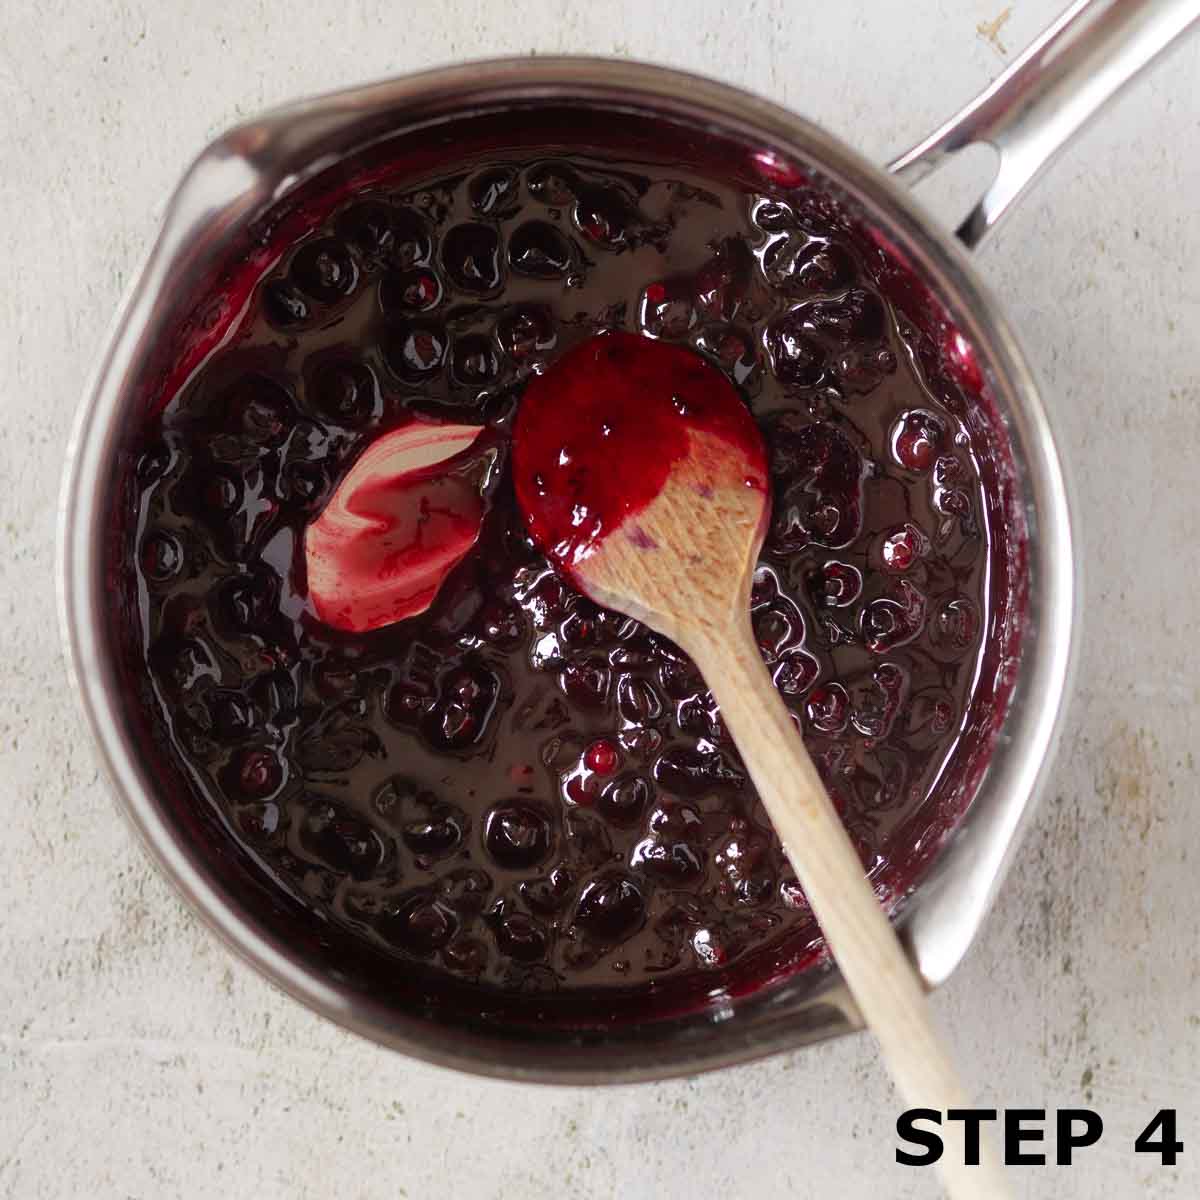
- Step 4: Cook over moderate heat, stirring constantly. The sugar will dissolve, the fruit will release its juices, and the mixture will thicken and darken - this takes about 3-5 minutes, depending on whether you're using fresh or frozen fruit. Take off the heat and set aside.
3. Make the cheesecake batter
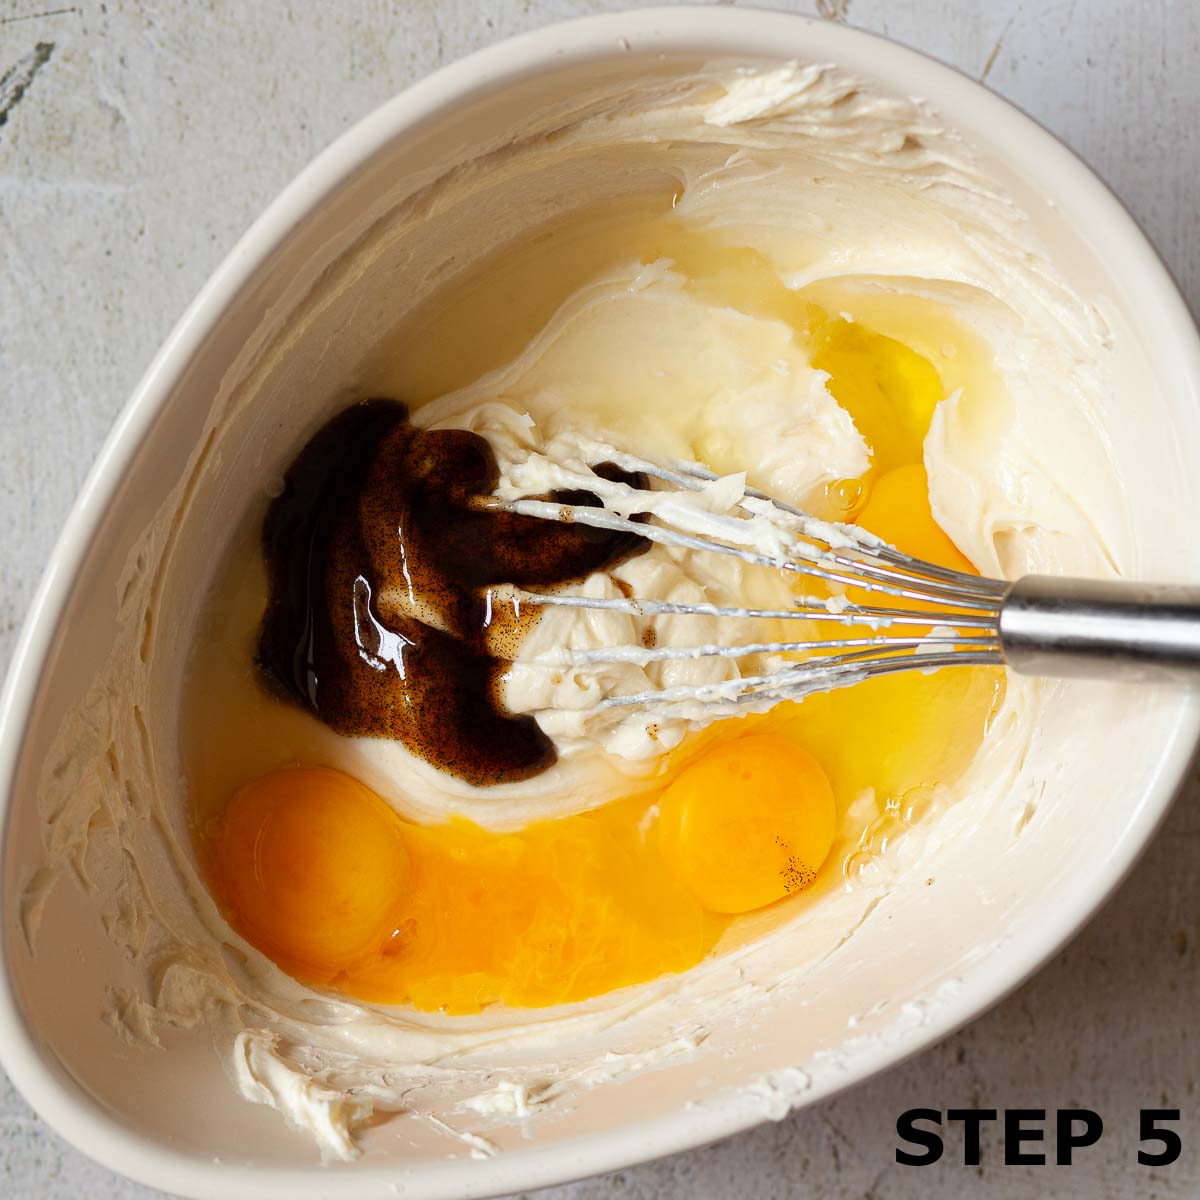
- Step 5: In a bowl, mix cream cheese, sugar, and sieved flour using a handheld balloon whisk until smooth. Add the eggs, yolks, lemon juice, and vanilla bean paste.
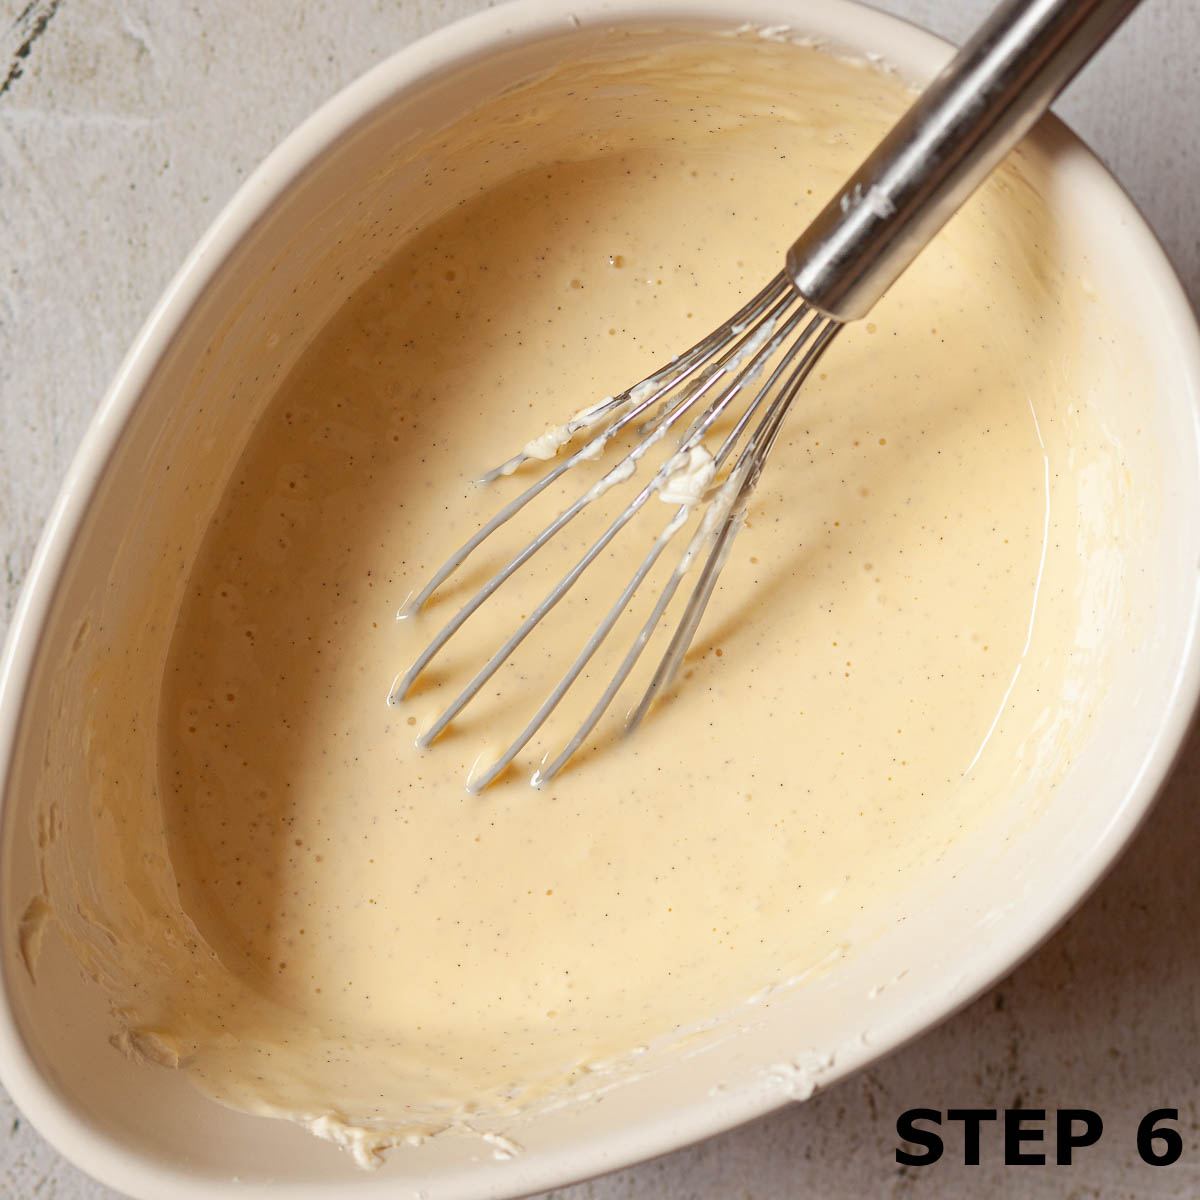
- Step 6: Beat until combined and the cheesecake filling is smooth.
4. Assemble & bake the cheesecake
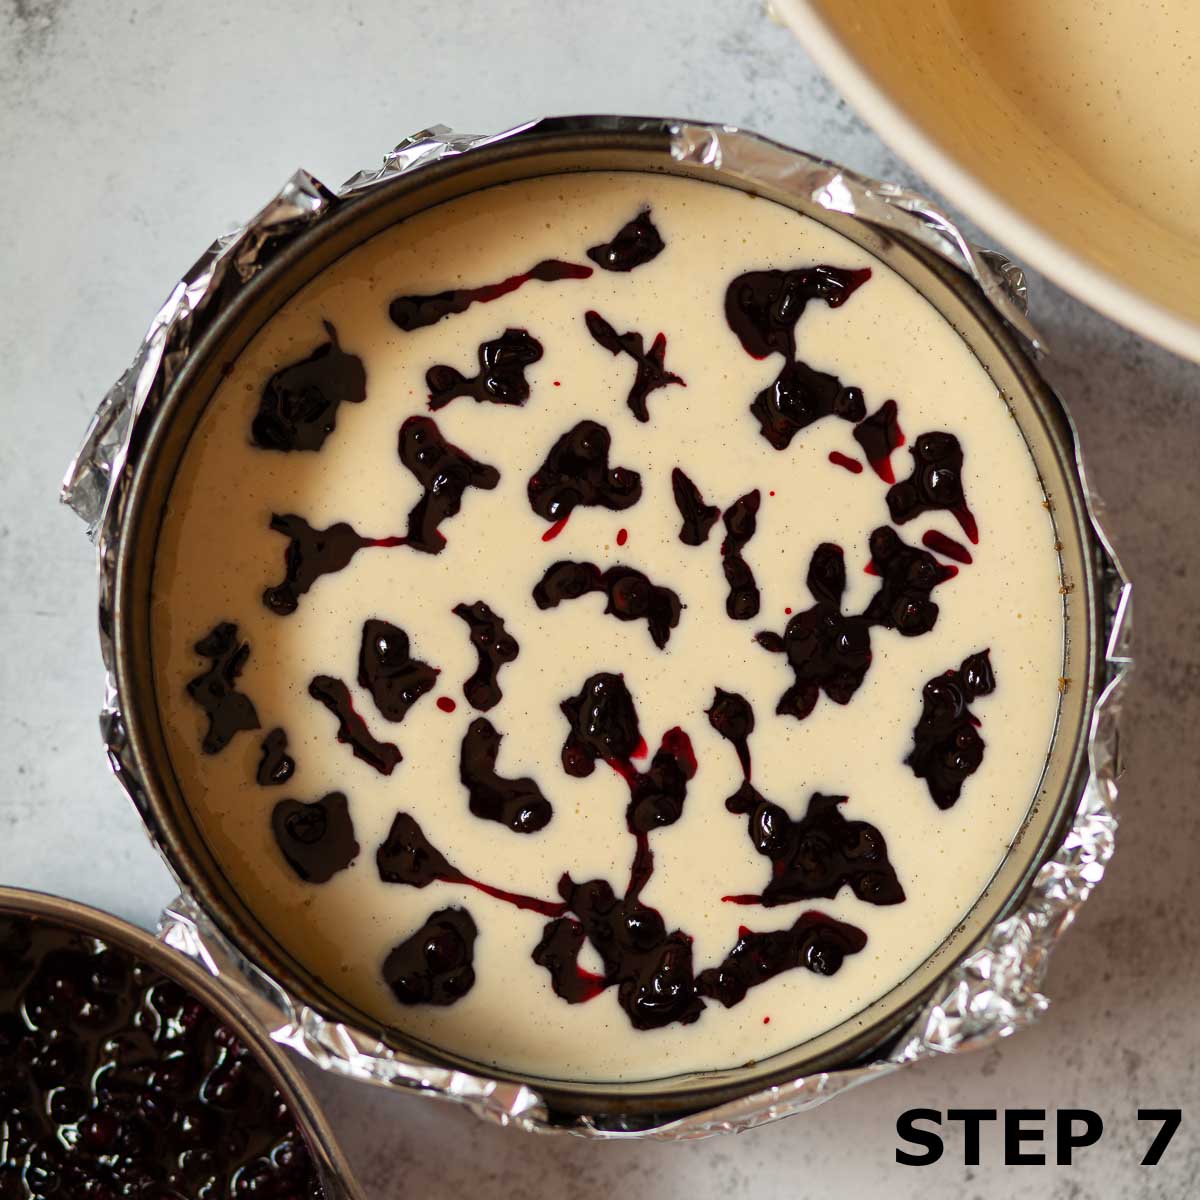
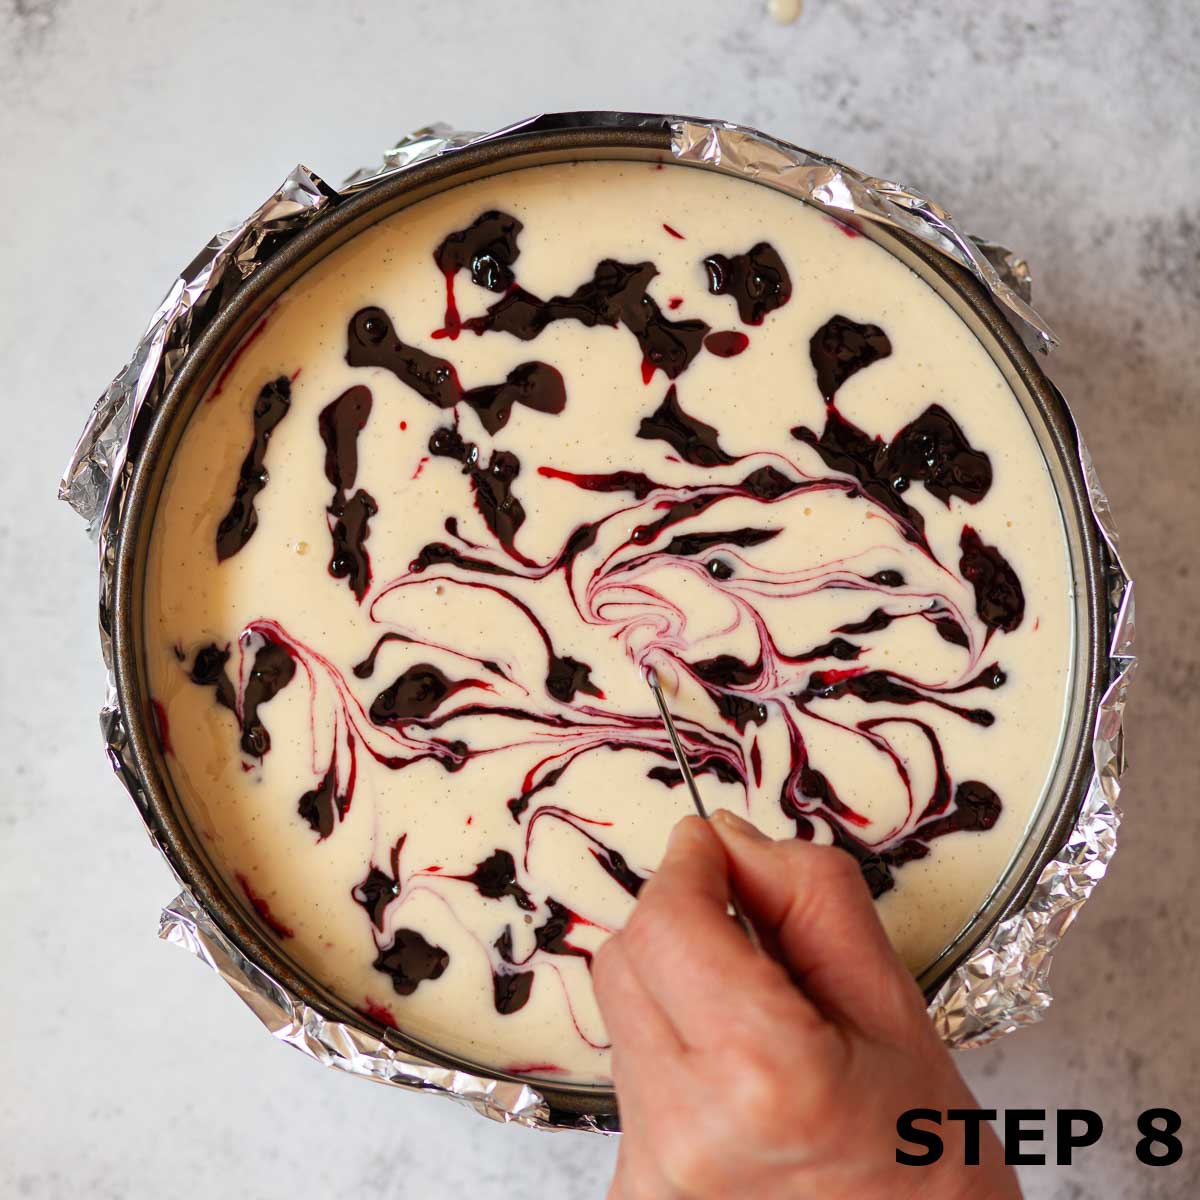
- Step 7: Pour just under half the cheesecake batter over the biscuit base. Spoon over half the blackcurrant compote. Add the remaining batter, then top with the rest of the compote.
- Step 8: Cook the cheesecake in a water bath (see full details in the next section) for 25 minutes. Check to see if it is cooked and if not cook for a further 5 minutes before testing again.
- Step 9: After baking, turn off the oven and leave the cheesecake inside with the door ajar for 1 hour. Then remove it from the water bath, run a knife around the edge (leave it in the tin), and let it cool completely. Cover and chill in the fridge for at least 6 hours before unmoulding and serving.
How to bake a cheesecake in a water bath
Baking cheesecake in a water bath ensures a soft, creamy texture and helps prevent cracking. Follow these key steps for success:
- Grease the tin and line the base only - not the sides.
- Wrap the tin in two layers of extra-wide (45cm) foil to prevent leaks.
- Place the tin in a deep roasting tray or oven-safe pot.
- Pour freshly boiled water around the cheesecake - it should come halfway up the sides.
- Bake until the centre wobbles slightly (about a 2-3 inch wobble zone is perfect). It firms up as it cools.
- Cool gently: Turn off the oven, prop the door open, and let it sit for 1 hour.
- Remove from the water bath, loosen with a knife, but leave it in the tin to cool completely.
- Chill for at least 6 hours in the fridge, covered tightly.
- Unmould before serving.
Expert tips
- Use the right tin: This recipe for blackcurrant cheesecake is designed for a deep 8-inch (20cm) springform tin, approx. 7cm deep.
- Wrap it well: Always wrap the tin in extra-wide (45cm) foil - standard foil isn't wide enough and may let water seep in, resulting in a soggy base.
- Use a water bath: It helps achieve the smoothest, creamiest texture and reduces the risk of cracking.
- Don't overmix: Beating the batter too much adds air, which can cause cracks as the cheesecake bakes.
- Watch the bake time: Stop baking when the centre wobbles slightly - overbaking can dry it out and lead to cracking.
- Cool fully: Let the cheesecake cool completely before chilling it in the fridge for at least 6 hours to set properly.
Frequently asked questions
Just stir in a little water, a teaspoon at a time, until it reaches a looser, spoonable consistency.
Yes, this blackcurrant cheesecake can be baked without a water bath but the texture will not be quite so velvety soft. It may also be more prone to cracking.
Yes, this baked blackcurrant cheesecake can be frozen for up to 2 months. Defrost overnight in the fridge before consuming. There is minimal impact on the texture of this dessert after it has been frozen.
To make this blackcurrant cheesecake gluten-free, simply swap the digestive biscuits for a gluten-free alternative and use cornflour instead of plain flour in the filling. Always double-check labels to ensure products are certified gluten-free and free from cross-contamination.
Unfortunately, cracks can't be undone - but they can be covered up beautifully. Try one of these easy fixes:
1. Fill the cracks with a little extra blackcurrant compote.
2. Pipe whipped cream rosettes around the edge and spoon compote into the centre.
3. Embrace the rustic look! Cracks happen - and your cheesecake will still taste amazing.
Variations
- Top your cheesecake with the blackcurrant compote: Worried about cracks? Bake the vanilla cheesecake without the compote and simply spoon the blackcurrant topping on once it's cooled. It'll cover any imperfections beautifully.
- Ginger and blackcurrant cheesecake: Swap digestives for gingernut biscuits in the base for a warmly spiced variation.
- No bake option: make the no-bake cheesecake filling from my Raffaello cheesecake recipe and top it with the blackcurrant compote.
More recipes with blackcurrants
Have you made this recipe for blackcurrant cheesecake? If so, I'd really appreciate your comments and/ or rating to let me know how you got along with it.
Stay in touch: sign up to receive LittleSugarSnaps newsletters to hear when new recipes are published. Or follow me on social media:
📖 Recipe
Blackcurrant Cheesecake
Equipment
- 1 8-inch (20cm) spring form circular cake tin with a depth of at least 2½-inches (7cm)
Ingredients
Biscuit Base
- 200 g Digestive biscuits (or graham crackers)
- 100 g Butter
Blackcurrant Compote
- 150 g Blackcurrants fresh or frozen
- 75 g Caster sugar
- 2½ teaspoons Cornflour
- 1½ teaspoons Lemon juice
Cheesecake Filling
- 400 g Full fat Philadelphia cream cheese do not use low-fat
- 120 g Caster sugar
- 30 g Plain flour or cornflour
- 2 Eggs large, free-range
- 2 Egg yolks large, free-range
- 1 tablespoon Lemon juice
- 1 tablespoon Vanilla bean paste or vanilla extract
Instructions
Prepare the baking tin
- Preheat the oven to 170C/ 325F/ GM3.
- Grease the base and sides of the baking tin with cake release spray.
- Line the base (but not the sides of the tin) with baking parchment.
- Wrap the outside of the tin in a sheet of extra-wide (45cm) kitchen foil. Neatly fold the edge of the foil over so that it does not exceed the top of the pan. Repeat with a second layer of foil.
Make the biscuit base
- Crush the biscuits until they look like breadcrumbs. Do this either in a food processor or put the biscuits into a foodbag and crush them using a rolling pin.
- Melt the butter either on the hob or in the microwave and stir it into the biscuit crumbs.
- Tip the biscuit crumbs into the base of the prepared baking tin, level and press down lightly using the back of a spoon. Bake it for 15 minutes then set it aside.
Prepare the blackcurrant compote
- Put the blackcurrants into a medium-sized pan with the sugar, lemon juice and cornflour.
- Place the pan over moderate heat and cook, stirring constantly with a wooden spoon. The sugar will melt and the fruit will give off liquid. Eventually, everything will thicken and the sauce will look dark (this will take 3-5 minutes depending on whether fresh or frozen fruit is being used).
- Take the pan off the heat and set aside.
- Now fill a kettle with water and set it to boil.
Make the cheesecake filling
- Put the cream cheese into a bowl with the sugar. Sieve the flour into the bowl and use a handheld balloon whisk to mix everything up until combined and smooth.
- Add in the eggs, egg yolks, lemon juice and vanilla bean paste and beat until just combined (do not overmix).
Assemble the cheesecake
- Pour just under half of the cheesecake batter over the biscuit base and use a teaspoon to dot half of the blackcurrant compote over the top.
- Spoon the rest of the batter over the top and dot the rest of the compote onto this.
- Use a small skewer or cocktail stick to drag the compote around, creating a marbled effect.
Baking and cooling the cheesecake
- Stand the baking tin in an ovenproof pot or tin deep enough to allow water to come up to the halfway mark on the baking tin when poured into the pot/tin.
- Transfer to a low shelf in the oven and pour enough of the freshly boiled water into the ovenproof pot/ tin to come halfway up the baking tin containing the cheesecake.
- Bake for 25 minutes then tap the side of the baking tin to check if it cooked. The middle 2-3 inches should be wobbly (not runny and not firm). If it is, then the cheesecake is sufficiently cooked. It will firm up as it cools.
- If the centre still looks too loose cook for a further 5 minutes and test again.
- Once cooked, turn the oven off but do not remove the cheesecake. Prop the oven door slightly ajar and leave the cheesecake to cool for 1 hour.
- Carefully remove the cheesecake from the water bath and run a sharp knife around the end of the tin to loosen the cheesecake from it but do not remove the cheesecake from the baking tin. Instead, return it to the oven to finish cooling down (not in the water bath).
- When it is completely cold remove the tin foil, cover the baking tin tightly with food wrap and transfer it to the fridge for at least 6 hours.
- Remove the cheesecake from the baking tin before serving.
Notes
- Use the right tin: This blackcurrant cheesecake recipe is designed for a deep 8-inch (20cm) springform tin, approx. 7cm deep.
- Wrap it well: Always wrap the tin in extra-wide (45cm) foil - standard foil isn't wide enough and may let water seep in, resulting in a soggy base.
- Use a water bath: It helps achieve the smoothest, creamiest texture and reduces the risk of cracking.
- Don't overmix: Beating the batter too much adds air, which can cause cracks as the cheesecake bakes.
- Watch the bake time: Stop baking when the centre wobbles slightly - overbaking can dry it out and lead to cracking.
- Cool fully: Let the cheesecake cool completely before chilling it in the fridge for at least 6 hours to set properly.
- Make a little more blackcurrant compote and use it to fill the cracks.
- Pipe whipped cream on the top and drizzle with a little extra blackcurrant compote.
- Simply embrace the rustic look and serve it just as it is with no apology - it will still taste phenomenal.

Jane Coupland says
This is a gorgeous rendition of blackcurrant cheesecake - much more stylish than just dumping blackcurrant sauce on the top of a vanilla cheesecake. Loved by all my taste testers.