


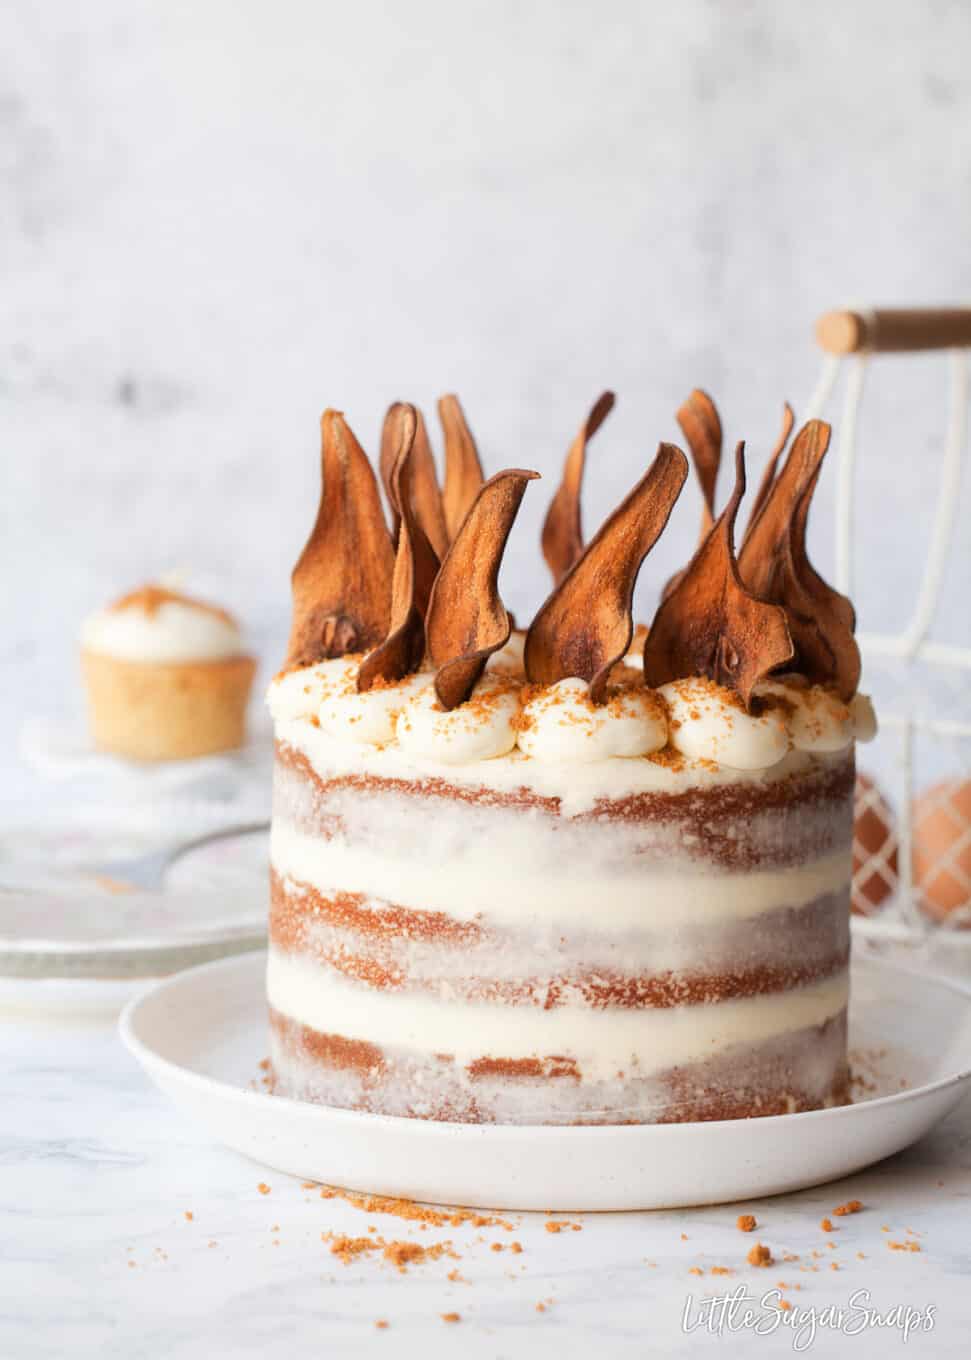
Biscoff cake with pears and a white chocolate mascarpone frosting is a decadent, creamy, and rather sophisticated layer cake. This Lotus Biscoff cake recipe is like no other - try it once and expect it to become your new favourite.
Don't miss my vegan Biscoff cake either. It's a straight flavour and extremely easy.
Jump to:
This Lotus Biscoff cake recipe featuring pears and white chocolate came about because I told my (now ex) husband that I was planning on making a chocolate cake for my Father-in-law's birthday. He groaned. Very loudly.
All I can say is thanks for the groans. I went away, feeling more than chippy but in the end came up with the notion of this glorious, fantastically different and rather dramatic looking Biscoff cake instead.
Just before we delve further into this recipe, I must let you know about some of my other Biscoff recipes already published. There's Biscoff flapjack, Biscoff rocky road and a no-bake Biscoff Cheesecake to tempt you too. Both are fantastic treats for Biscoff fans.
Why make this cake?
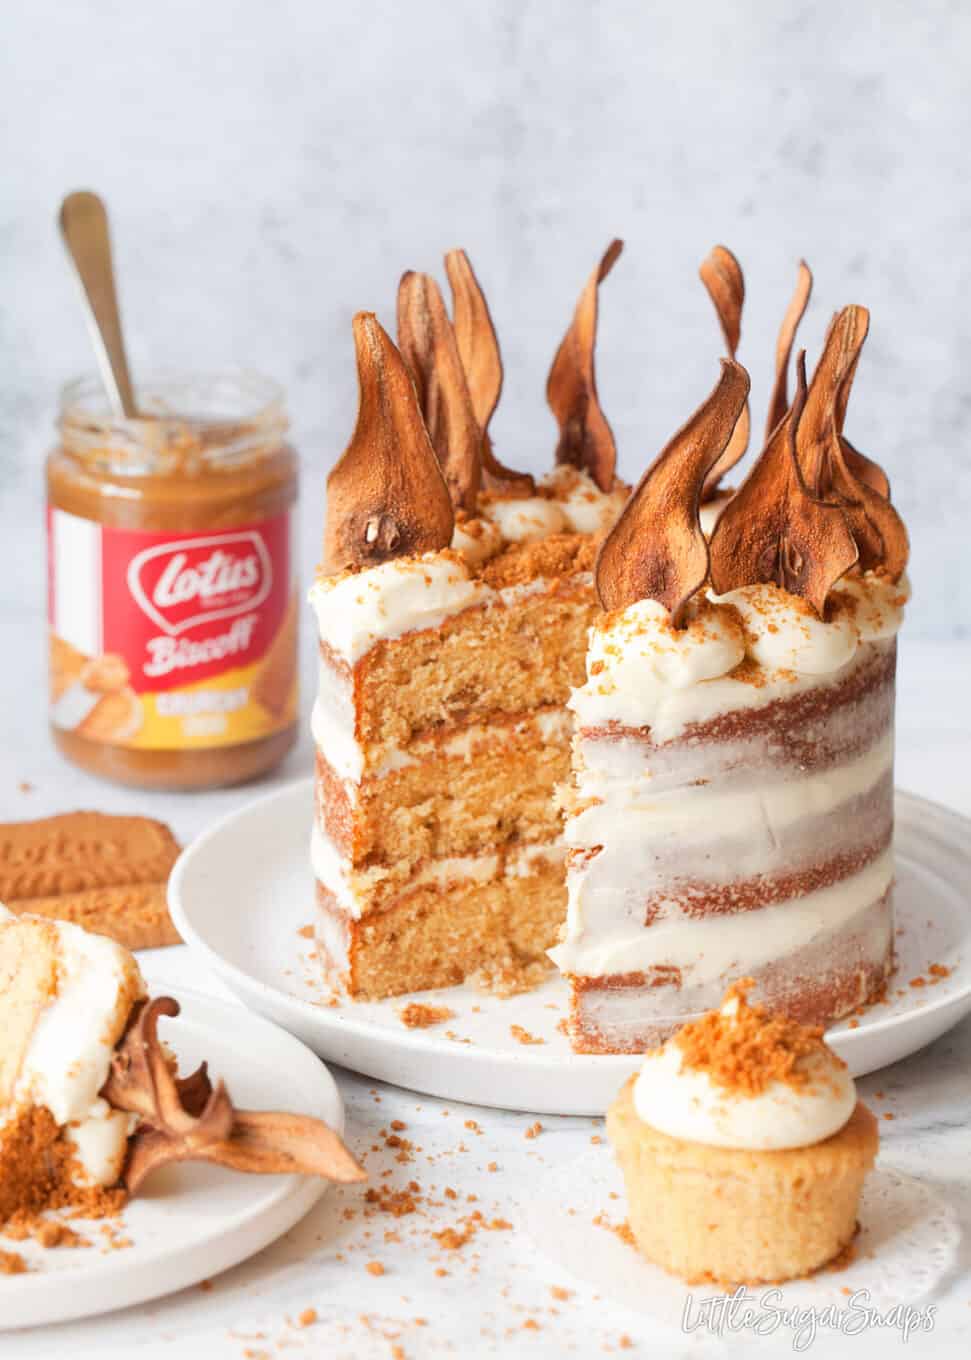
There's a lot to entice you in this Lotus Biscoff cake recipe. In a nutshell it comprises:
- Biscoff spread and pears in the cake batter
- Biscoff spread inside each layer
- Plus a generous covering of white chocolate mascarpone frosting
- Crushed Biscoff biscuits and dried pear wafers on top
This recipe is easier than it looks and the resulting cake is quite spectacular. It's definitely in show-stopper territory. In fact, with the white chocolate and pears in the mix, it offers up a Lotus Biscoff cake like no other.
Try serving a Biscoff latte alongside a slice.

What is Biscoff?
I'm sure most people know what Biscoff biscuits and spreads are. But a few people, such as my husband (until recently), may not. So for the few people yet to be enlightened, let me thrill you:
- Biscoff is a biscuit with a crunchy bite and distinctive & deep caramelised flavour. They are alternatively known as speculoos cookies
- The spread (aka cookie butter) is made from these cookies and can be enjoyed on toast, in bakes or straight from the jar (who me?) - available in smooth and crunchy
It's the cookie butter that features in the batter for this cake and it's also used to sandwich the layers together. Crumbled cookies on the top round off the theme in style.
Ingredients notes

At the heart of this recipe is a basic sponge cake made using the creaming method. But I've added 3 ingredients to the standard recipe:
- Cookie butter - beaten directly into the batter adds a wonderful flavour dimension. I used crunchy but smooth would suffice
- buttermilk - renowned for producing a succulent crumb in cakes, it is a worthy addition here to counterbalance the addition of the biscuit spread which could easily have made the cake dense. It worked a treat
- Semi-dried pears - they are easy and cheap to make at home in the oven and they add extra flavour and texture dimensions to this cake. They can be left out if time is short though
Notice I have not called the white chocolate mascarpone frosting a buttercream or an icing. It contains not a scrap of butter or confectioners' sugar. Instead, this dreamy & creamy frosting is made from Mascarpone cheese, white chocolate and cream.
It is important to use only Mascarpone cheese for this recipe. It has a sublimely creamy and mild taste that works wonders with the white chocolate. Regular cream cheese has a much stronger flavour and a less creamy finish, so it is not a good substitute.
Step by step instructions
How to make oven-dried pears
This wonderfully different cake recipe incorporates a double whammy of home-dried pears. First of all chunks of semi-dried pears are folded into the cake batter. Then, fully dried pear slices are used to adorn the finished cake in a dramatic and eye-catching fashion. This type of decoration is cheap and very easy to achieve:
1. Cut each pear in half and, using a mandolin, slice 4 wafer-thin slices from the centre of each pear (2 from each half). Peel and core the remaining pieces of pear. Cut into thin chunks.
2. Lay the chunks and the full slices of pear in a single layer on a large baking tin covered with parchment and cook at 120C/ 250F/ GM ½ for 1 hour then remove the chunks and set aside to cool
4. Reduce the oven temperature to 100C/ 210F/ GM ¼ then turn the remaining pears over and cook for another hour. Turn them over again and cook for a final hour. They should now be golden and crisp. Set aside to cool down
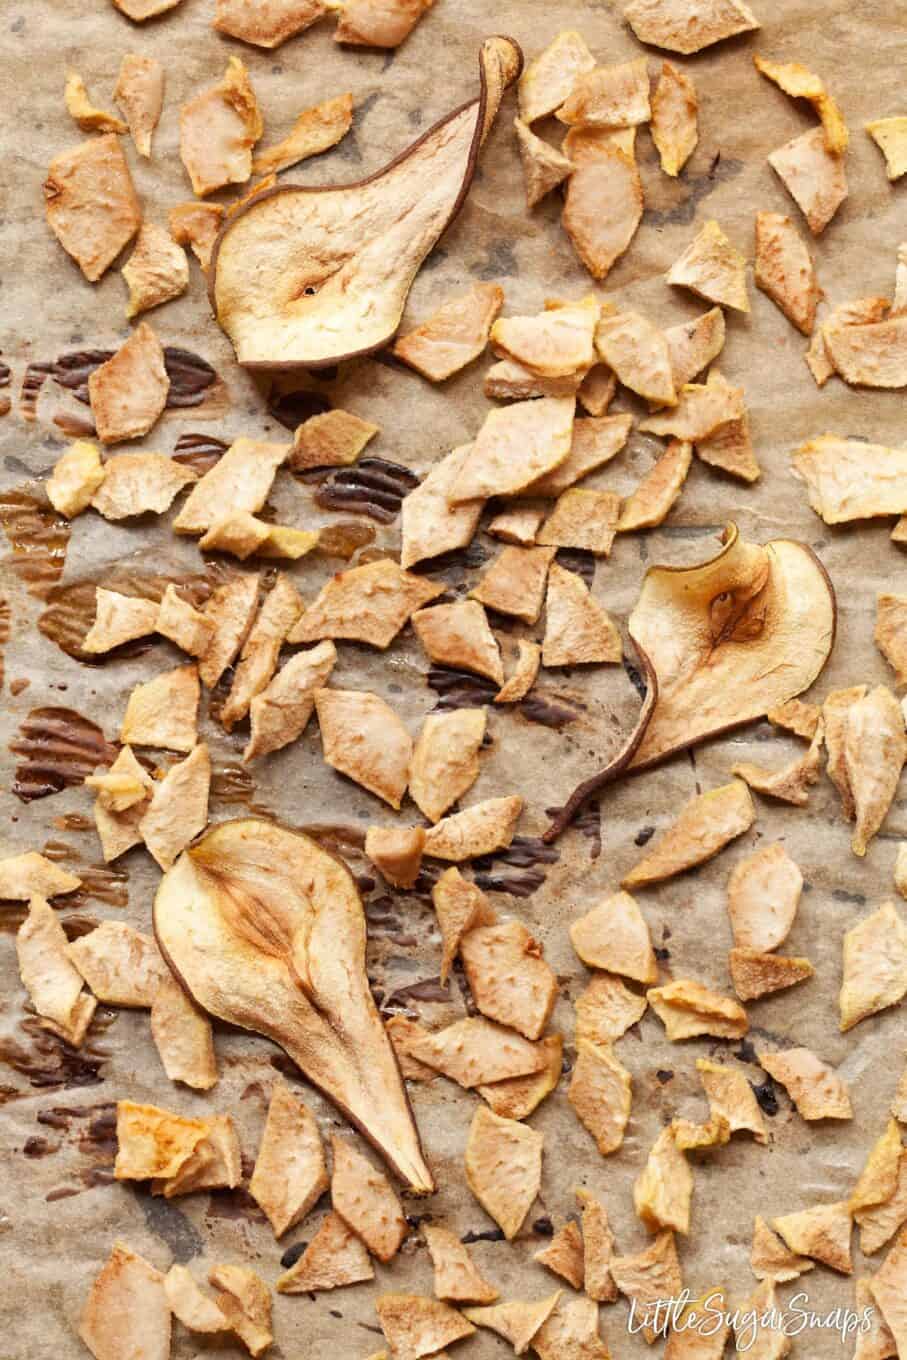
Note: homemade pear wafers do not have a long shelf-life. For this reason, make them on the day you intend to serve the cake and do not refrigerate them. Add to the finished cake just before taking to the table, otherwise they will wilt and flop.
The pear chunks go directly into the cake batter, so do not suffer in quite the same way. I do, however, suggest eating the cake within 2 days to avoid the semi-dried pears leaking any moisture into the cake.
How to make the Biscoff sponge cake
Note: the recipe presented is for a 3 layer cake made in 6-inch circular tins. Advice on scaling up this recipe for larger tins is in the footnotes of my recipe card.
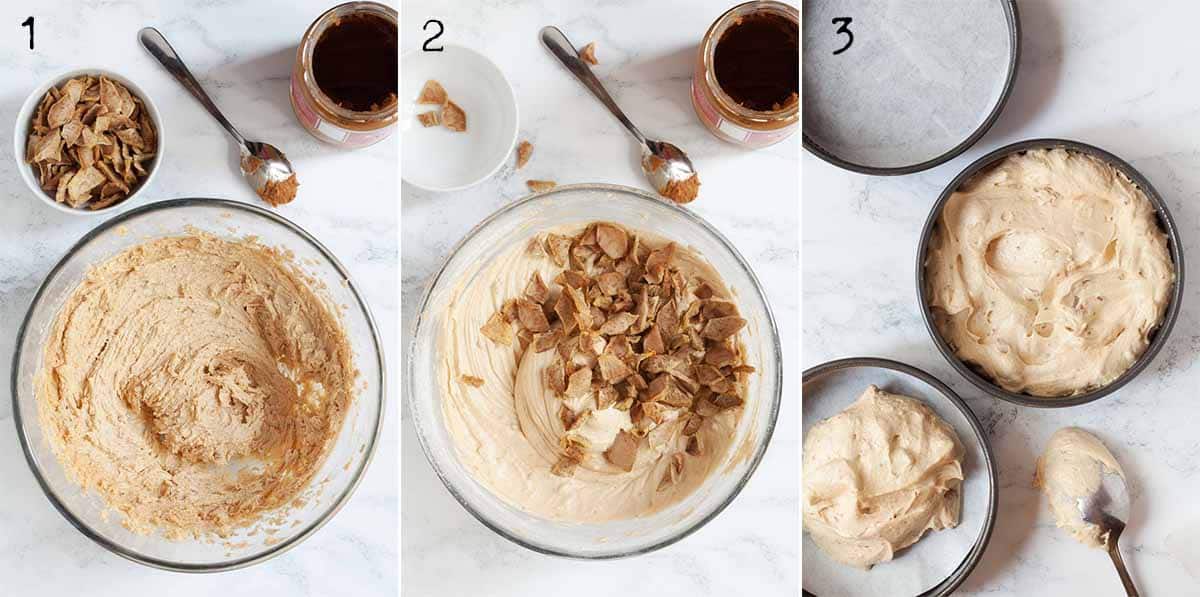
1. Begin by creaming the butter, sugar and Biscoff spread together until light and fluffy
2. Next beat in the eggs, one at a time, followed by the buttermilk. Add the flour and baking powder, mixing well then fold in the semi-dried pear chunks
3. Divide equally between the 3 tins (approx ⅔ full) and bake until a skewer poked into the centre of the cake comes out clean
Make the white chocolate frosting and assemble the cake
4. While the cake is cooling make the frosting: melt the chocolate, whip the mascarpone briefly and then whisk in the melted chocolate. Pour in the cream and whip until it thickens to the soft peak stage. Let firm up in the fridge for 20 minutes
Note: this frosting can easily split - please read my recipe tips before making it
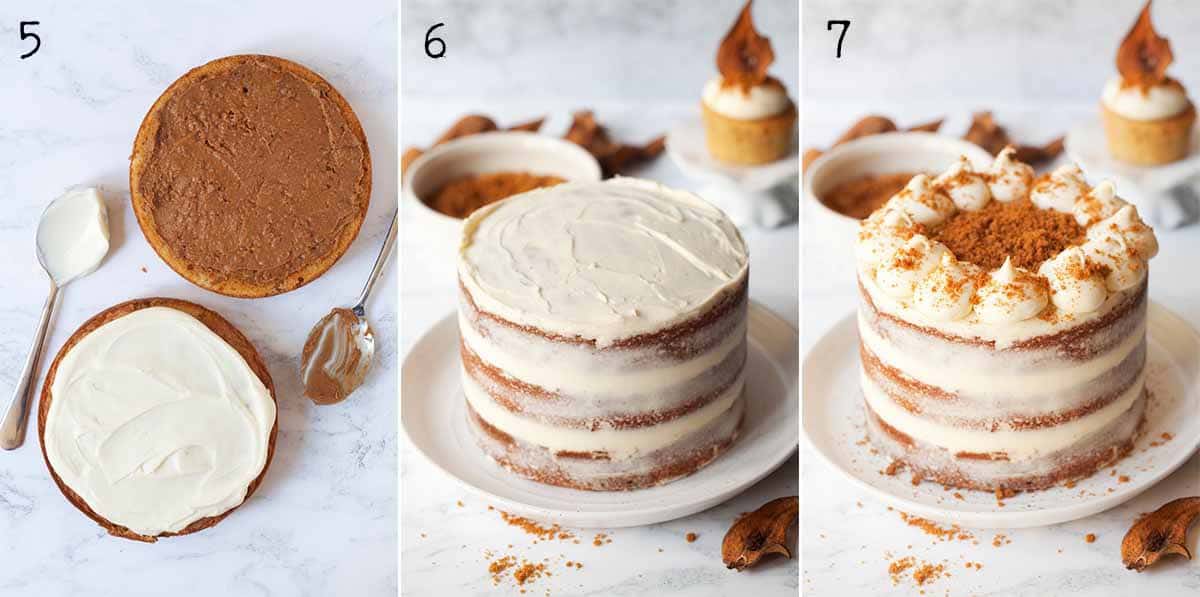
5. When the cake has cooled completely, lay a single layer of sponge onto a flat surface and spread some frosting over the top. Take another sponge layer, spread it with cookie butter then flip it over to top the bottom cake layer. Add another spoonful of frosting on the top of this cake and spread more cookie butter on the remaining cake layer before laying on the top of the other two. All 3 cakes should now be stacked on top of each other
6. Load the remaining frosting into a piping bag fitted with a wide plain round nozzle (I used a Wilton 1A) and pipe frosting into the gap between the layers and a little around the edges. Use a bench scraper to run around the sides of the cake to smooth out the frosting and remove any excess until the naked style is achieved
7. Use the remaining frosting to pipe 12 mounds around the top of the cake in a circle. When ready to serve, push a pear wafer into each mound of frosting, crush 2 Biscoff biscuits to fine crumbs and use to fill in the centre of the cake, scattering a little over each mound of frosting too
Expert tips
I recommend reading through these tips before beginning to make this Lotus Biscoff cake recipe - there are some important points to note beyond the basic cake-baking tips presented:
- Please use digital scales for this recipe as they are so much more accurate than the cup system. Cups are notoriously inaccurate because they can vary in size and one person's method of filling a cup can be quite different to another person's
- Preheat the oven and prepare the baking tins before baking commences. This way the cake can go into the oven as soon as it is mixed and those raising agents are activated
- Always grease the tins and use a circle of baking parchment to line the bases. These 2 steps help ensure the cakes never get stuck in the pan
- Let the cakes rest in their baking tins for 2 minutes once they are taken out of the oven. They will shrink slightly, pulling away from the edge of the tin. This helps get them out of the tins more easily
- Mascarpone is quite an unstable baking ingredient as it is prone to splitting easily. However, in this cake the mascarpone frosting adds such a fabulous finish that it's worth using. Do take care not to overbeat the mixture - use electric beaters on a medium speed and beat as little as possible (no more than 1 minute) to combine the other ingredients. The frosting will split if it is overbeaten
- If the frosting does split you can try to salvage curdled masccarpone frosting, although I've not had much success rescuing it to date
- The pears are optional - they are tasty inside of the sponge and make a fantastically bold statement on top of this cake, making it impossible to ignore
- If you do not have time to oven bake the pears it is best to leave them out of the recipe altogether. Do not use raw pears in the cake batter as they will leak juice into it, turning the sponge cakes soggy
- Use Biscoff cookies to garnish the top of the cake if not using pears
Frequently Asked Questions
If you need to make this Biscoff cake recipe ahead of time, it is fine to do so a day in advance and store it in the fridge. However, go as far as frosting the cake only. Do not add the pears or biscuit crumbs at this stage as they will both soften in the fridge.
Remove from the fridge 2 hours ahead of eating (unless it's a hot day) to bring to room temperature. Top with the pears and biscuit crumbs just prior to serving.
Remember that the pear wafers may soften overnight. If this happens then substitute Biscoff cookies in place of the pears on top of the cake.
Any uneaten cake will need to be stored in the fridge and those dried pears will droop - please keep this in mind (serve big portions?). They are still edible and still very tasty. They just don't look so impressive.
I recommend eating this pear cake recipe within 48 hours to avoid leakage from the pears in the sponge turning the cake soggy.
This recipe can easily be adjusted to make Biscoff cupcakes instead of the layer cake. The recipe as stated will make around 15 cupcakes, depending on the size of your tin holes, so you will need to make 15 pear wafers if you intend to use them as decoration.
Once baked and cooled:
1. Scoop a small hole in the centre of each cupcake and fill with around 1 teaspoon of Biscoff spread
2. Pipe a generous pile of the mascarpone frosting onto the top of each cake
3. Crush 1 Biscoff biscuit and divide between the cakes, sprinkling it over the frosting
4. Slip a pear wafer into the top of each cake
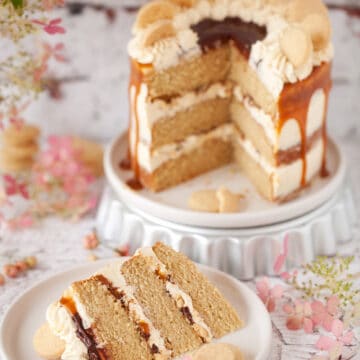
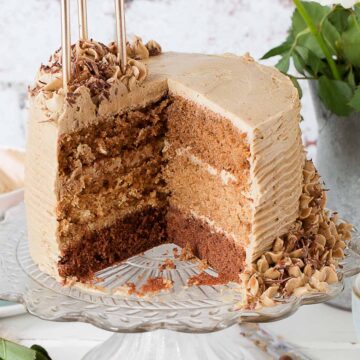
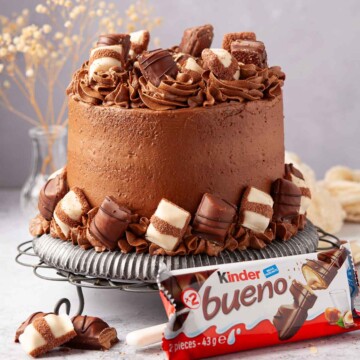
More impressive layer cakes
I have a growing collection of decadent & delicious layer cake recipes to tempt you with. Here are a few reader favourites:

If you have tried this Lotus Biscoff cake recipe, please give it a rating or comment. I love to hear how you get along with my recipes. And feel free to tell me if there are any other Bisoff recipes you'd love me to create a recipe for - I have a few more planned, but I'm very open to new ideas!
Please add us as a trusted site on Google so that our recipes show up more in your searches!
Stay in touch: sign up to receive LittleSugarSnaps newsletters to hear when new recipes are published. Or follow me on social media:
📖 Recipe

Biscoff Cake with Pear and White Chocolate
Equipment
- This recipe uses 3 x 6-inch cake tins. These are smaller than the standard 8-inch tins often used in cake baking. Please see the notes for instructions on how to scale up the recipe for larger tins
Ingredients
For the Dried Pears
- 3 Pears medium, firm, not too ripe
For the Cake
- 180 g/ 6 ½ oz Butter softened
- 180 g/ 6 ½ oz Golden caster Sugar
- 75 g/ 2 ½ oz Biscoff spread crunchy (recommended) or smooth
- 3 Eggs large, free range
- 3 tablespoon Buttermilk
- 180 g/ 6 ½ oz Plain (all-purpose) flour
- 1 ½ teaspoon Baking powder
For the White Chocolate Mascarpone Frosting
- 250 g/ 9 oz Mascarpone cheese
- 150 g/ 5 ¼ oz White chocolate
- 125 ml/ 1.2 cup Double (heavy) cream around 35% fat
Extras
- 2 Biscoff biscuits
- 3 tablespoon Biscoff spread
Instructions
Make the Dried Pears
- Begin by cutting each pear in half and, using a mandolin, slice 2 wafer-thin slices from widest part of each pear half. You should end up with 12 slices in total
- Next, peel and core the remaining pieces of pear. Cut into thin chunks
- Lay the chunks and the full slices in a single layer on a large baking tin covered with parchment and cook at 120C/ 250F/ GM ½ for 1 hour
- Remove the chunks and set aside to cool
- Turn the remaining pear slices over then cook for a further hour at 100C/ 210F/ GM ¼ then turn once more and cook for 1 more hour, by which time they should be golden and crisp
- Let cool completely. Once cool, store in an airtight container (a glass jar is ideal) at room temperature - do not refrigerate
Make the Cake
- Preheat the oven 180°/ 350°F/ GM4 and grease & line 3 x 6-inch circular baking tins (note these are smaller than average tins)
- In a large bowl cream the butter, sugar and Biscoff spread together until light and fluffy
- Next beat in the eggs, bit by bit (to reduce the risk of the batter splitting), followed by the buttermilk
- Sift the flour and baking powder into the bowl and whisk briefly to combine
- Finally, fold in the semi-dried pear chunks. Ensure the batter is throughly mixed and no streaks remain, but take care not to overmix as this will result in a tough cake
- Divide the batter equally between the 3 tins (approx ⅔ full) and bake for around 20 minutes until a skewer poked into the centre of the cake comes out clean
- Remove from the oven and let rest in the tins for 2 minutes before turning out onto a cooling rack and removing the baking parchment
Make the Mascarpone Frosting
- Melt the white chocolate over a bain-marie or in the micowave in 30 second bursts
- Briefly beat the mascarpone with electric beaters until smooth (15 seconds) then beat in the melted chocolate
- Pour in the cream and beat on medium speed for 30-45 seconds until the mixture reaches the soft peak stage. Stop after 15 seconds and scrape the bowl down if necessary, then beat again for another 15 seconds and repeat. NOTE: take care not to overbeat as this will cause the frosting to split and look grainy
- Rest in the fridge for 20-30 minutes - longer on a hot day
Assemble the Cake
- Lay a single layer of sponge onto a flat surface and spread a heaped tablespoon of white chocolate mascarpone frosting over the top
- Take another sponge layer and spread with 1 ½ tablespoons Biscoff then flip it over to top the bottom cake layer so the Biscoff side sites on top of the frosting
- Add more frosting to the exposed top of this second layer and spread another 1 ½ tablespoons Biscoff onto one side of the remaining sponge cake, then flip this onto the top of the cake layers
- You should now have all 3 cakes stacked on top of each other
- Spoon a heaped tablespoon of frosting over the top of the cake and smooth out
- Load the remaining frosting into a piping bag fitted with a wide plain round nozzle and pipe frosting into the gap between the layers and a pipe a few blobs around the edges of the cake
- Use a bench scraper to run around the sides of the cake to smooth out the frosting and remove any excess until the naked style is achieved
- Use the remaining frosting to pipe 12 mounds around the top of the cake in a circle
- When ready to serve, push a pear wafer into each mound of frosting, crush 2 Biscoff biscuits to fine crumbs and use to fill in the centre of the cake, scattering a little over each mound of frosting too
Notes
Expert Tips
- Please use digital scales for this recipe as they are so much more accurate than the cup system. Cups are notoriously inaccurate because they can vary in size and one person's method of filling a cup can be quite different to another person's
- Preheat the oven and prepare the baking tins before baking commenses. This way the cake can go into the oven as soon as it is mixed and those raising agents are activated
- Always grease the tins and use a circle of baking parchment to line the bases. These 2 steps help ensure the cakes never get stuck in the pan
- Let the cakes rest in their baking tins for 2 minutes once they are taken out of the oven. They will shrink slightly, pulling away from the edge of the tin. This helps get them out of the tins more easily
- Mascarpone is quite an unstable baking ingredient as it is prone to splitting easily. However, in this Biscoff cake the mascarpone frosting adds such a fabulous finish to this cake that it's worth using. Do take care not to overbeat the mixture - use electric beaters on a medium speed and beat as little as possible (no more than 1 minute) to combine the other ingredients. The frosting will split if it is overbeaten
- If the frosting does split you can try to salvage it, although I've not had much success rescuing it to date
- The pears are optional - they are tasty inside of the sponge and make a fantastically bold statement on top of this Biscoff cake, making it impossible to ignore
- If you do not have time to oven bake the pears it is best to leave them out of the recipe altogether. Do not use raw pears in the cake batter as they will leak juice into it, turning the sponge cakes soggy
- Use Biscoff cookies to garnish the top of the cake if not using pears
Chris says
Hi Jane, cake looks fabulous. I have just measured everything out and about to mix one layer as a trial before making full recipe for a special function on the weekend and have noticed that in the ingredient list you have baking powder, yet in mixing instructions you list baking soda. Which one is it?
Jane Coupland says
Hi Chris, ah thanks for letting me know - go with baking powder and I'll update the recipe asap!
Samia says
Hi,
While making the frosting, do i need to use room temperature marscapone cheese or does it have to be cold?
Jane Saunders says
Hi Samia, cold is best for the mascarpone. Enjoy....
Christina says
Hi Jane, is it possible to leave out the pears from the recipe entirely and follow all instructions anyway or would I need to amend anything else?
Jane Saunders says
Hi Christina, you should be fine to leave out the pears - they are not for everyone 🙂 - Happy baking!
Karla says
This sounds incredible! I'm exited to give it a go, I just have a little doubt, is it American buttermilk (the yogurt-like cultured product) or British buttermilk (by product of making butter) that you're calling for?
Jane Saunders says
Hi Karla - I'm referring to the cultured milk product - happy baking, this one is a lovely cake
wilhelmina says
Wow! This cake is AMAZING! The flavor of the pears with the biscoff is so unexpectedly fabulous!
Jane Saunders says
I couldn't agree more - pleased it was a hit
Liz says
You had me at biscoff!! Haha this cake looks absolutely delicious. My family is going to love this one! Thanks for the recipe 🙂
Jane Saunders says
My pleasure - enjoy.
Kat (The Baking Explorer) says
This is absolutely gorgeous and the flavours sound stunning!
Jane Saunders says
Thanks Kat