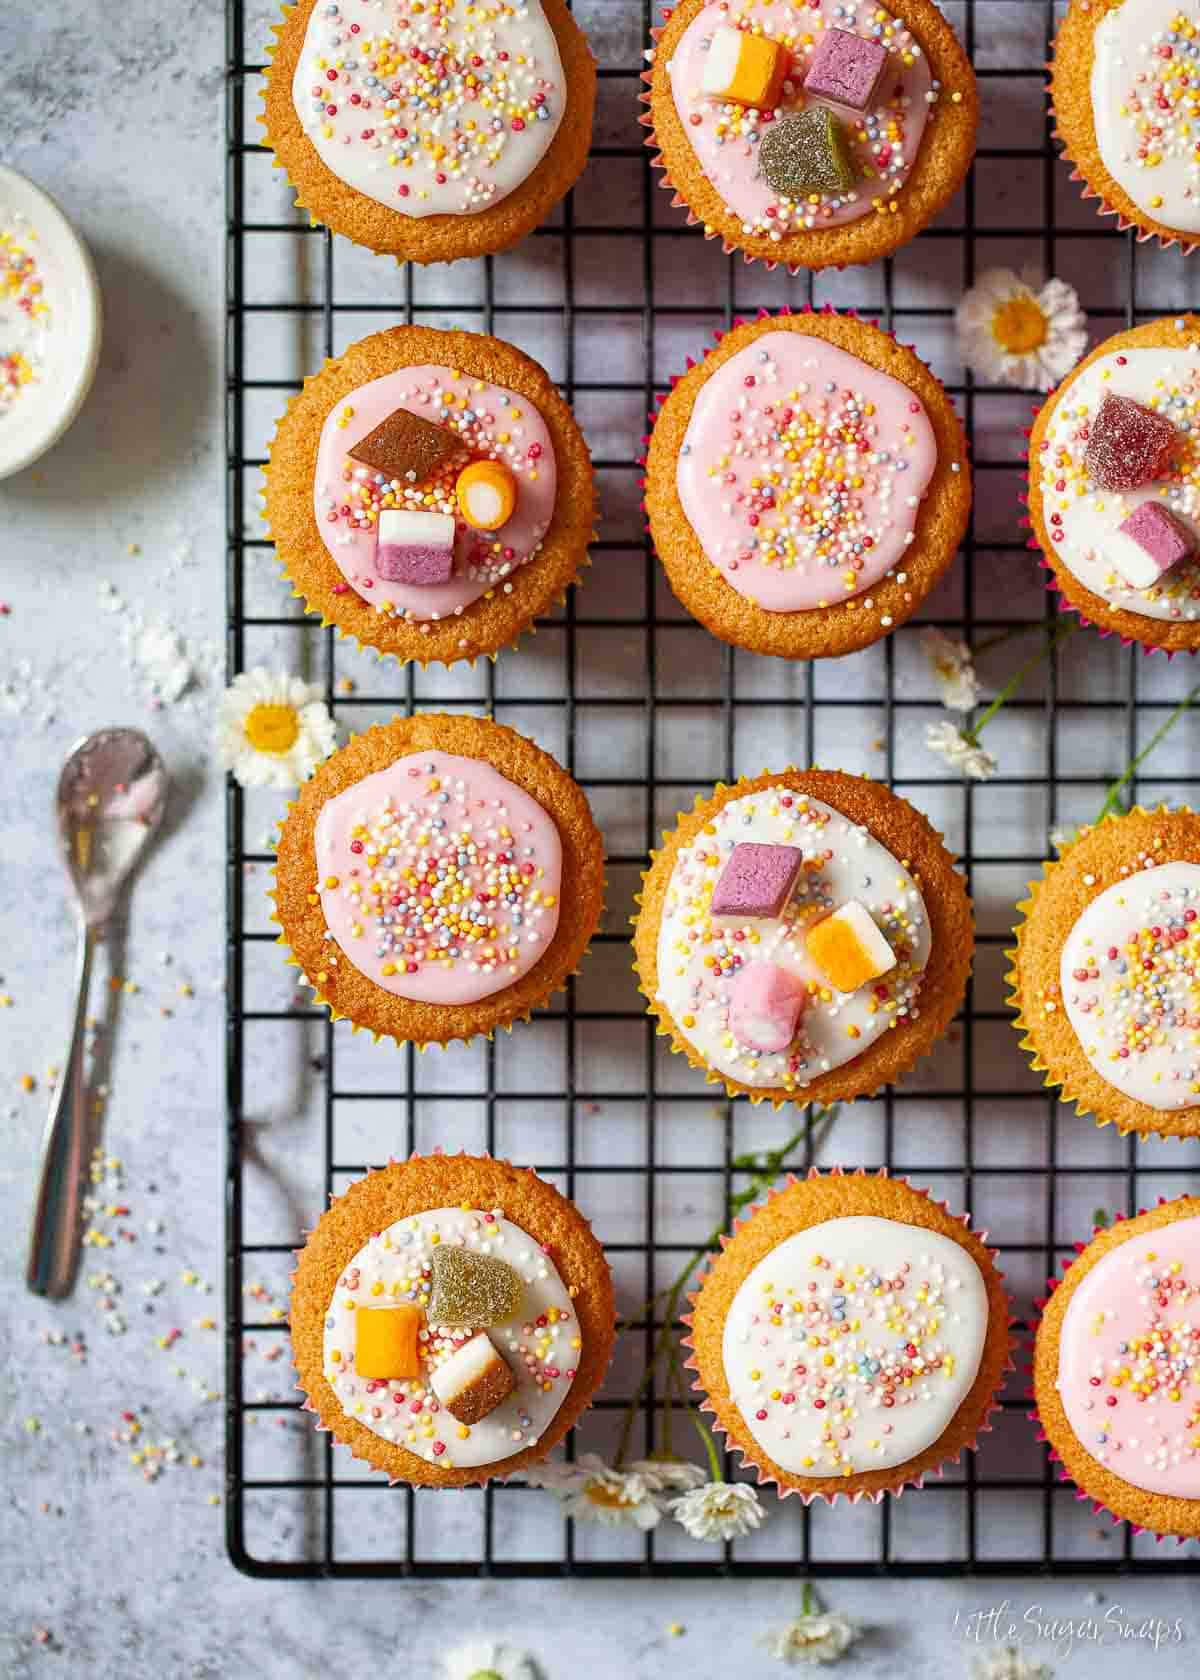
Fairy cakes have been delighting children at birthday parties for generations. They are quick, easy and cheap to make, not too large and decorated simply with water icing. In fact, iced fairy cakes are an ideal bake for children to get involved with.
They are a charming addition to a tea party along with dainty butterfly cakes.
Want to Save This Recipe?
Why you’ll love this recipe
- It’s quick and simple.
- The mixture goes a long way – expect to make at least 12 fairy cakes from your batter.
- This makes it a relatively budget-friendly recipe to make.
- The cakes are light and fluffy.
- The size of these cakes is child-friendly.
- It’s a great recipe to make with children too.
This bake is right up there with old school cake and butterfly cakes for retro charm and universal popularity.
Sometimes a classic recipe is all that is needed to create a feeling of nostalgic cosiness in a home bake. Fairy cakes are one such recipe, and it saddens me somewhat that they are often overlooked in favour of funky flavoured cupcakes piled high with copious amounts of buttercream.
Light and fluffy iced fairy cakes are always welcome to grace my table, especially when small children are gathered around it. In my experience, a cupcake is simply too much for many of them to handle. And anybody with a larger appetite can always tuck into a second one.
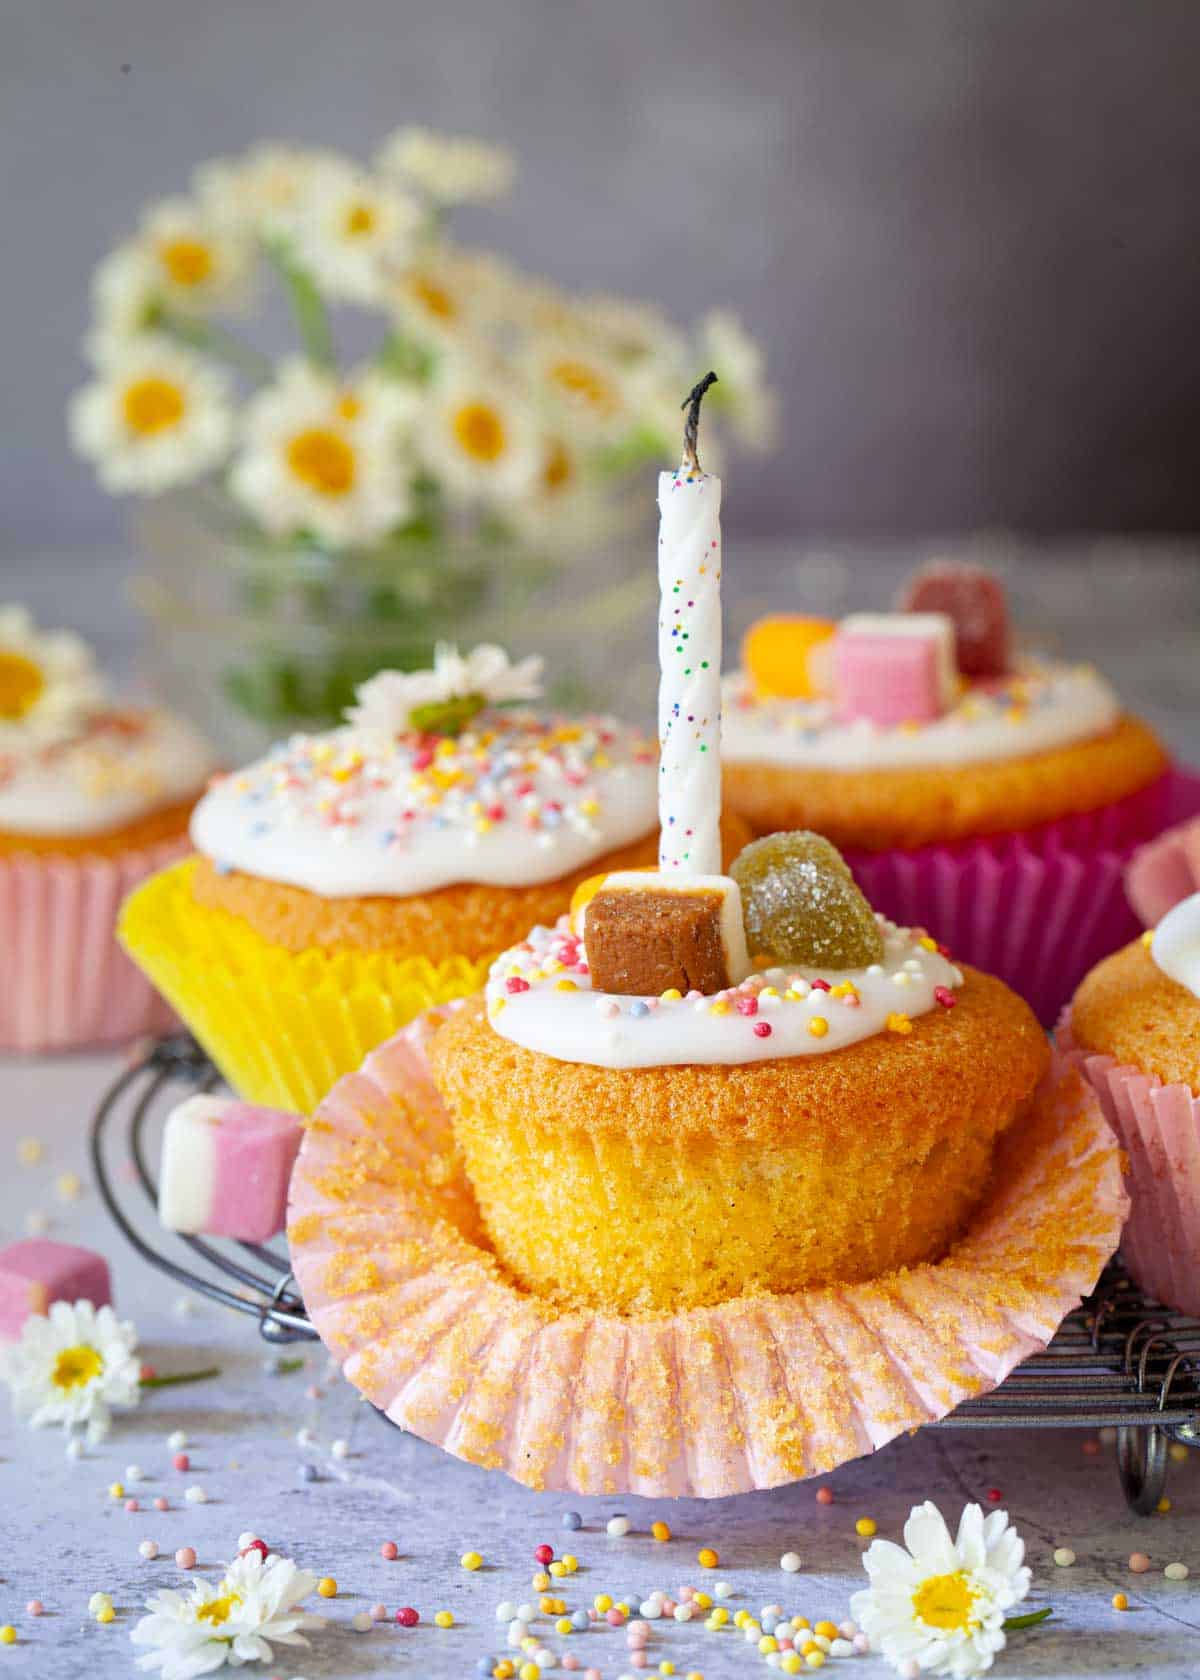
Empire biscuits also make a great addition to the tea table along with old school sponge cake topped with icing and sprinkles.
What are Fairy Cakes?
Fairy cakes are a classic English teatime treat. They are small cakes made from a Victoria sponge mixture baked and presented in small cake wrappers and typically topped with water icing and simple sweet decorations.
Why are they called fairy cakes? That’s down to their dainty size. In fact, the petite proportions are what makes these cakes a welcome addition to the table at children’s birthday parties on on a homemade afternoon tea spread.
Ingredients notes
Only a handful of easy-to-obtain ingredients (6 to be precise) are needed when making this easy recipe for fairy cakes.
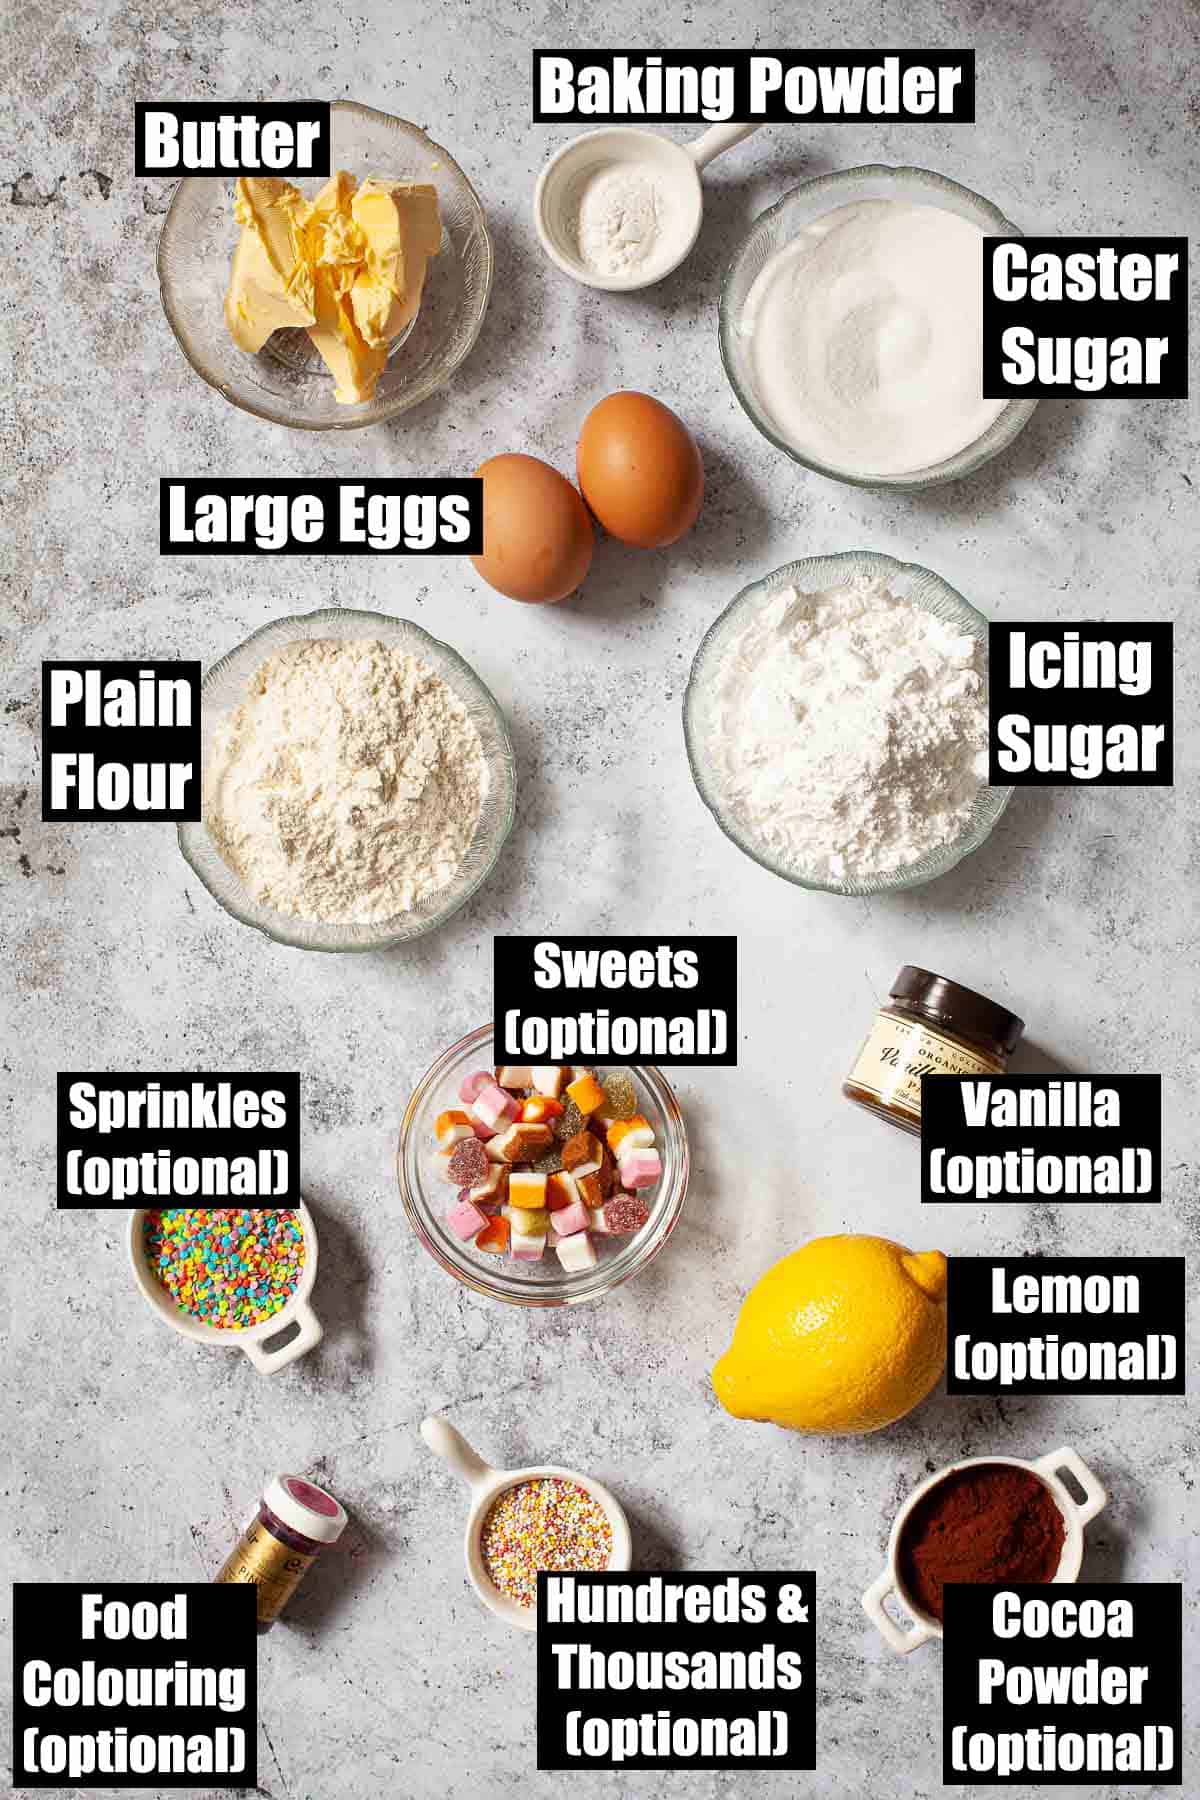
Butter/ baking margarine: ensure it is at room temperature as it will be easier to cream with the sugar and the cake batter will be less likely to split. Baking margarine has a reputation for creating lighter and fluffier cakes than butter. However, it’s undeniable that butter has a richer flavour. Both work well in this recipe, so which one to use is really down to personal preference.
Eggs: these need to be large ones to ensure that the ingredients combine to produce cake batter with a soft dropping consistency that bakes into light, soft and fluffy little buns.
Small and medium-sized eggs will result in a batter that is too thick, although a splash of milk mixed in will help attain the right consistency.
Sugar: use white caster sugar here. It has a finer texture than granulated sugar, meaning it dissolves more easily when baking.
Vanilla extract/ vanilla bean paste: this is not a traditional addition to a classic fairy cakes recipe. But times change and I think a little vanilla is always welcome in ‘plainer’ cakes.
(Who else is so old that they remember when standard (vanilla) ice cream or cake would be labelled as plain? What a way to describe those sweet treats!)
Plain flour and baking powder: this recipe lists both plain flour and baking powder as ingredients. Feel free to use self-raising flour if preferred – just remember to omit the baking powder if you do.
Optional extras: included in the ingredients photo are a few options for flavouring and decorating these little delights. Towards the end of this post, I’ve included further details and suggestions for making a few changes to the basic iced fairy cakes recipe presented here.
Step by step instructions
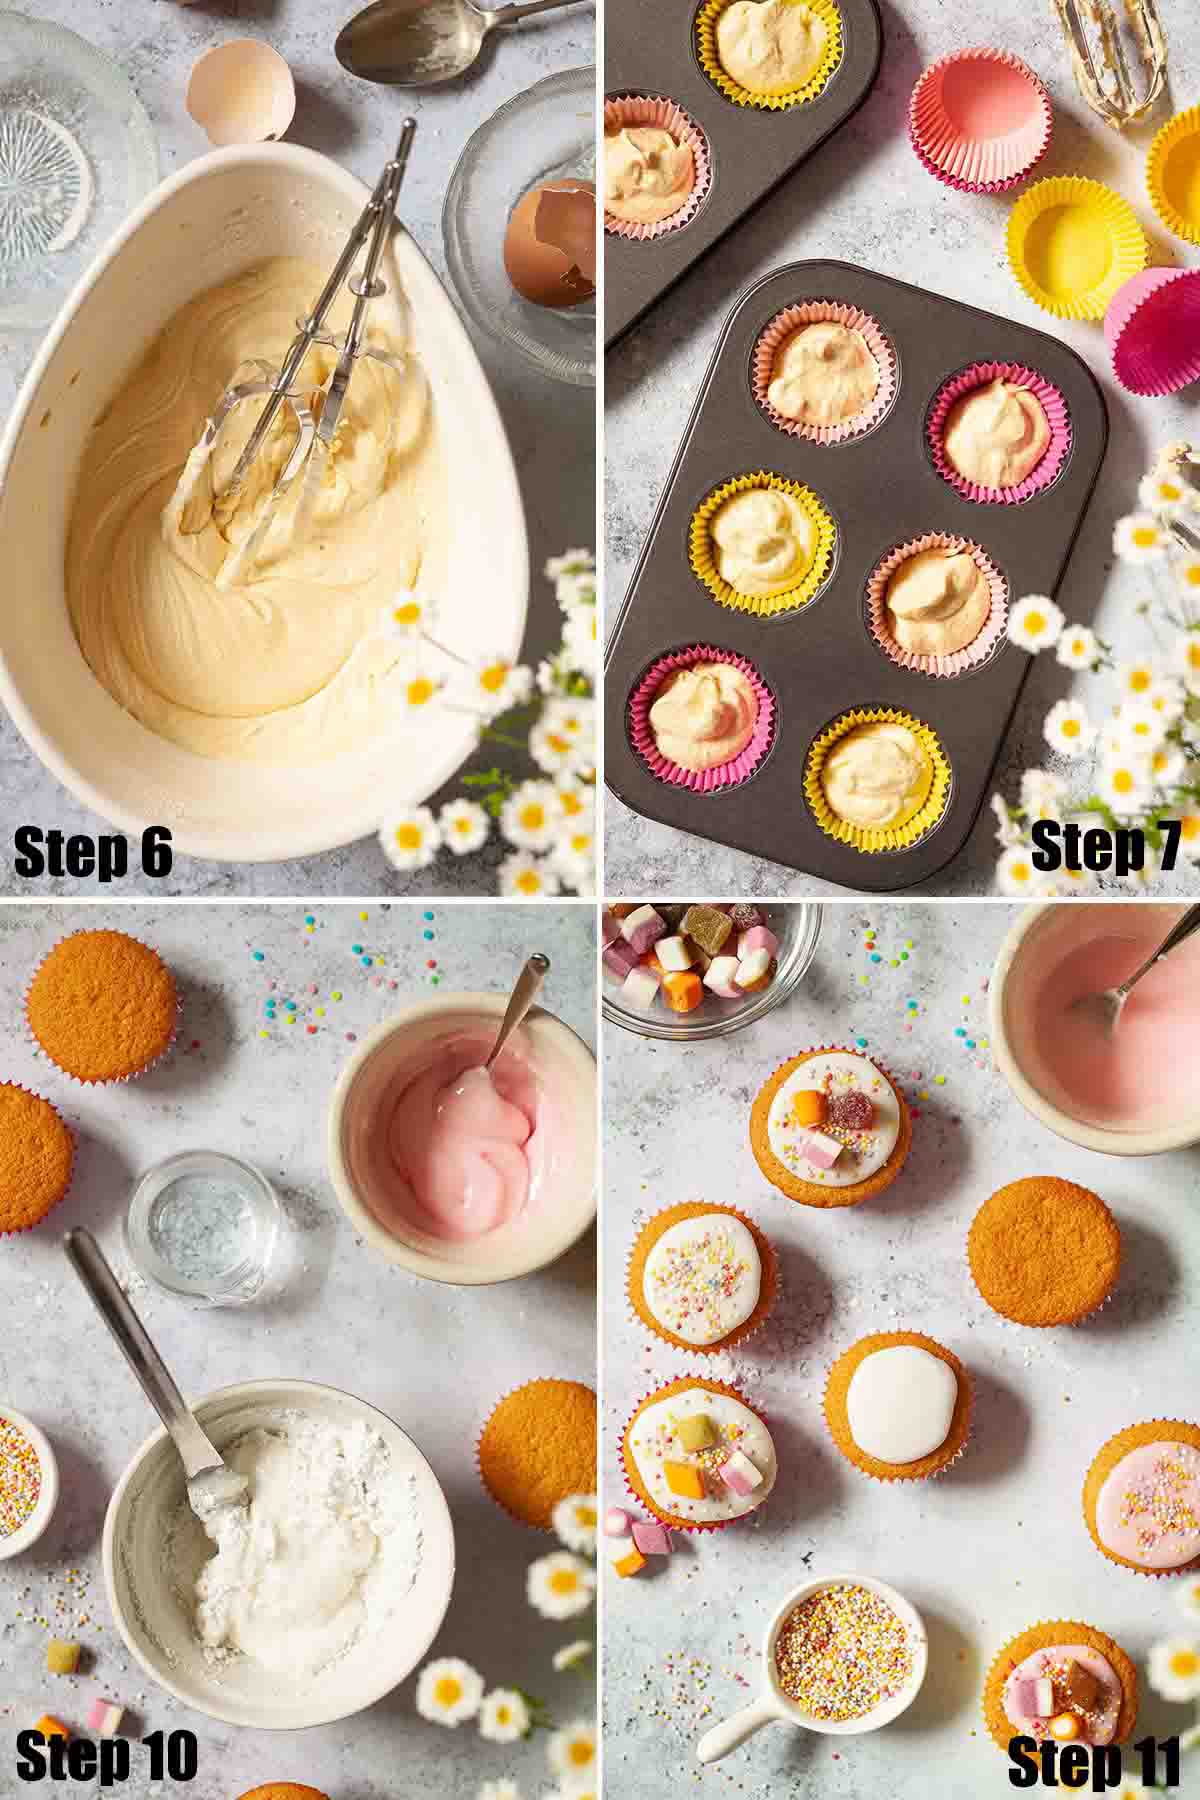
- Cream the butter and sugar together until pale and fluffy.
- Add the vanilla (if using) and 1 egg. Beat well.
- Beat in 1 tablespoon of flour.
- Then beat in the second egg.
- Sieve the remaining flour and baking powder into the bowl.
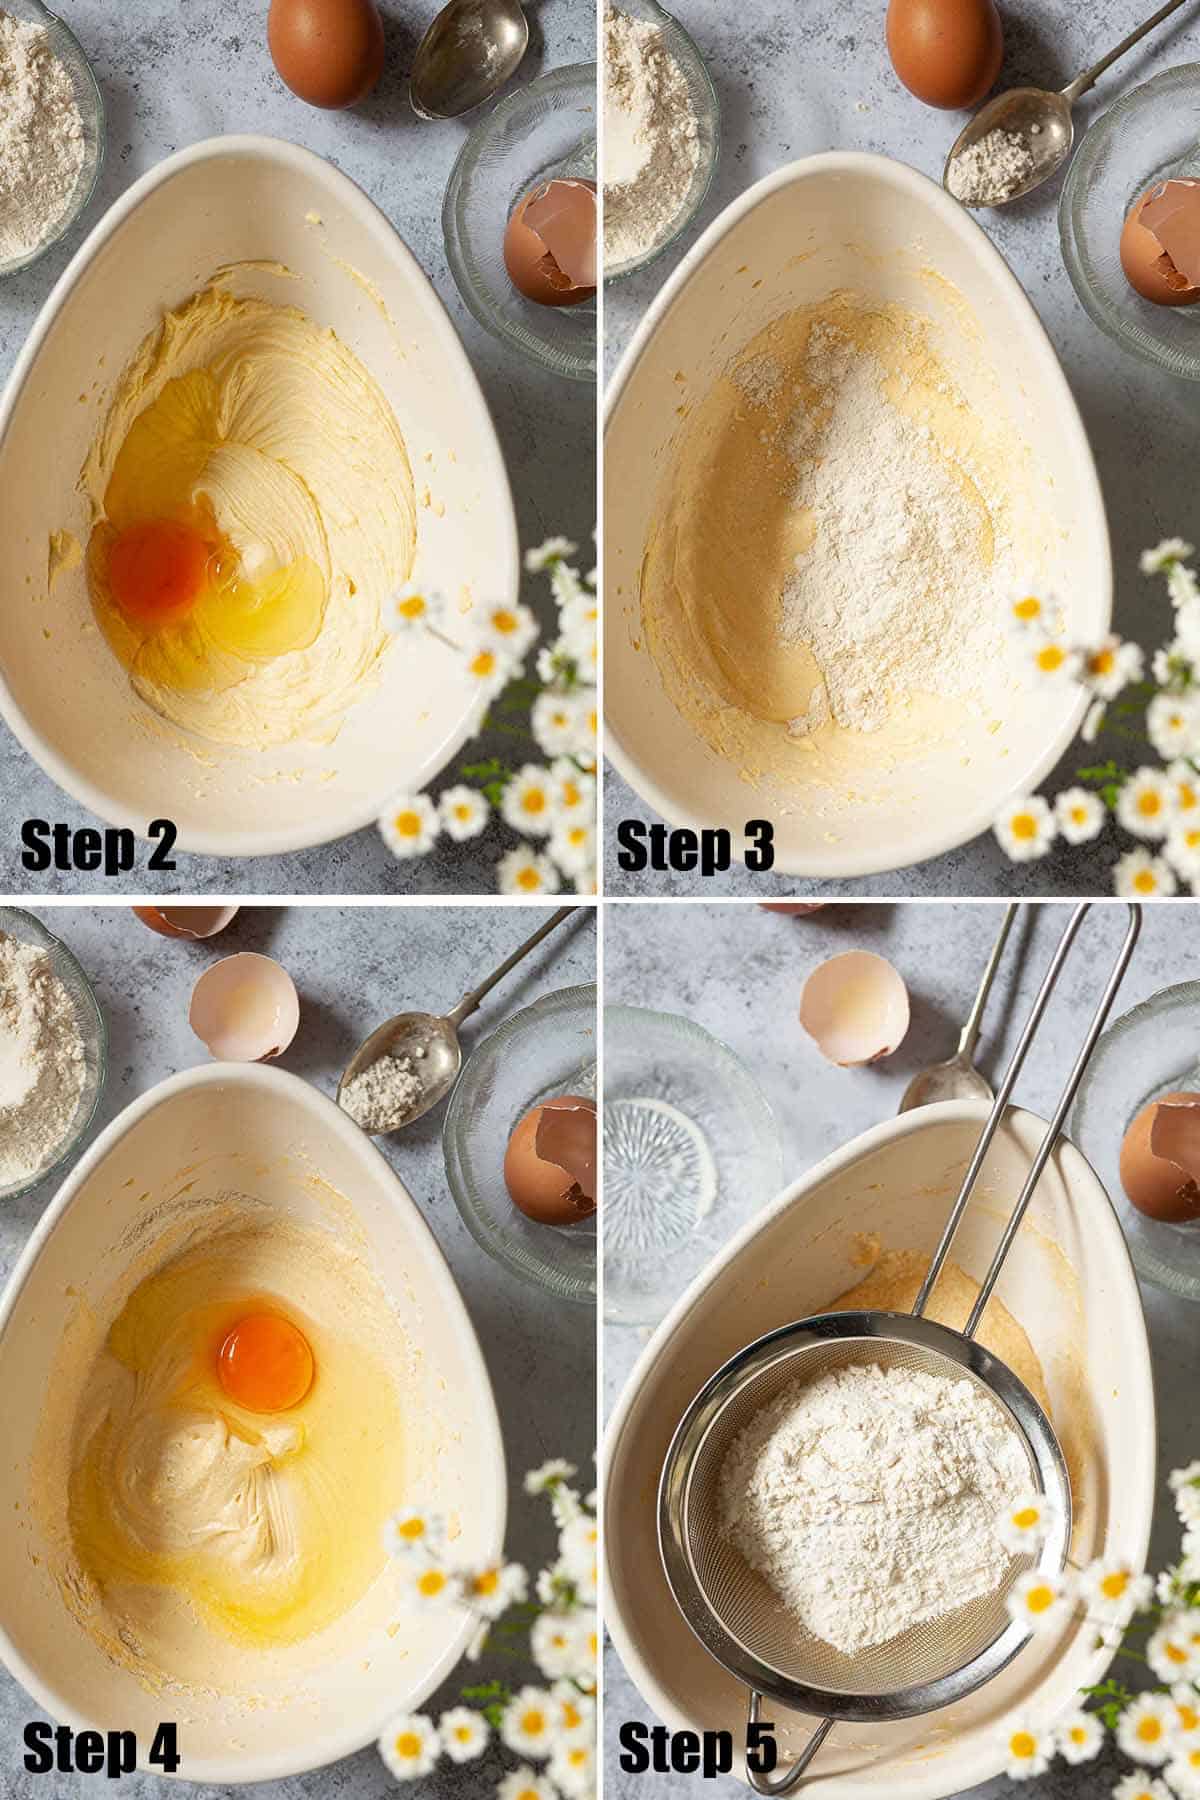
- Beat until just combined to create a batter with a soft dropping consistency.
- Divide the batter between the paper cases. Fill 12 first and then use any leftover batter to create a few extras (the exact number of cakes made depends on the size of the paper cases used).
- Bake for 15-18 minutes until well risen and golden.
- Lift the paper cases out of the bun tin and let cool on a wire rack.
- Sieve the icing sugar and mix with enough water to form a fairly stiff icing that won’t just run off the cakes.
- When the cakes are cold, spoon some icing over each cake and decorate with sweets or sprinkles of choice.
Expert tips
- I recommend using grams and digital kitchen scales when baking cakes. Baking is all about precision and this is the best way to ensure the ingredients are measured accurately. The cup system is a hugely inaccurate method for measuring and I don’t recommend it.
- Make sure you hunt out paper cases for fairy cakes to make yours in. Don’t use cupcake cases as these are much deeper and you’ll only get 6-7 cakes out of the recipe.
- Put the paper cases into the bun tins before baking begins. Once the batter has been mixed the raising agent (baking powder) is activated, so getting the cakes into the oven as soon as possible is the best course of action to ensure you get light and fluffy fairy cakes.
- Prefer a little peak to your cakes rather than a flat top? Add an extra ½ teaspoon of baking powder for a more pronounced rise.
- Ensure the cake batter has a soft dropping consistency. If yours is too thick to fall slowly off a spoon then add in a dash of milk (around 1 tablespoon).
Frequently asked questions
It’s likely they were baked for too long or the batter was too stiff.
Next time assess your batter to ensure it has a soft dropping consistency, adding in a little milk if necessary. Also, reduce the time in the oven by a couple of minutes – oven temperatures do vary slightly, so 15-18 minutes is a guide time only.
Once cooked and decorated, put these cakes into an airtight container and store them at room temperature for up to 2 days.
Un-iced cakes can also be frozen for up to 3 months. Open freeze them, then drop them into a freezer bag, ready for pulling out when required. Let defrost at room temperature for 1-2 hours before proceeding to decorate.
Letting fairy cakes cool in the tin might mean that the cake sticks to the wrapper instead of pulling away neatly when it’s time to devour one or two of them. Don’t forget to slide them out of the bun tin onto a wire rack to cool as soon as they are out of the oven.
1. Fairy cakes are much smaller than cupcakes. In fact, they are about half the size.
2. They should always be much more simply and daintily decorated than a cupcake. Forego that mile-high swirl of piped buttercream and opt for a dab of water icing instead. With significantly less cake, there needs to be significantly less icing.
3. Flavours should be simple and classic. Vanilla is a great addition to this simplest of small cakes, but to ring the changes think along the lines of chocolate fairy cakes or lemon fairy cakes. This is not the place to go crazy with indulgent or extravagant flavours such as caramel orsticky toffee. Reserve these for the cupcakes.
The difference between these two classic childhood teatime treats comes down to presentation. Butterfly cakes are simply jazzed-up fairy cakes – they have wings!
To turn a fairy cake into a butterfly cake a circle of the sponge cake is cut from the centre of the cake and sliced in half. The hole in the cake is then filled with jam and/ or buttercream and the pieces of cake are pressed into the buttercream to represent the wings of a butterfly.
Simple. Fun. Effective.
Ideas for decorating fairy cakes
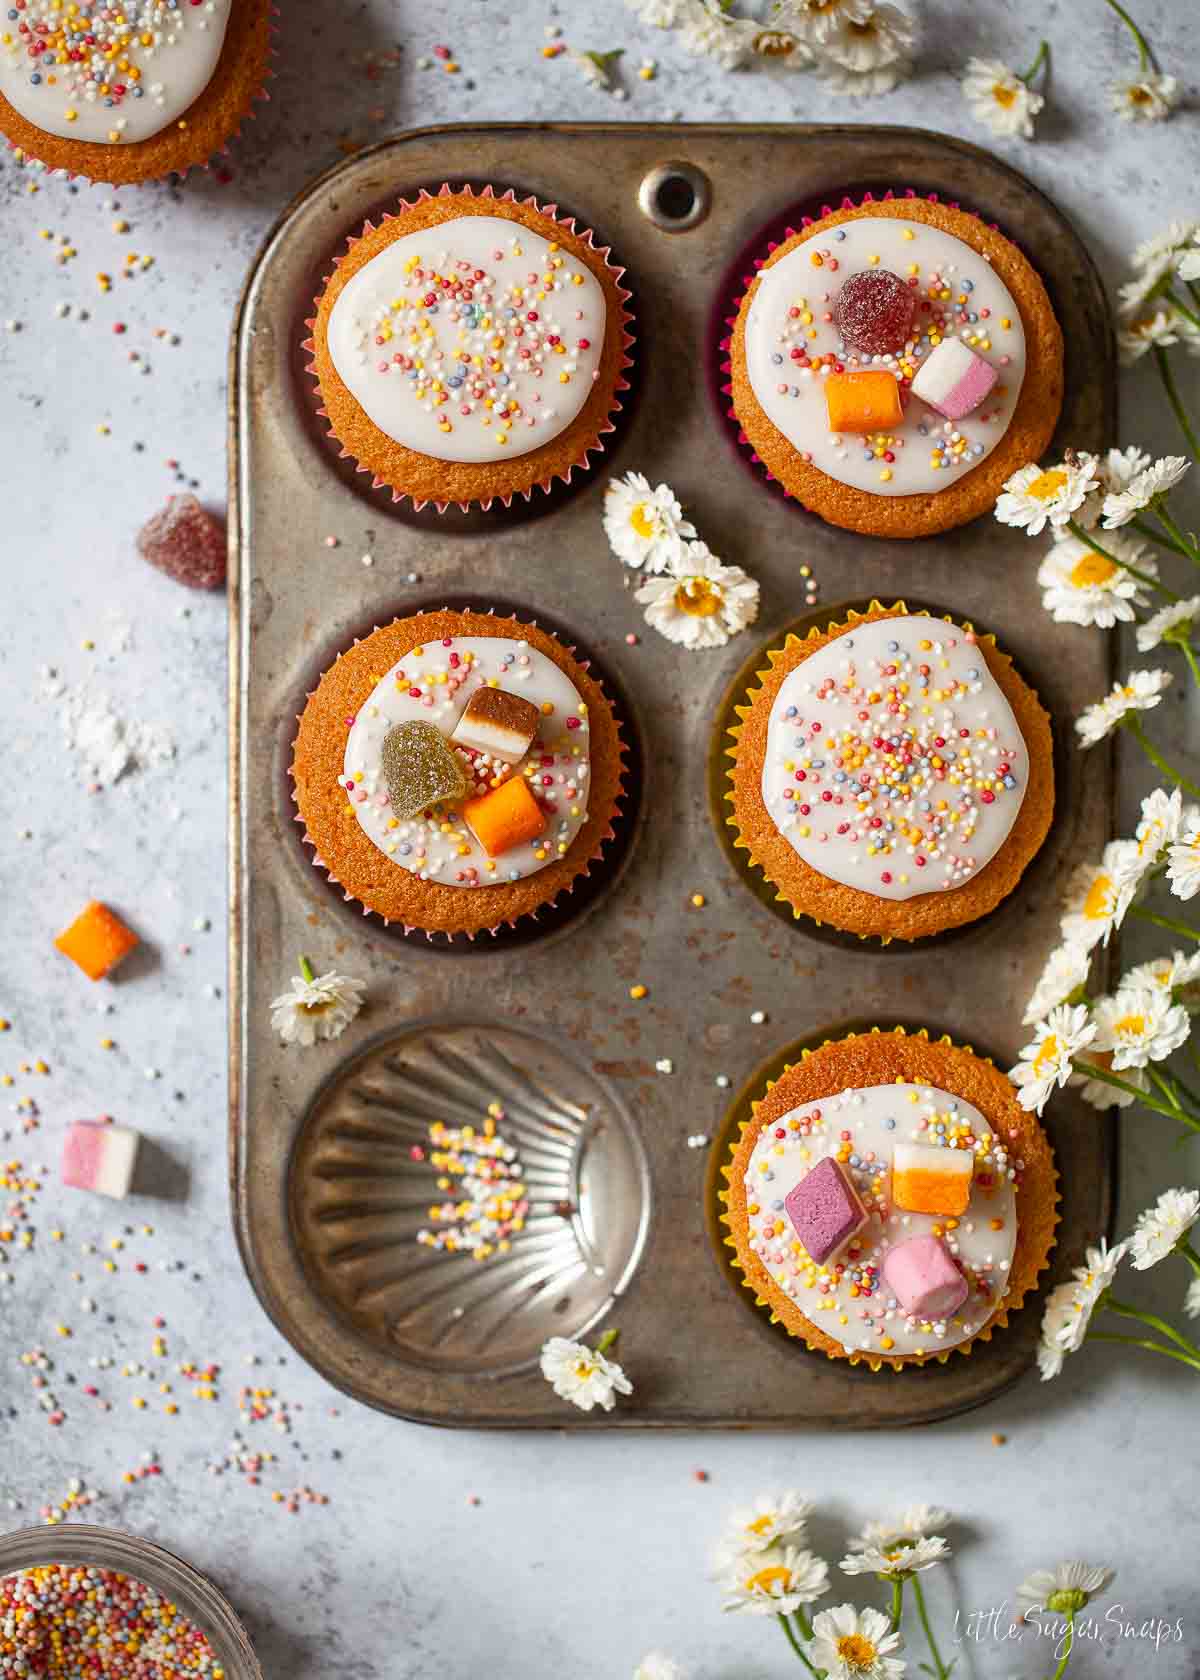
Although decoration should always be kept simple for old-fashioned fairy cakes, that doesn’t mean it has to be boring. Consider the following topping ideas:
- Once iced, top the cakes with sweets of your choice such as Dolly Mixtures, Jelly Tots or Jelly Beans.
- Or opt for half a glace cherry (or for a more dainty approach, take the advice of my former home economics teacher and chop a cherry into 12 pieces – trust me, the effect may be understated, but it is effective). This option is particularly fitting for cherry fairy cakes or sultana fairy cakes.
- Go for a retro twist with hundred and thousands.
- Or have some old-school fun with Jelly Diamonds.
- Top chocolate fairy cakes with chocolate vermicelli strands.
- Or top lemon fairy cakes with lemon and orange jelly slices.
- Crushed edible rose petals sprinkled on the top turn these simple fairy cakes into something really quite elegant (making them great for including in an afternoon tea).
- Finish iced fairy cakes off with a blast of vibrant colour using crystalised violet.
Variations
This recipe is very easy to adapt to include a few alternative classic flavours. Try the following suggestions when you fancy a change.
Chocolate fairy cakes
Need a chocolate fix? Replace 30g of the flour with cocoa powder and proceed with the recipe as normal.
It’s up to you whether to make the water icing chocolate flavour too. Just add in a little sieved cocoa powder until you are happy with the taste and colour.
Alternatively, colour the icing a gentle pastel shade to complement the darker colour of the chocolate fairy cakes. I think pale pink looks lovely against brown.
Lemon fairy cakes
To make lemon fairy cakes just omit the vanilla and mix in the finely grated zest of a lemon in step 2 instead. Use lemon juice rather than water to make the glace icing. Can you resist topping them with a retro jelly lemon slice?
Orange fairy cakes can be made in exactly the same way.
Sultana fairy cakes
Fold in 30g of sultanas to turn the basic recipe into a fruity one. You may prefer not to ice sultana fairy cakes at all. Feel free to use raisins instead of sultanas if that is what you have to hand in your pantry.
Cherry fairy cakes
Use 30g of either glace cherries or maraschino cherries. You’ll need to rinse the cherries, pat them dry and then chop them finely before folding into the batter. Definitely opt for a piece of glace cherry as decoration when making cherry fairy cakes.
More classic British teatime bakes
Have you made this fairy cakes recipe? Please give the recipe a rating or leave a comment – I love to hear how you get along with my creations. And of course, if you have a question, just drop me a line and I’ll do my best to help you out.
New here? Why not sign up to receive LittleSugarSnaps newsletters. You’ll hear first-hand when new recipes are published. You’re welcome to stay in touch on Facebook, Instagram and Pinterest too.
📖 Recipe
Want to Save This Recipe?

Fairy Cakes
Equipment
- 12 hole bun tins
- 12-15 Paper fairy cake cases
Ingredients
- 110 g Butter or baking margarine – room temperature
- 110 g Caster sugar
- 110 g Plain flour (all-purpose)
- 2 Eggs large, free-range
- 1 teaspoon Baking powder
- 1 teaspoon Vanilla extract or vanilla bean paste
Decorations
- 200 g Icing sugar
- Water
- Sweets or sprinkles of choice
Instructions
- Preheat the oven to 180C/ 350F/ GM 6 and put 12-15 paper fairy cake cases into the cavities of several bun tins.
- Cream the butter and sugar together, using electric beaters, until pale and fluffy (2-3 minutes).
- Add the vanilla (if using) and 1 egg. Beat well.
- Beat in 1 tablespoon of flour followed by the second egg.
- Sieve the remaining flour and baking powder into the bowl and mix well.
- Test the batter is not too stiff. It should have a soft dropping consistency. If not, mix in a tablespoon of milk to loosen it slightly.
- Divide the batter between the paper cases. Aim to fill 12 and if there is batter left after this fill the extra 3 cases.
- Bake for 15-18 minutes until well risen and golden.
- Lift the paper cases out of the bun tin and let cool on a wire rack.
Decoration
- Sieve the icing sugar and mix with enough water to form a fairly stiff icing that won’t just run off the cakes. (it's best to add 1-2 teaspoons of water initially, then continue to mix in additional water ¼ teaspoon at a time to avoid turning the icing too runny).
- When the cakes are cold spoon some icing over each cake and decorate with sweets or sprinkles of choice.
- Let set for 30 minutes then serve or store in an airtight container for up to 2 days.








Leave a Reply