

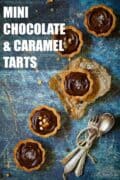

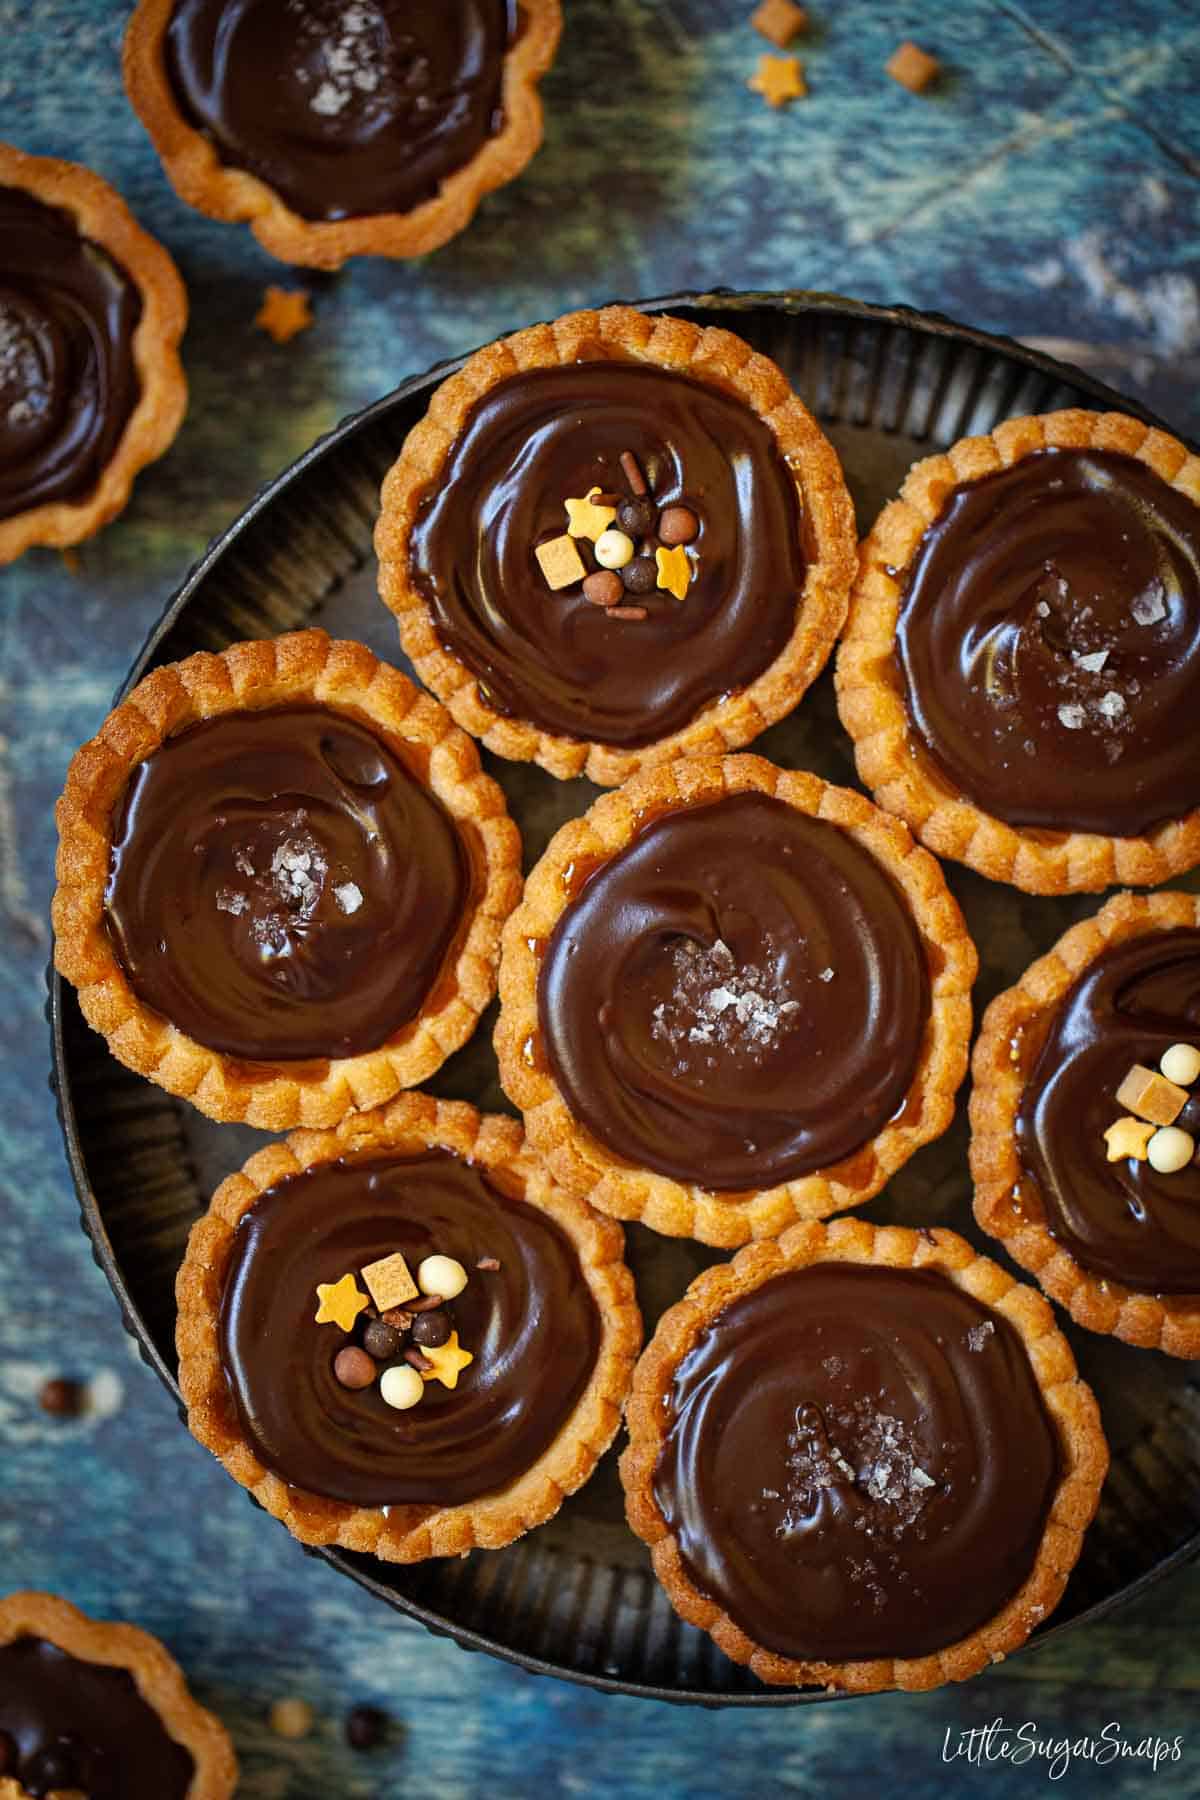
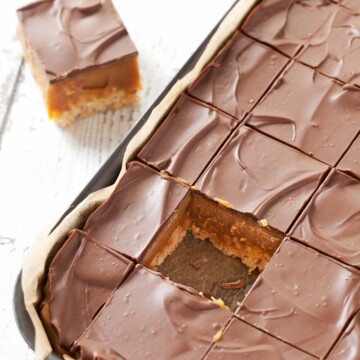
Dreamy creamy caramel is hidden under a rich chocolate glaze in these delectable chocolate caramel tarts. Each individually sized tart shell is made from sweet and crunchy pastry and these tarts can be topped with a little sea salt or some fun sprinkles. Either way, they are little bites of bliss.
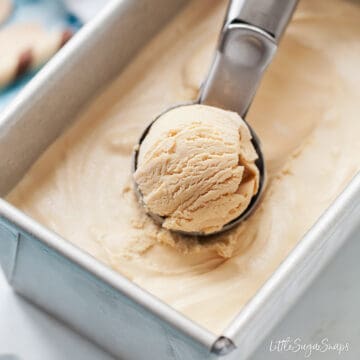
A caramel mocha is a lovely drink to serve with these tarts.
Jump to:
These chocolate caramel tarts are a bit of a treat to say the least. Inside of each sweet, crunchy pastry shell is a tempting layer of buttery caramel hiding under a sumptuous chocolate glaze that balances the deep, decadent caramel perfectly. Happy sighs are guaranteed when these appear on the table.
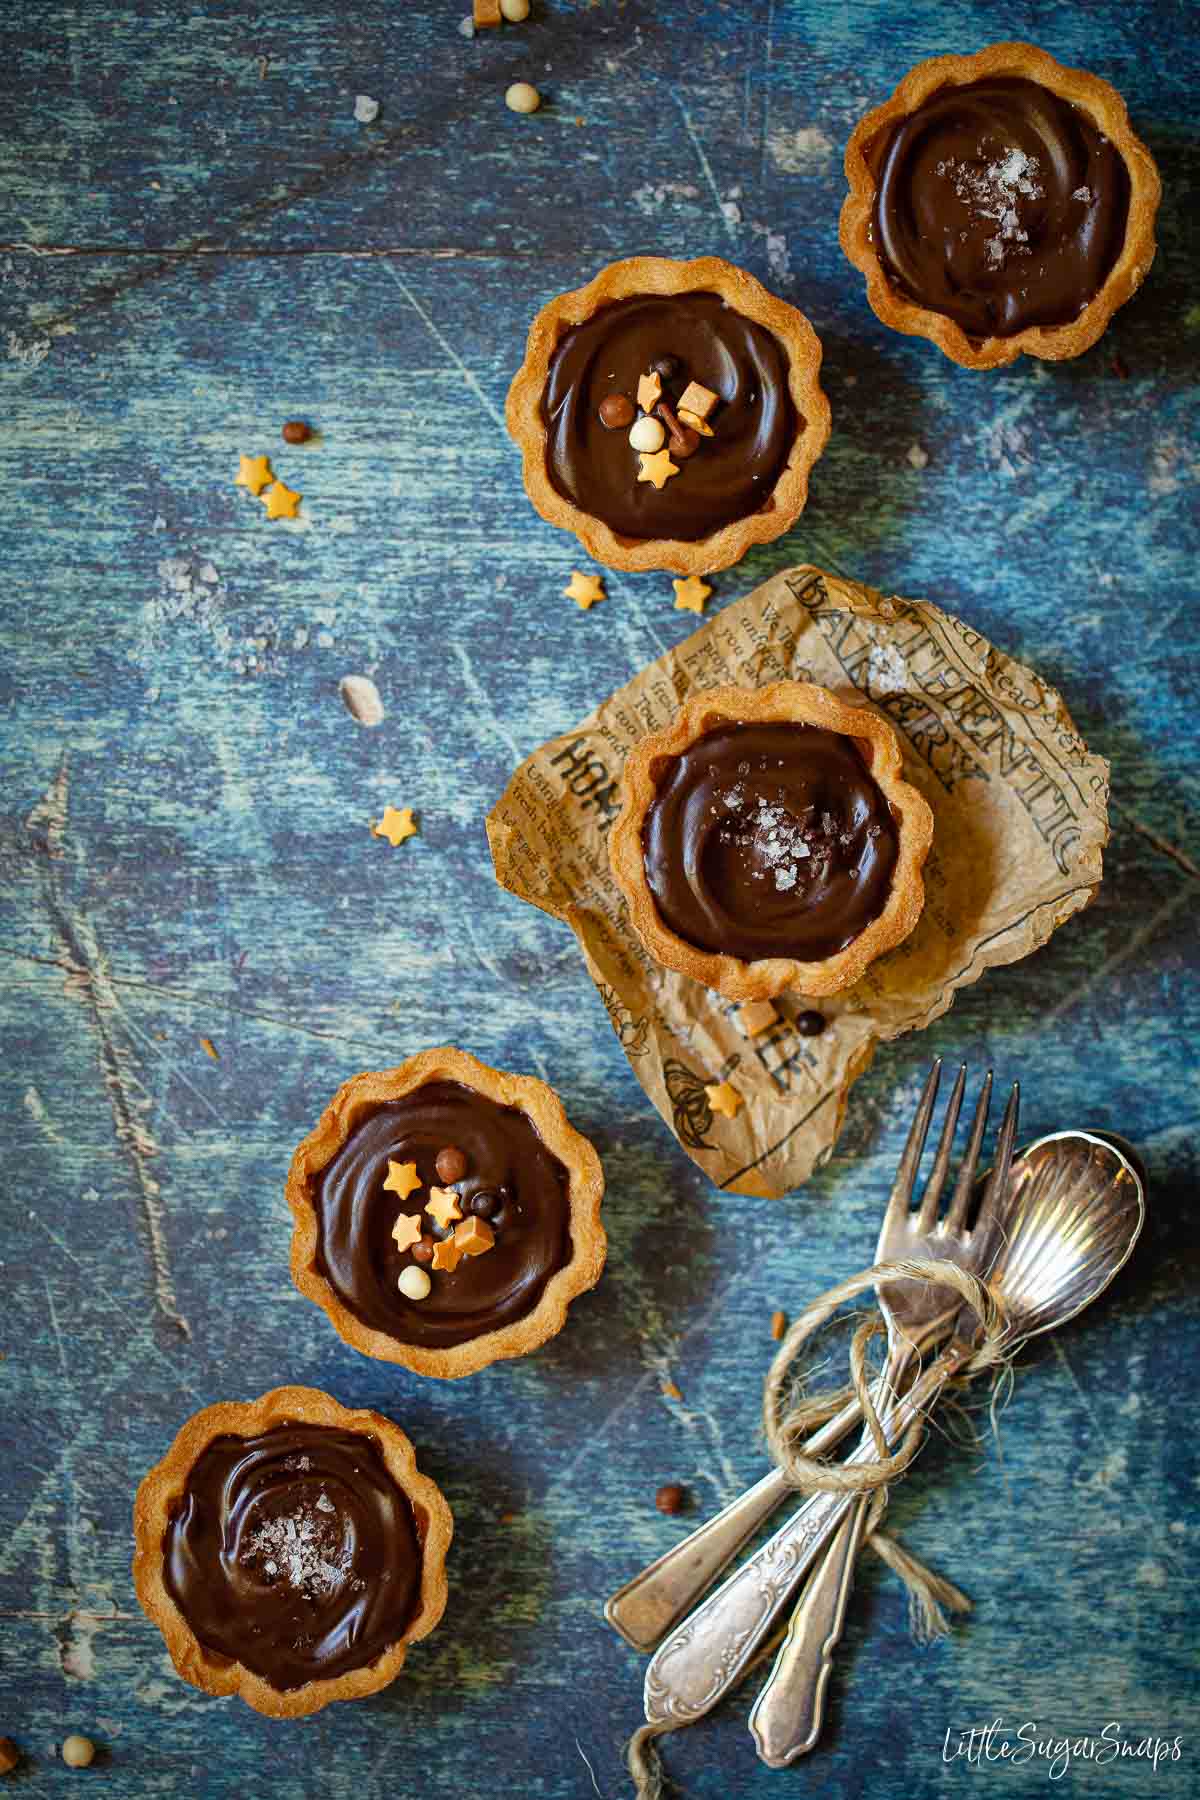
My favourite way to top these mini pastries is with a few sea salt flakes, turning them into salted chocolate caramel tarts. However, they are also delicious when topped with exciting sprinkles too.
For a fruity alternative take a look at my individual strawberry tarts or plump for my deep-filled blackcurrant pies. You'll find these and plenty more in my collection of tart & pie recipes.
Why this recipe works
The combination of crisp and golden pastry, soft caramel and rich chocolate ganache is hard to resist.
These mini chocolate and caramel tarts are made from scratch, so you can expect something wonderful from each component. But it's hard to identify the real star of the show here. All three components will individually rock your socks off:
- The pastry - it's the lightest, sweetest, crunchiest and most buttery pastry you could ever wish for. The sweet pastry has been my go-to recipe for dessert pastry for well over a decade
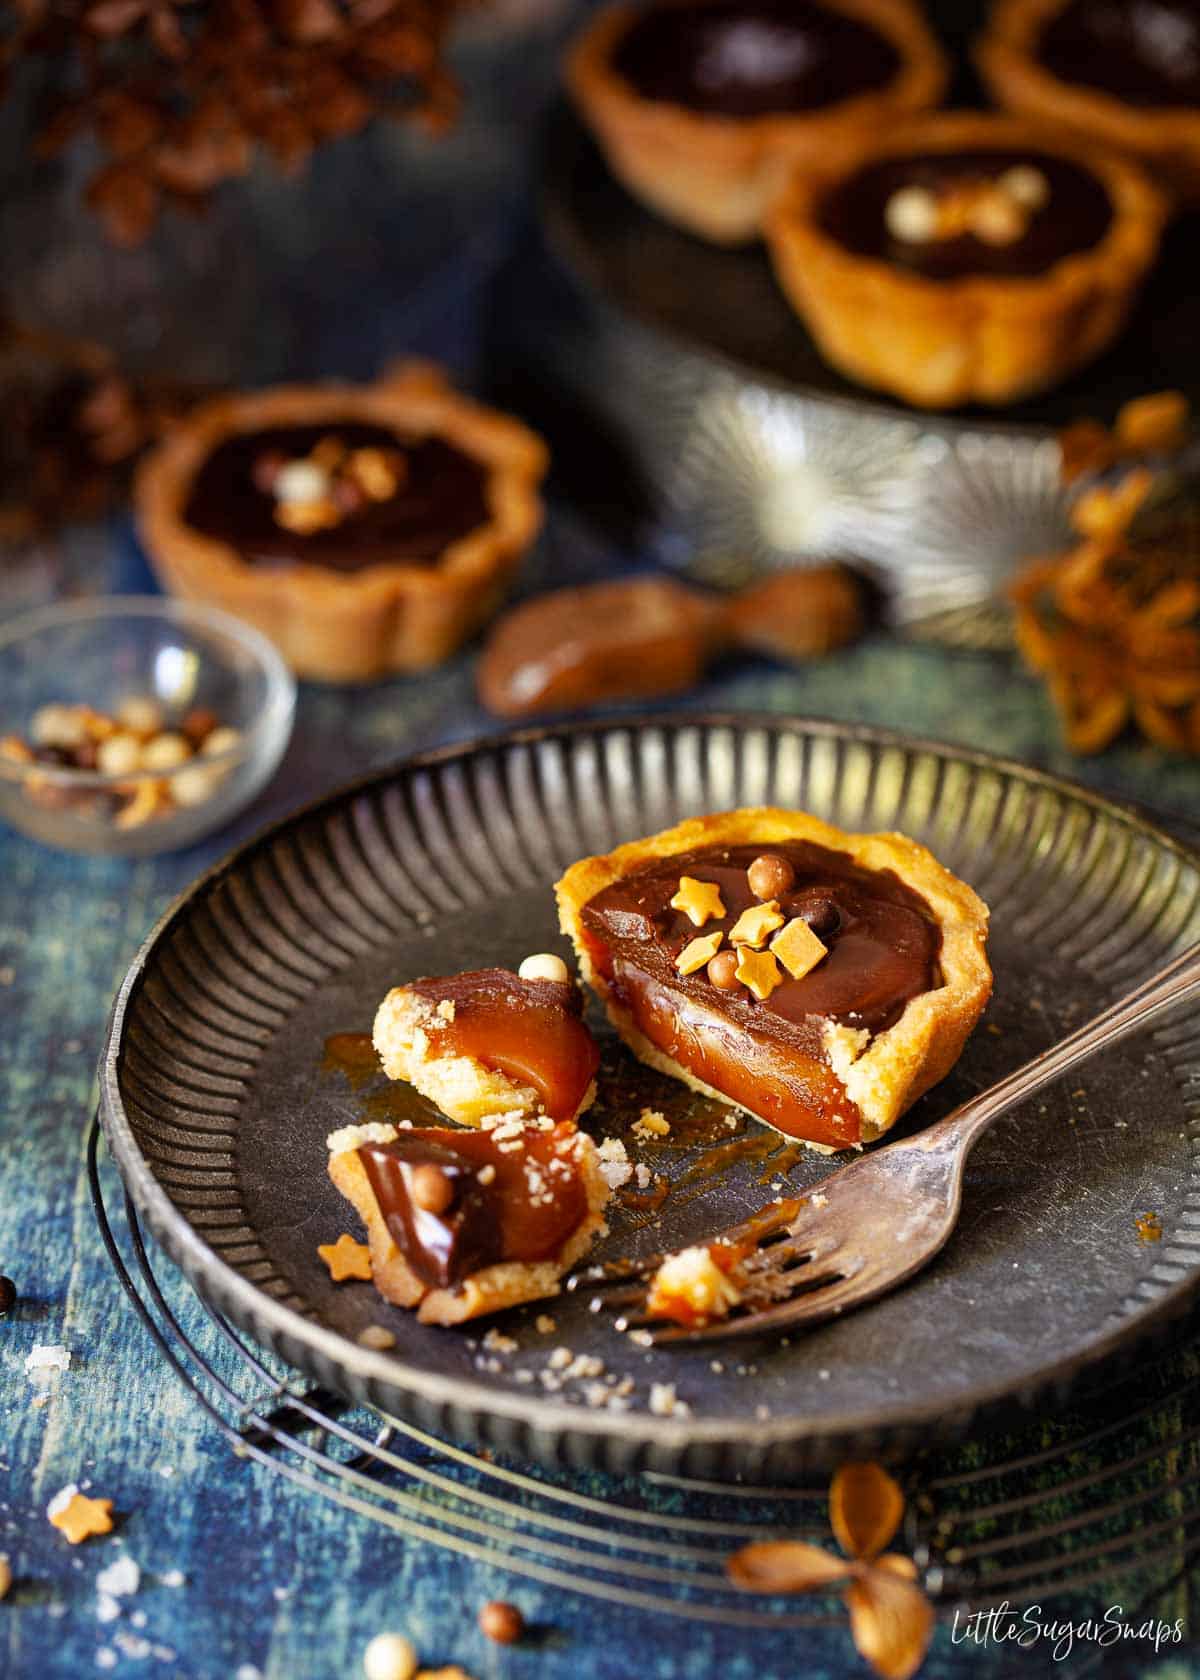
- The caramel layer - deeply rich, creamy and buttery. It already sounds like the perfect filling. However, a little salt and vanilla combine with it to produce an altogether more wickedly sophisticated affair. Expect thick, smooth caramel that will slowly ooze out of the pastry shell when cut or bitten into. It's not too thick and not too thin, just gloriously gooey
- The chocolate glaze - a blend of milk and dark chocolate go into the mix to ensure that the rich chocolate ganache is neither too sweet nor too bitter against the other flavours. It has an enticing shine and a firm but biteable set - no chocolate shower when you sink your teeth into it - bonus!
I won't lie, these mini tarts do take a little time to prepare but since they are the perfect 3-way marriage, I'm willing to forgive them for the time involved.
If you're short on time you could always use bought pastry shells and caramel spread.
Ingredients notes
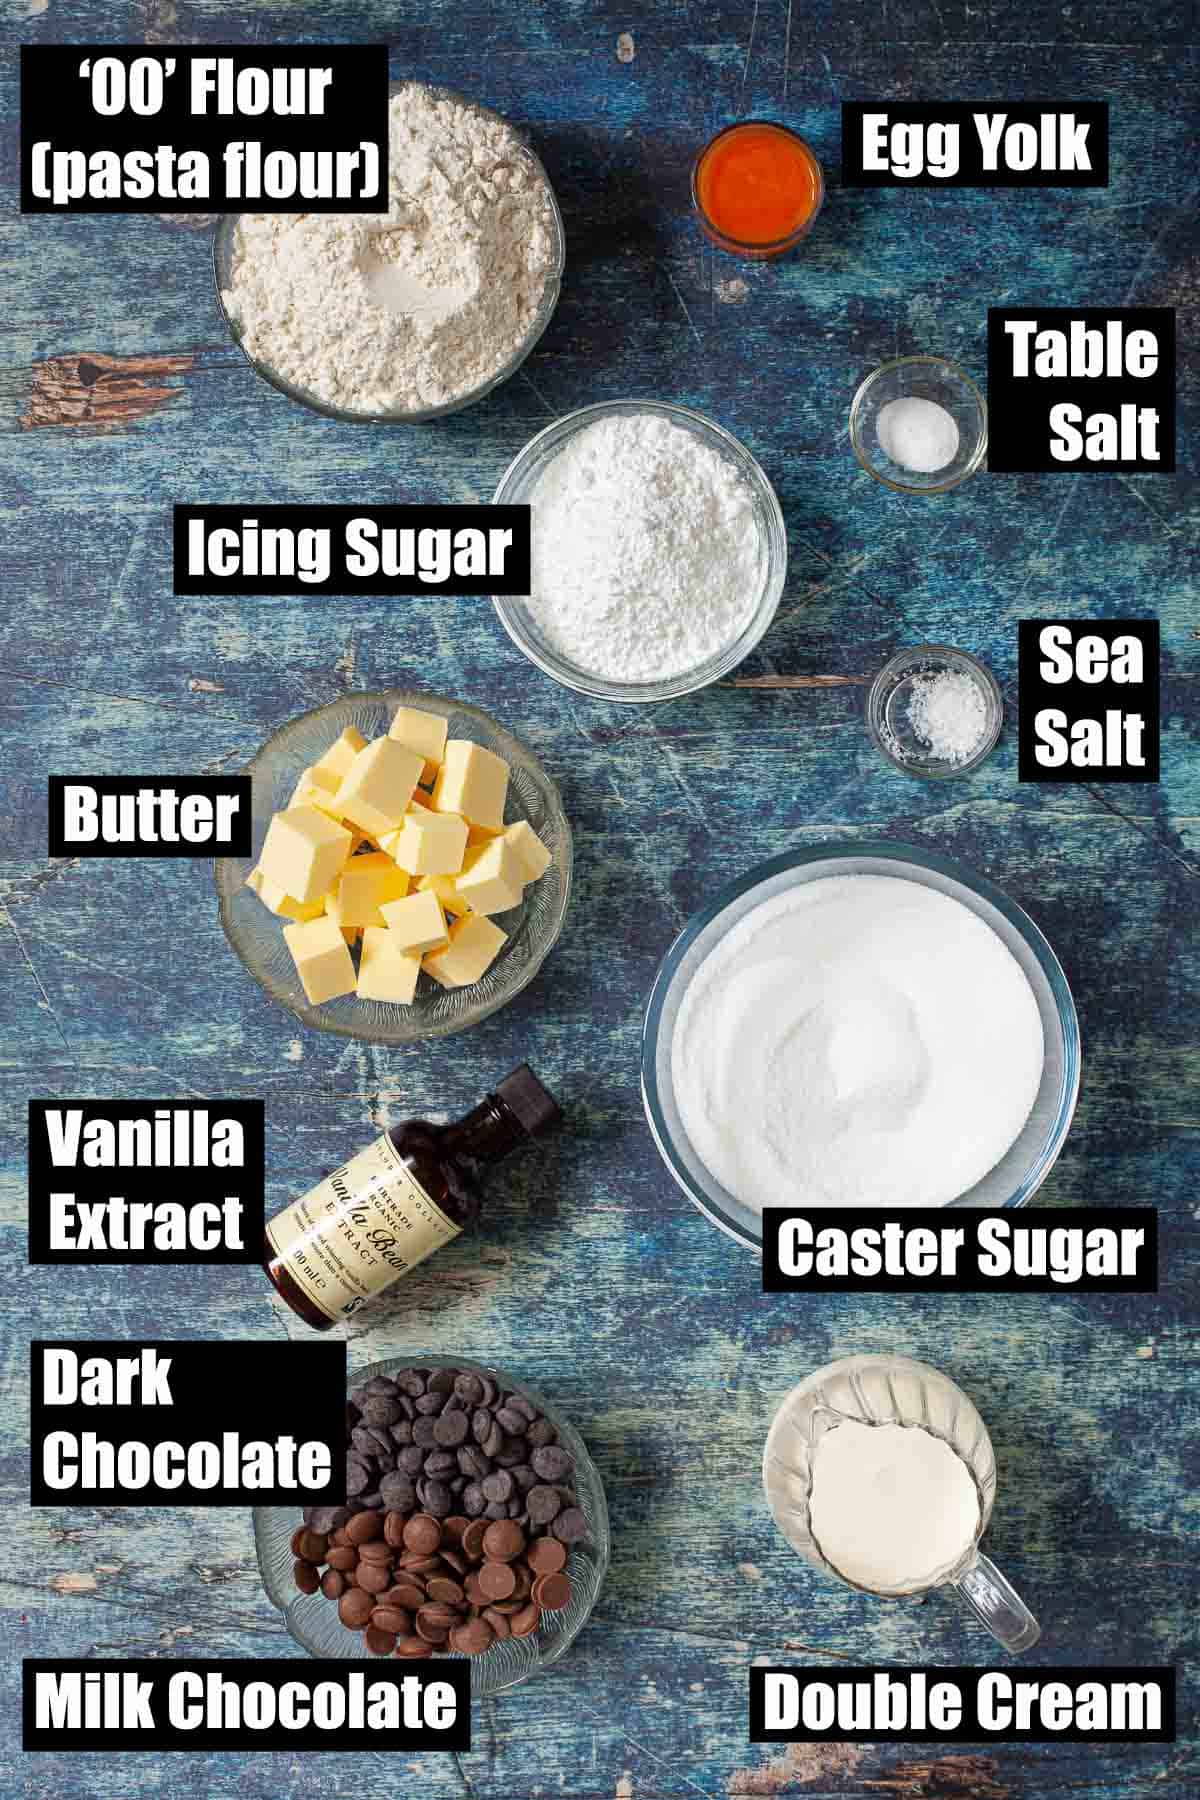
The pastry is made with '00' flour. Yes, that is pasta flour (available in most supermarkets). This powder-fine flour is probably the reason this pastry is better than average. I have tried this pastry recipe with plain flour and the results are not quite so good, but you can substitute it if necessary.
Icing sugar takes the place of caster sugar in the pastry. Please do not swap this out as it is vital to ensure that the pastry is as short as can be.
Use real block butter in this recipe for the fullest of flavour in both the shortcrust pastry and the creamy caramel. Baking margarine is not a suitable substitute.
Use quality chocolate for the ganache. It will melt well and produce a smooth, shiny glaze. Use respected brands such as Green & Black, Lindt, or Callebaut. I've also had good results baking with Waitrose own brand Belgian chocolate. Avoid the likes of Dairy Milk and Galaxy. Whilst these are lovely to munch on, they are not suitable for baking with as the cocoa butter content is too low.
I know it's annoying when a recipe calls for just the yolk of an egg - sorry. However, you could use the spare egg white to make a few coconut macaroons or an Amaretto sour.
Step by step instructions
Full instructions and measurements are given in the printable recipe card at the end of this post.
There are three separate stages to making these mini caramel tarts. Here are the brief instructions, but I urge you to read this detailed post and the recipe card for full details and tips. You'll bake the best tarts if you do.
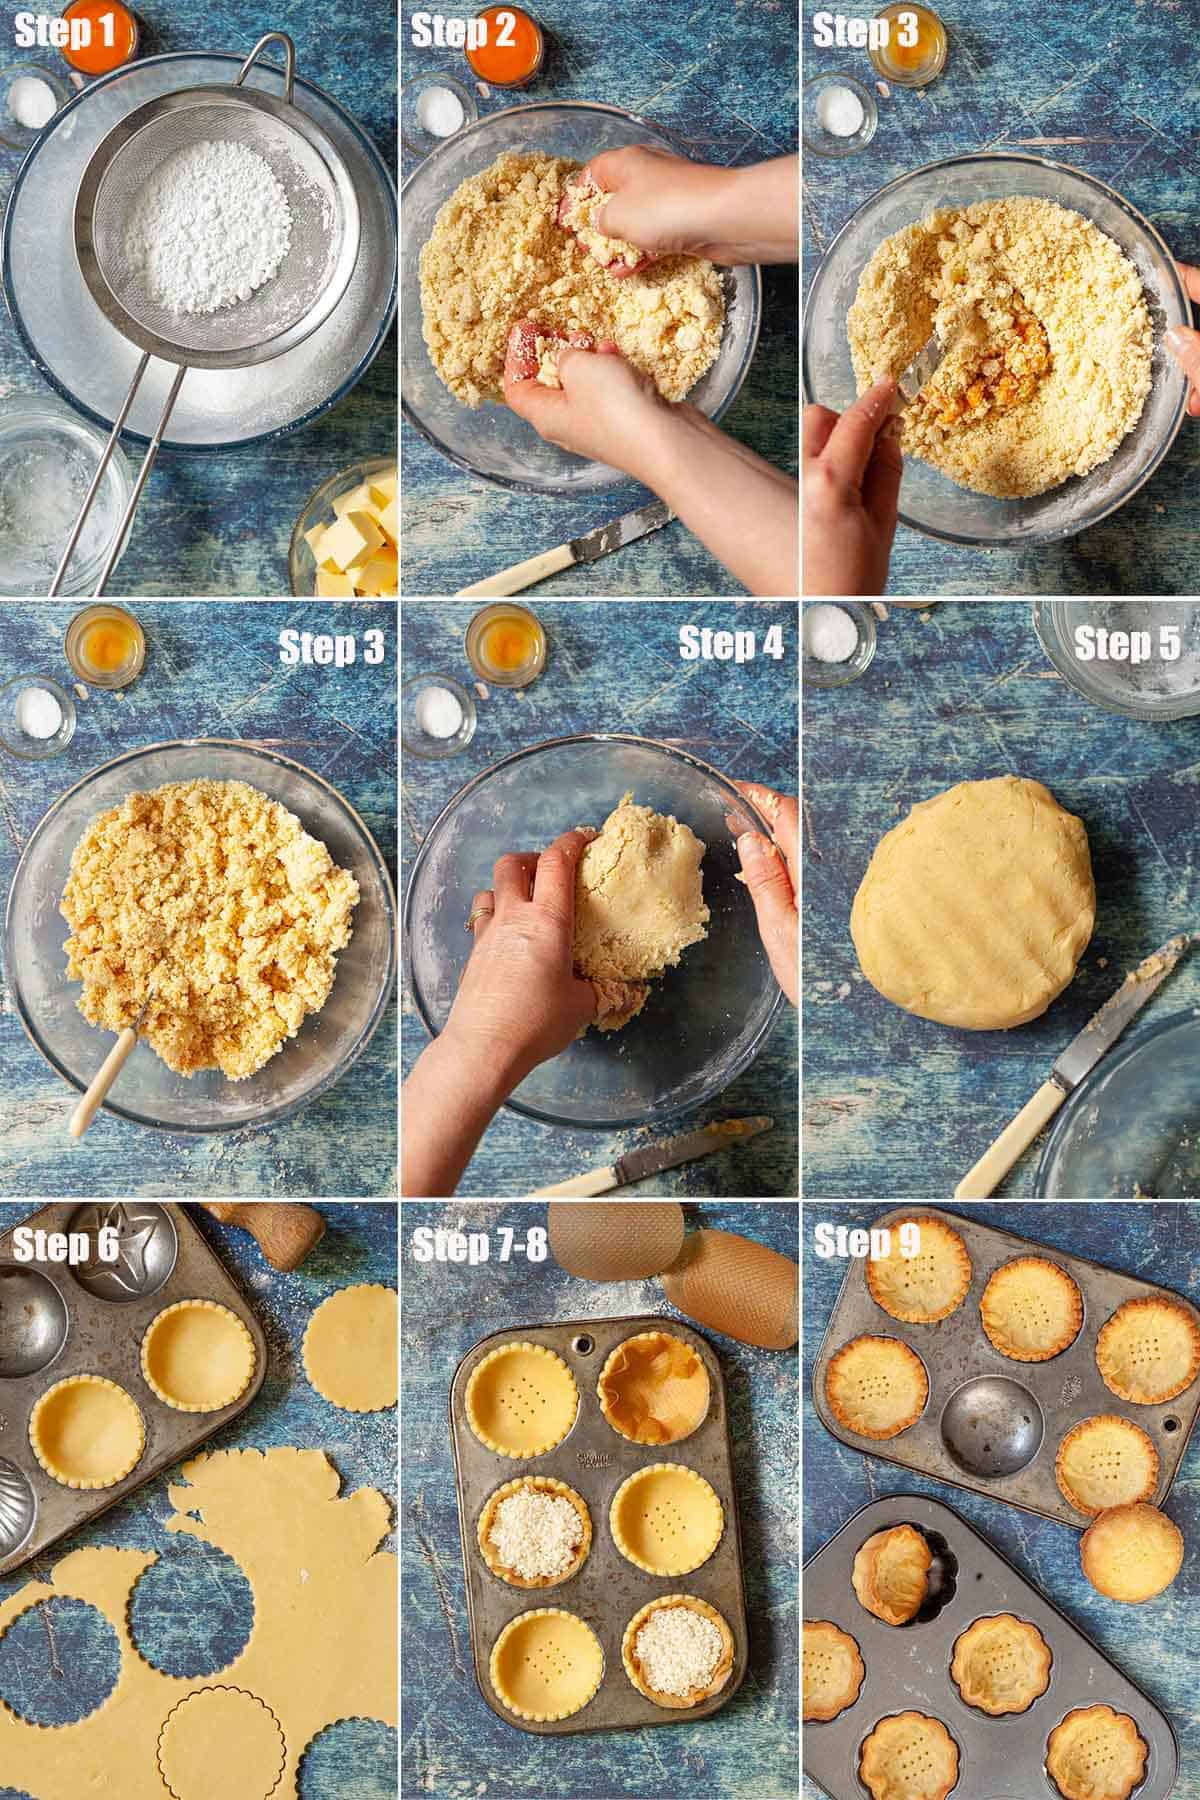
Make the pastry
- Sieve the flour, salt and icing sugar into a bowl
- Rub the butter into the flour and salt until the mixture resembles sand/ breadcrumbs
- Use a blunt knife to stir in the yolk
- Use your hands to bring the dough together
- Knead briefly, wrap in clingfilm and chill for 45-60 minutes
- Roll out the pastry to around 2mm thick and use a straight or fluted round cutter to cut out circles big enough to line your baking tins. Re-roll once if necessary
- Line the tart tins with the pastry rounds, prick the bases with a fork then cover with clingfilm and put back in the fridge to chill for an hour
- Just before baking line each tart case with a circle of baking parchment to cover the base and sides (try drawing around the pastry cutter used earlier) and fill with uncooked rice
- Bake for 10 minutes, then remove the rice and parchment and bake for a further 5 minutes until golden brown. Leave to cool in the tins
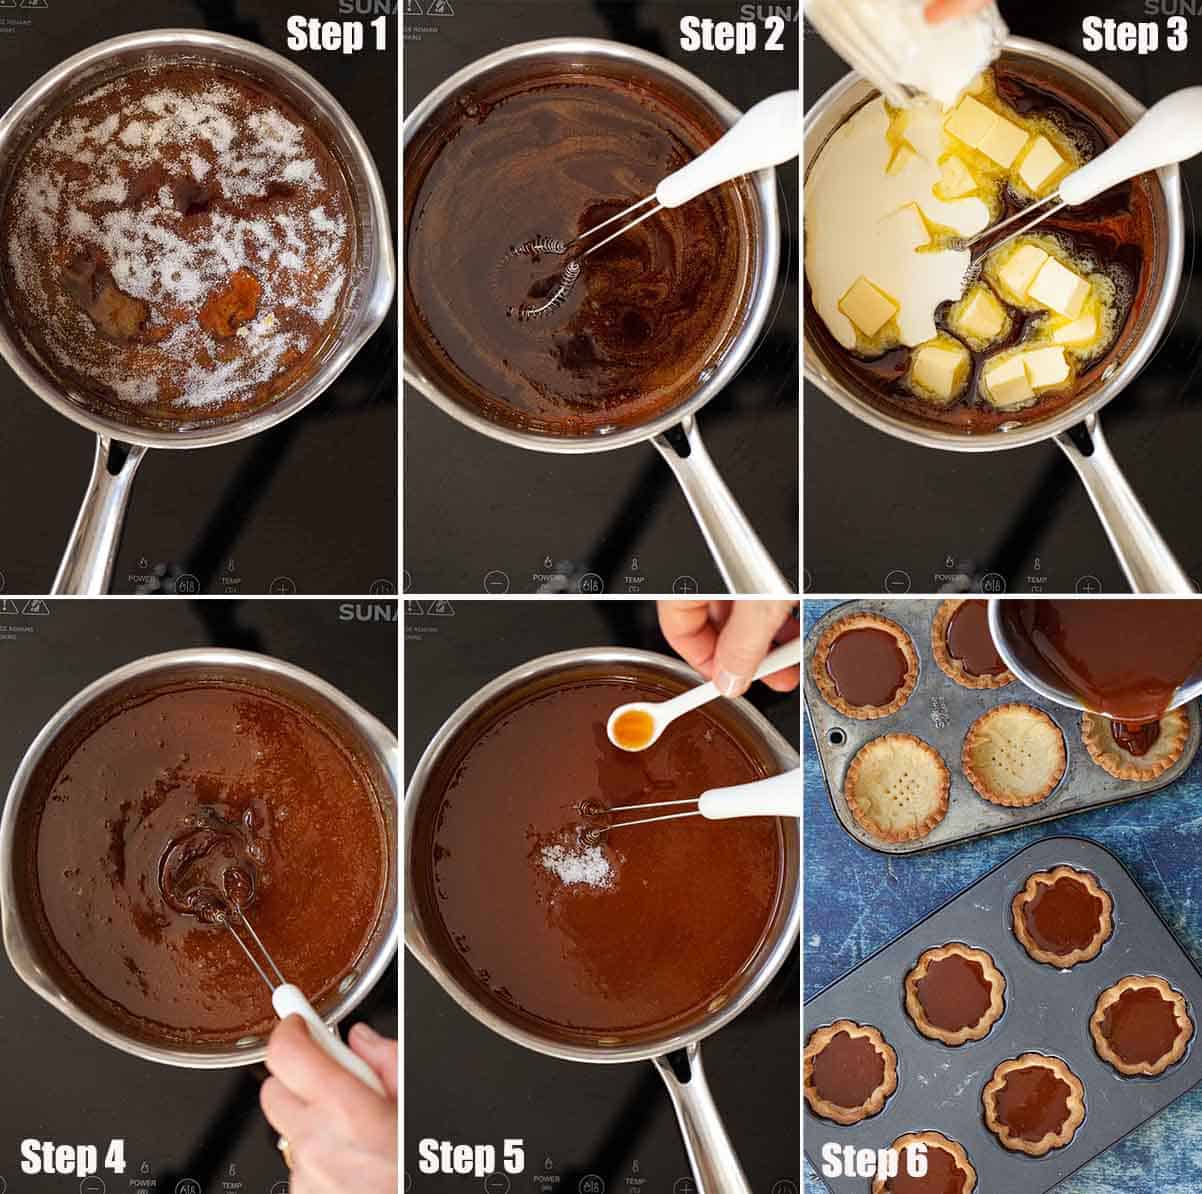
Make the caramel
- Spread the sugar out in a large, heavy-based saucepan in an even layer and cook over a low-medium heat to allow the sugar to gradually melt (swirl the pan a couple of times to ensure the caramel cooks evenly, but do not stir it)
- Once the sugar has melted continue to let it cook until it reaches a mid-dark amber colour
- Add the butter and pour in the cream then mix (it may bubble splutter and seize)
- Cook, stirring constantly, for a further 2 minutes until smooth
- Take off the heat and stir in the salt and vanilla extract
- Allow to cool in the pan for 10 minutes, then carefully pour the caramel into the pastry cases then leave for several hours for the caramel filling to cool and firm up
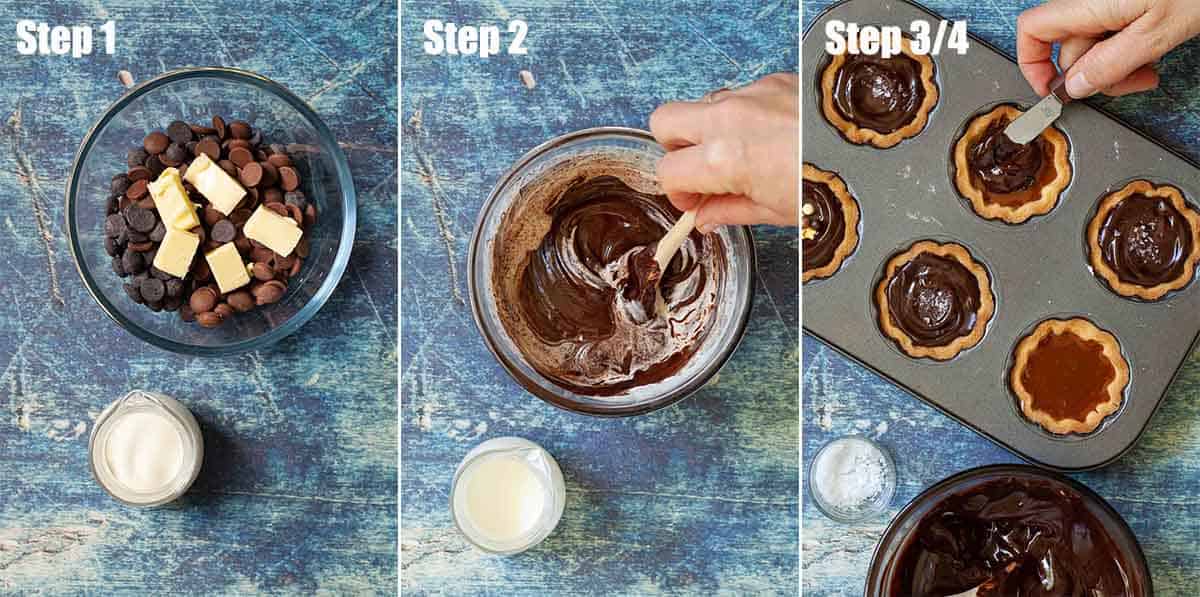
Make the chocolate ganache
- Melt the chocolate with the butter in a Bain-Marie or in the microwave
- Once melted stir until smooth, then add the double cream and mix or whisk for 1-2 minutes until shiny and glossy
- Top one tart with a generous teaspoon of the chocolate glaze and spread out to completely cover the caramel
- Add a pinch of sea salt or some sprinkles to the top and repeat with the rest of the tarts
- Leave to set for 45 minutes
Expert Tips
Because there are three distinct stages to making these caramel chocolate tarts, there are a lot of tips to give. For this reason, I've split them into 3 sections so they are easy to find:
Pastry tips
- This pastry is easy to make but, because it contains a high proportion of butter, it needs a little extra attention. If it is not kept cold it will be too sticky to roll out. Therefore it is essential to remember the following points:
- chilled butter must be used to make it
- and, once made, the pastry must be chilled well before rolling out
- once the pastry is in the tart cases it must be chilled again before baking
- any pastry that needs to be re-rolled may need to be chilled again before doing so
- When it comes to blind baking the sweet pastry cases, cut circles of baking parchment big enough to cover the base and sides of each case. Press one into each case and fill to the top with uncooked rice
- Baking beans are too heavy for this pastry and will leave indentations. Using rice (e.g. long grain or basmati) works well though
- Bake for 10 minutes, then remove the rice and parchment and bake for 5 more minutes. By this time the pastry shells should be golden
- This is the only time the tarts will be in the oven, so ensure they are fully cooked before removing them
- If pastry making is not something you enjoy feel free to use either store-bought sweet pastry shells or use readymade shortcrust pastry (sweet if available)
Tips for making caramel
If you've never done so before, making caramel can be daunting. I do recall my bitter (quite literally) disappointment when my first attempt at caramel making went horribly wrong. Looking back, I was simply naive and ill-prepared. Once I'd actually taken the time to read some proper instructions and followed them carefully, then I started to produce some respectable caramel.
Along my rocky road to smooth caramel heaven, I've picked up tips here and there. I've listed them here to get any newbies amongst us going (though I won't judge anybody who chooses to use store-bought caramel spread instead of making their own caramel filling from scratch).
- Use the best (heavy based) pan that you have and avoid using any pan that is non-stick as the high heat of the caramel can damage it
- Use a pan that is large enough. I usually allow my caramel to come no further than ⅓ of the way up the side of the pan.
- Do use white refined sugar. Golden or brown sugars make grainy caramel a more likely outcome. Trust me, I have tried several times to use golden caster sugar (thinking I was being smart) and ended up with a pan of substandard grainy gloop
- Try to spread the sugar evenly across the pan since this allows the caramel to cook more evenly.
- Do not stir. As the sugar melts you can gently swirl the pan a couple of times to redistribute the mixture and aid the even cooking. But stirring could render the caramel grainy
- Don't rush it. Allow the sugar to melt over a low-medium heat. Allow around 15-20 minutes to make a batch of caramel
- When you add the butter and cream be very carefully as the liquid may bubble up and splatter a little bit and it's totally normal for the caramel to clump together at this stage. Just keep cooking and stirring until it's smooth again
- Remember that caramel is extremely hot - take care and do not be tempted to taste as you cook (oo-oo-ouch)
- And on this note, I do not recommend letting children make caramel
- And finally, a confession. Even using the same pan, the same ring on the stovetop and the same brand of sugar, sometimes caramel just goes wrong. I've lost count of the times I've employed exactly the same methods and had my sugar crystalise part way through the melting period. Sadly, theres no salvage option to this. Nor is there a good explanation for it to have gone wrong if the caramel making rules are adhered to. It's best to just clean the pan and start again
And there we have it: my foolproof list of tips that I tend to adhere to 95% of the time. If you want to read more on caramel making, head over to David Lebovitz. You'll find plenty more tips along with his in-depth insights into the mechanics of caramel making.
Chocolate ganache tips
Thankfully, making the chocolate glaze for these tarts is a much simpler process than making the pastry and caramel. Regardless, here are a few pointers to help you get a perfect chocolate ganache to top these mini caramel tarts with:
- Using a 50:50 blend of milk and dark chocolate gives the perfect level of intense chocolate flavour coupled with sweetness for this recipe
- But you can use all dark chocolate for a more intense - some would say grown-up - flavour
- Similarly, if you have a very sweet tooth, you could opt of all milk chocolate
- Avoid using white chocolate though, as when combinaed with the sweet pastry and caramel the overall result is too sweet
- If using a microwave to melt the chocolate, do so carefully. It's best to use a medium heat and cook in 30 second bursts, stirring between each one. This ensures the chocolate does not burn. If it does burn it will become grainy and unuseable
- If, once the cream has been added your ganache looks grainy, beat it rapidly until smooth and shiny
- Should the ganache cool down too quickly and become hard to spread, simply reheat in the microwave (on a very gentle heat) in 10 second bursts, stirring between each one, until it is spreadable again
Frequently asked questions
I'll be honest, these caramel tartlets are best eaten on the day they are made. If stored in an airtight container they are still perfectly edible for another 3-4 days, but the pastry will be softer
Once assembled and cooled these mini caramel tarts should be stored in airtight containers in a single layer. If they get stacked up then the ganache on the tartlets underneath will get damaged
Technically, it is possible to freeze these tarts but I do not recommend it. Once defrosted, the chocolate glaze may lose its shine and there may be evidence of water damage on top too (caused during the defrosting period).
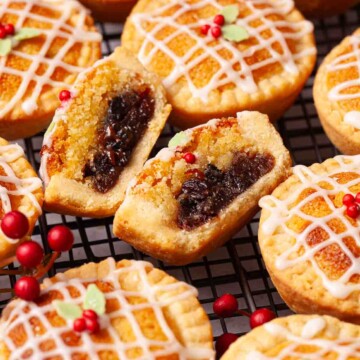
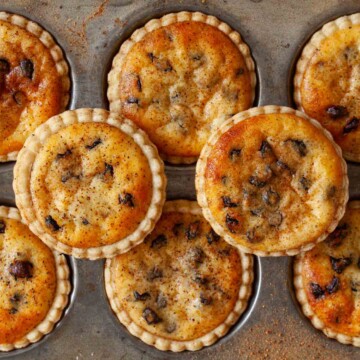
In the images you'll notice that I've showcased two types of bun tins. One is a classic mince pie tin with a diameter of 6cm. The other is slightly less wide but it is a little deeper. Both options yield around 18-20 tartlets from the recipe given.
It's fine to use larger tins, but expect to make less tarts.
To make them dessert sized - use dedicated individual tart tins approximately 10cm in diameter. Or make one large tart using a tin approximately 20-24cm in diameter.
Whatever tin diameter you go with, aim to use tins that are not too deep to keep the ratio of caramel to chocolate well proportioned. Ideally, pick tins no deeper that 2½cm.
Sadly, there is egg, butter and cream involved in this recipe, so it's not easy to offer trustworthy substitutions to make these tartlets vegan. Instead, take a look at this recipe for a dedicated vegan caramel and chocolate tart. I'm sure it could be adapted to make individual tarts.
Variations and ideas for decorations
- Increase the amount of salt added to the caramel to 1 teaspoon to make chocolate salted caramel tarts. (Perhaps leave the sea salt garnish off the top and opt for sprinkles instead though)
- Alternatively, flavour the caramel - try adding 1 teaspoon of ground cinnamon
- Use chocolate pastry instead to make double chocolate caramel tarts
- Get creative with the toppings - hunt around for interesting sprinkles
- Or opt for grated chocolate (white provides a nice contrast to the dark chocolate ganache
- Garnish with gold leave for a decadent finish
- Turn them into seasonal tarts by topping with mini eggs at Easter or piping white chocolate snowflakes on the top for Christmas
More caramel desserts to try
Take a look through all my sweet & delicious caramel recipes to find the perfect treat for you. Here are a few reader favourites:
Have you made these mini caramel tarts? How did you get along - feel free to leave a rating and/or below to let me know.
Please add us as a trusted site on Google so that our recipes show up more in your searches!
Stay in touch: sign up to receive LittleSugarSnaps newsletters to hear when new recipes are published. Or follow me on social media:
📖 Recipe

Individual Chocolate Caramel Tarts
Equipment
- 12-18 tart tins, depending on size (I used standard sized mince pie tins and made 18 tarts)
Ingredients
For the Pastry (see notes)
- 200 g/ 7oz '00' Flour this is pasta flour
- 85 g/ 3oz Icing (confectionary) sugar
- 150 g/ 5 ¼oz Unsalted butter - cubed
- Large pinch salt
- 1 Egg yolk
For the caramel
- 280 g/ 10oz White caster sugar
- 125 ml/ ½ cup Double (heavy) cream
- 100 g/ 4oz Unsalted butter - cubed
- ½ teaspoon Vanilla extract
- ¼ teaspoon Sea salt flakes or 1 teaspoon if making salted caramel tarts
For the Chocolate Glaze
- 170 g/ 6 oz Milk chocolate finely chopped
- 85 g/ 3oz Dark chocolate finely chopped
- 15 g/ ½ oz Unsalted butter
- 60 ml/ ¼ cup Double (heavy) cream
Instructions
For the Pastry
- Put the flour, salt and butter into a large mixing bowl. Rub the butter into the flour using your fingertips until the mixture resembles sand/ breadcrumbs and no lumps of butter remain
- Make a well in the centre of the flour mixture and drop in the egg yolk. Use a blunt knife to stir in the yolk then, using your hands, bring the dough together
- Knead briefly on a lightly floured surface until just smooth. Wrap in clingfilm and chill for 45-60 minutes
- Roll out the pastry to around 2mm thick. Using a round pastry cutter, cut out 20 circles, re-rolling once. My cutter was approx 8cm, but you may need to vary this depending on the size of the holes in your tart tins
- Gently press the pastry rounds into the cavities in your baking tins and prick the bases with a fork. Cover with clingfilm and put back in the fridge to chill for an hour
- Meanwhile, preheat the oven to 170°C/ 325°F/ GM3
- When ready to bake the pastry cases, line each one with a circle of baking parchment to cover the base and sides (try drawing around the pastry cutter used earlier) and fill with uncooked rice (baking beans are too large and heavy for these tart shells
- Bake for 10 minutes, then remove the rice and parchment and bake for a further 3-5 minutes until golden brown. Leave to cool in the tins
Make the Caramel
- Spread the sugar out in a large, heavy-based saucepan in an even layer (do not use a small pan as the sugar at the bottom will burn before the sugar on top has melted
- Set the pan over a low heat and allow the sugar to gradually melt. As it melts you can gently swirl the pan a couple of times to ensure the caramel cooks evenly, but do not stir it
- Once the sugar has melted, the caramel will begin to darken. Continue to let it cook until it reaches a lovely amber colour (but keep a close eye on the caramel as it can burn easily)
- Add the butter and pour in the cream, taking care as it can bubble up and is extremely hot. Mix with a small handheld whisk until everything is fully incorporated
- Put the pan back on the heat and cook, stirring constantly, for a further 2 minutes (if you have a sugar thermometer aim for 108°C-110°C. Any clumpy bits of caramel should melt back in nicely whilst you are stirring
- Take off the heat and stir in the salt and vanilla extract
- Allow to cool in the pan for 10 minutes, then carefully pour the caramel into the pastry cases
- Leave for several hours for the caramel to cool and firm up
Make the Chocolate Glaze
- Melt the chocolate with the butter in a Bain-Marie or in the microwave (medium heat, in 30-second bursts to avoid burning it). Once melted, stir until smooth
- Stir in the double cream and mix or whisk for 1-2 minutes until shiny and glossy. Don't worry if your glaze looks grainy initially, just keep on whisking and it will turn glossy
- Top each tart with a generous teaspoon of the chocolate glaze and spread out to completely cover the caramel
- Add a pinch of sea salt to the top of each one or some sprinkles if desired and leave to set for around 45 minutes
- These tarts are best eaten on the day they are made but can be stored for 3-4 days in an airtight container
Notes
- If you are using store-bought pastry you will need a 450g block
- This pastry is easy to make but, because it contains a high proportion of butter, it needs a little extra attention. If it is not kept cold it will be too sticky to roll out. Therefore it is essential to remember the following points:
- chilled butter must be used to make it
- and, once made, the pastry must be chilled well before rolling out
- once the pastry is in the tart cases it must be chilled again before baking
- any pastry that needs to be re-rolled may need to be chilled again before doing so
- When it comes to blind baking the sweet pastry cases, cut circles of baking parchment big enough to cover the base and sides of each case. Press one into each case and fill to the top with uncooked rice
- Baking beans are too heavy for this pastry and will leave indentations. Using rice (e.g. long grain or basmati) works well though
- Bake for 10 minutes, then remove the rice and parchment and bake for 5 more minutes. By this time the pastry shells should be golden
- This is the only time the tarts will be in the oven, so ensure they are fully cooked before removing them
- If pastry making is not something you enjoy feel free to use either store-bought sweet pastry shells or use readymade shortcrust pastry (sweet if available)
- Use the best (heavy based) pan that you have and avoid using any pan that is non-stick as the high heat of the caramel can damage it
- Use a pan that is large enough. I usually allow my caramel to come no further than ⅓ of the way up the side of the pan.
- Do use white refined sugar. Golden or brown sugars make grainy caramel a more likely outcome. Trust me, I have tried several times to use golden caster sugar (thinking I was being smart) and ended up with a pan of substandard grainy gloop
- Try to spread the sugar evenly across the pan since this allows the caramel to cook more evenly.
- Do not stir. As the sugar melts you can gently swirl the pan a couple of times to redistribute the mixture and aid the even cooking. But stirring could render the caramel grainy
- Don't rush it. Allow the sugar to melt over a low-medium heat. Allow around 15-20 minutes to make a batch of caramel
- When you add the butter and cream be very carefully as the liquid may bubble up and splatter a little bit and it's totally normal for the caramel to clump together at this stage. Just keep cooking and stirring until it's smooth again
- Remember that caramel is extremely hot - take care and do not be tempted to taste as you cook (oo-oo-ouch)
- And on this note, I do not recommend letting children make caramel
- And finally, a confession. Even using the same pan, the same ring on the stovetop and the same brand of sugar, sometimes caramel just goes wrong. I've lost count of the times I've employed exactly the same methods and had my sugar crystalise part way through the melting period. Sadly, theres no salvage option to this. Nor is there a good explanation for it to have gone wrong if the caramel making rules are adhered to. It's best to just clean the pan and start again
- Using a 50:50 blend of milk and dark chocolate gives the perfect level of intense chocolate flavour coupled with sweetness for this recipe
- But you can use all dark chocolate for a more intense - some would say grown-up - flavour
- Similarly, if you have a very sweet tooth, you could opt of all milk chocolate
- Avoid using white chocolate though, as when combinaed with the sweet pastry and caramel the overall result is too sweet
- If using a microwave to melt the chocolate, do so carefully. It's best to use a medium heat and cook in 30 second bursts, stirring between each one. This ensures the chocolate does not burn. If it does burn it will become grainy and unuseable
- If, once the cream has been added your ganache looks grainy, beat it rapidly until smooth and shiny
- Should the ganache cool down too quickly and become hard to spread, simply reheat in the microwave (on a very gentle heat) in 10 second bursts, stirring between each one, until it is spreadable again
noah bishell says
unbelievable recipe, I would 100% recommend to anyone who wants a lovely sweet and succulent tart.
eddie sykes says
your a succulent tart
eddie sykes says
Hi Noah, I want to thank you for your review as it has introduced me to these amazing tarts. I bet you're a tart too
Jane Coupland says
Goodness Eddie - what do you know about Will that I don't.... I hope you know each other 😉
Glad you have had the pleasure of these little tarts - thanks for the review.
will proctor says
oooh ahhhh ooohh ahhh. this tart makes me go wild. Recommened bish as the top tart. Lost one star because hes from skegness.
Jane Coupland says
Now, now, one must not judge Skeggie-resies 🙂
Thanks for the review - glad you enjoyed them - seems Eddie did too.
Peter Russell says
Loved this crispy sweet pastry and I was very happy to have the caramel, that I had never tried to make before, work out really nicely thanks to your explicit instructions Jane.
The chocolate topping worked great in its preparation but created too sweet a combination in the mouth with the caramel for my taste and some others.
I really like the caramel in the tart and it is a great base for some imaginative toppings. I think I might try some chopped pecans with a tiny bit of Maldon Salt sprinkled in as I liked the salt on top of the chocolate as you had susuggested.
I thought that topping the caramel with Frangipane, as in your Mince Tarts version, would be a nice combination but of course this would have to be cooked so might mess up the caramel. Could you think of any way that this could be made to work … I really liked that Frangipani?
Jane Coupland says
Hi Peter, glad to hear you have been having success with the recipe even if the chocolate layer was too sweet for you. A few thoughts:
1. Swap some/ all of the milk chocolate to create a less sweet dark chocolate ganache for the top.
2. Add some chopped nuts to the caramel and finish them off with a drizzle of melted chocolate rather than the full ganache topping.
Regarding the frangipane idea, it could work! Once the caramel is in the tart chases I'd be tempted to chill (or freeze) them for an hour to firm up the caramel and then top with frangipane & bake.... I'd advise putting an old baking sheet/ layer of foil underneath your tin in cake the carmel oozes out - life is too short to clean up caramel from the oven floor :). If you try it let me know how you get along, though may have to give it a go myself - thanks for the idea.
Peter says
Thanks for addressing the frangipane idea Jane …. Your suggestion awaits a trial.
I did use the Pecans and salt idea and it worked well. I did a batch in Mini tart tins and found the smaller amount of caramel was a nice option … after all, you can always have 2 ( or 3 or ?? )
Seeva Thiagarajah says
easy chocolate recipe follow the chef for details.
Jane Coupland says
Thanks Seeva - glad you enjoyed them.
Dini @ The Flavor Bender says
I am one of those who will be cheering Jane! I LOVE caramel and what an amazing recipe!! I can't wait to try this 🙂 I can't wait to check out the rest of the caramel recipes!
Thank you for sharing this with us at #SaucySaturdays!
Jane Saunders says
Thanks Dini - I'll hurry up with those other recipes. It's a tough life having to test out all these caramel recipes 🙂
Diane says
Don't these looks scrumptiously naughty! Love the caramel and chocolate in these cute tarts!
Jane Saunders says
Thanks Diane - they are cheekily naughty 🙂
Monique says
Thank you for this beautiful recipe Jane..
Love the pics..and the dough is calling me..even for butter tarts!
Jane Saunders says
Thanks Monique. You and I seem to think the same way when it comes to tarts - enjoy.
Monique says
It's me again Jane:)
For these tarts..I see the importance and necessity of blind baking..but you have used this dough for regular pies?That you don't blnd bake?
Thank you..cannot wait to try it as I have 00 flour~:)
Jane Saunders says
Hi Monique. I've used this recipe for large tart cases for which I always bake blind. I have used it for small individual mince pies and it's been great - I haven't blind baked, but I did ensure I put the filled pies in the fridge to firm up before baking. I've never thought to use it for say, a large fruit pie. I'm wondering whether the inability to blind bake and a wetter filling for such a pie might cause issues - it's a very delicate pastry. I think it may not be suitable - may have to experiment now to fnd out 😉
Monique says
thanks Jane..I am going to try..at least a few butter tarts:)