
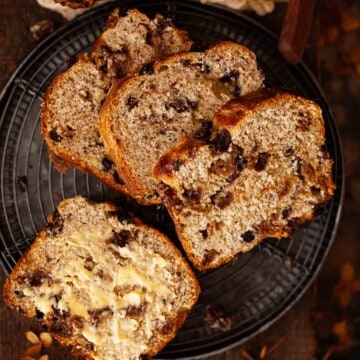
Homemade Coffee Date Rye Bread is worth taking your time over. Enjoy it fresh and thickly sliced. A dab of butter is all it needs. The combination of sweet dates, bitter coffee and sour rye makes a great simple breakfast.
Try a slice for breakfast with a cheeky gingerbread latte or cinnamon bun latte alongside it.

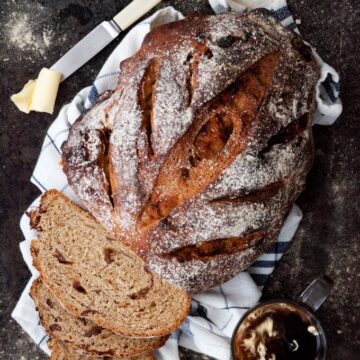
One of my guilty pleasures at the weekend is homemade bread slathered in cold, slightly salty butter. If that bread is slightly on the sweet side, I say all the better. Weekends are my time to relax the healthy eating a little. This Coffee, Date Rye Bread fits the bill perfectly. It is just the right side of sweet, with a bitter hint of coffee and a smidgen of sharpness from the rye. This loaf can wake me up any Saturday morning it pleases.
I like to enjoy my Coffee Date Rye Bread as fresh as possible and just as it is... plus that lick essential of butter. The loaf is large so there's often a little left over for the next day. I toast a few slices on day 2, so that I can marvel at how the heat of the toaster transforms those dates into soft, squidgy nuggets of sweet goodness.

If you want all-out doughy indulgence at breakfast, go for my lemon rolls.
And if you enjoy making dough, then take a look through my collection of bread recipes. You'll find Cheesy Jalapeño Beer Bread, Cinnamon Cherry Tea Bread and my Lincolnshire plum loaf. They are all beautiful loaves. And for the ultimate sweet indulgence, take a look at my easy jam doughnuts - go on, I dare you.
Making bread at home
Making bread at home can seem a little intimidating, but really there is no need for it to be something sinister.
Confession: I dabbled in bread making in my late teenage years. I was young (sigh) and had absolutely zero knowledge or experience of bread making. I don't think I even had bread flour (so naïve). Obviously, I ended up with a lump of heavy, barely edible carbohydrate loosely labelled as 'homemade bread' if anybody was brave enough to ask me what it was.
For close on 2 decades I ignored homemade bread. I was happy. But then one Christmas, about 6 years ago, I unwrapped a bread making machine. I was instantly and unexpectedly thrilled and immediately found it a home on my kitchen worktop.
This machine sat there proudly kneading and baking loaf after loaf of great bread for about 6 months. But then someone confessed that they were not completely happy with the way the machine baked the bread. Eh?!?!?!? That someone was relentlessly fussy when it comes to bread. It has to be spot on.
Hmm… for another 6 months I let the machine do the mixing and kneading of the dough and taking it through the first rise. But then I'd set an alarm, whip that dough out of the machine, knock it back, shape it, prove it and bake it in the oven. Phew.
I was a mug.
But then I got impatient with this machine. Not only was it taking up valuable space in my kitchen, it was taking me more time to programme the machine than was worth the effort... I would get brain ache trying to calculate the times in my head whilst simultaneously serving breakfast to my pre-schoolers, unloading the dishwasher, setting the washing machine going... you know the drill.
So I started making bread by hand. After all, that is the way I like to do things in my kitchen anyway.
After a few months of inactivity, the breadmaking machine took a one-way ticket to the charity shop. But I remain thankful for that gift. It was a present from the heart and without it, I would not have got around to mastering homemade bread. And I doubt very much if this Coffee Date Rye Bread would have evolved if I'd carried on with the bread making machine. It's so much easier to gauge the dough when you are actually in contact with it.
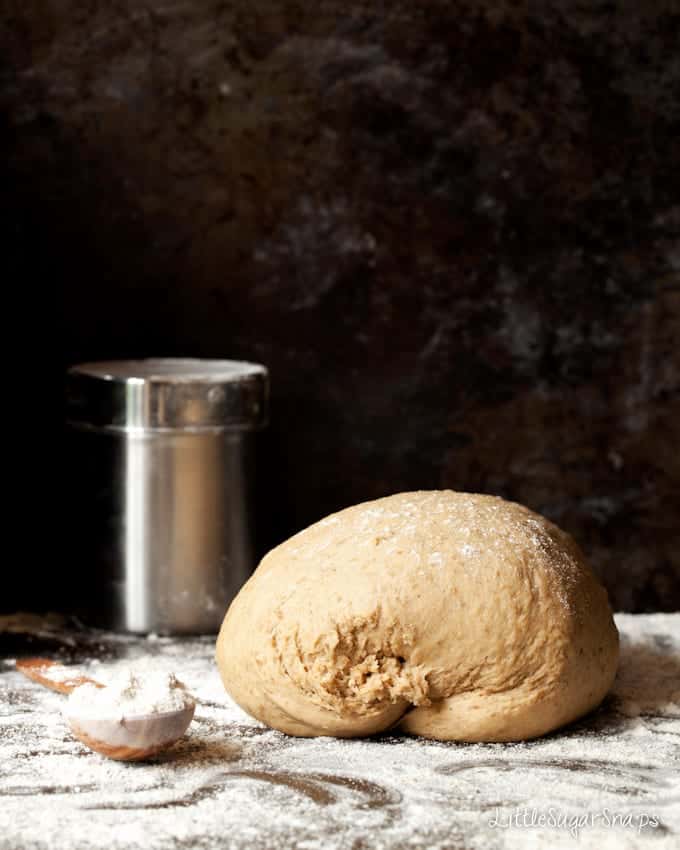
Homemade bread is a labour of love, but one that is worth the effort. My advice to anybody new to breadmaking is not to rush it:
- Knead until the dough is smooth and elastic (about 10 minutes). Don't take shortcuts and don't think 2 or 3 minutes must surely be enough. It is not. I love to feel the dough changing consistency as I knead it. And it's actually quite a therapeutic thing to do if you're feeling a little hacked off
- Allow plenty of time for the dough to rise. In the winter I can leave dough for 3-4 hours on the first rise and a further 1 ½ hours to prove. The bonus is that the longer the dough takes to rise the better the flavour
- Ensure that the bread is cooked throughout before you turn off the oven. You can either give the base a firm thump with your thumb and listen for a hollow sound or take the internal temperature of the bread using a probe thermometer. Most breads are cooked when the temperature hits 90C/190F. (For more information visit The Kitchn)
- For a crisp, crusty top create some steam in the oven. Fill a preheated roasting tin with water and placing it on the bottom shelf of the oven as the bread bakes. Once the loaf is cooked, turn off the oven, leave the oven door ajar and let the bread cool completely in the oven
Whether you are a first time breadmaker or Olympic champion, enjoy taking your time over this Coffee Date Rye Bread.
More recipes featuring dates


Have you made this coffee, date and rye bread? Please let me know if you enjoyed it by leaving a review below.
Please add us as a trusted site on Google so that our recipes show up more in your searches!
Stay in touch: sign up to receive LittleSugarSnaps newsletters to hear when new recipes are published. Or follow me on social media:
📖 Recipe
Coffee Date Rye Bread
Ingredients
- 400 g/ 3 ⅓ cups Strong bread flour
- 100 g/ ¾ cup Rye flour
- 1 ½ teaspoon Salt
- 1 teaspoon Ground ginger
- 2 teaspoon Quick action yeast
- 30 g/ 2 tablespoon Caster sugar
- 320 ml/ 1 ⅓ cups Tepid whole milk (or 50:50 milk and water)
- 30 g/ 2 tablespoon Butter - softened
- 30 ml/ 2 tablespoon Very strong espresso coffee - cold
- 150 g/ ⅞ cup Dates - chopped
Instructions
- Put the flours, sugar and ginger into a large mixing bowl and stir to combine
- Add the salt, yeast and butter, then pour in the cold espresso coffee and ¾ of the milk
- Stir with your hands to form a dough, adding more of the milk as required - the dough should be soft and not flaky, but it should also not be too wet or sticky
- Tip the dough onto a lightly floured worktop and knead for 10 minutes until smooth and elastic (or use the dough hook attachment on your mixer)
- Put the dough into a clean bowl and cover with a clean tea towel. Leave to rise until doubled in size (approx 1-2 hours depending on how warm your kitchen is)
- Knock back the dough in the bowl using your fist and then tip it onto a worktop. Flatten it out to a rough rectangle, scatter the chopped dates over it, fold it up and knead for a few minutes to distribute the fruit throughout the dough
- Shape the dough into a round or an oval. Lay it onto a floured baking sheet and put it inside a large plastic bag to prove for another hour or so until nearly doubled in size
- Meanwhile, heat the oven to 220C/ 425F/ GM7 and put a roasting tin into the bottom shelf
- Slash the top of the loaf with a very sharp knife (or a razor blade) and sprinkle with a little flour
- Put the loaf into the oven and at the same time fill the baking tin with water
- Cook for 20 minutes then turn the heat down to 200C/ 400F/ GM6 and bake for another 5-7 minutes until the loaf sounds hollow when tapped underneath
- Leave the loaf in the oven, but turn off the heat and let the bread cool down in the oven with the door ajar
- Eat as soon as possible and within 3 days


Karen says
I have made this bread a few times now. It is absolutely delicious! Positively addictive!
Jane Saunders says
Thankyou Karen - so pleased you enjoy it. I haven't made it in a while, so thanks too for the reminder that I really should!