
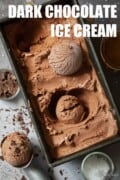
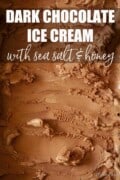

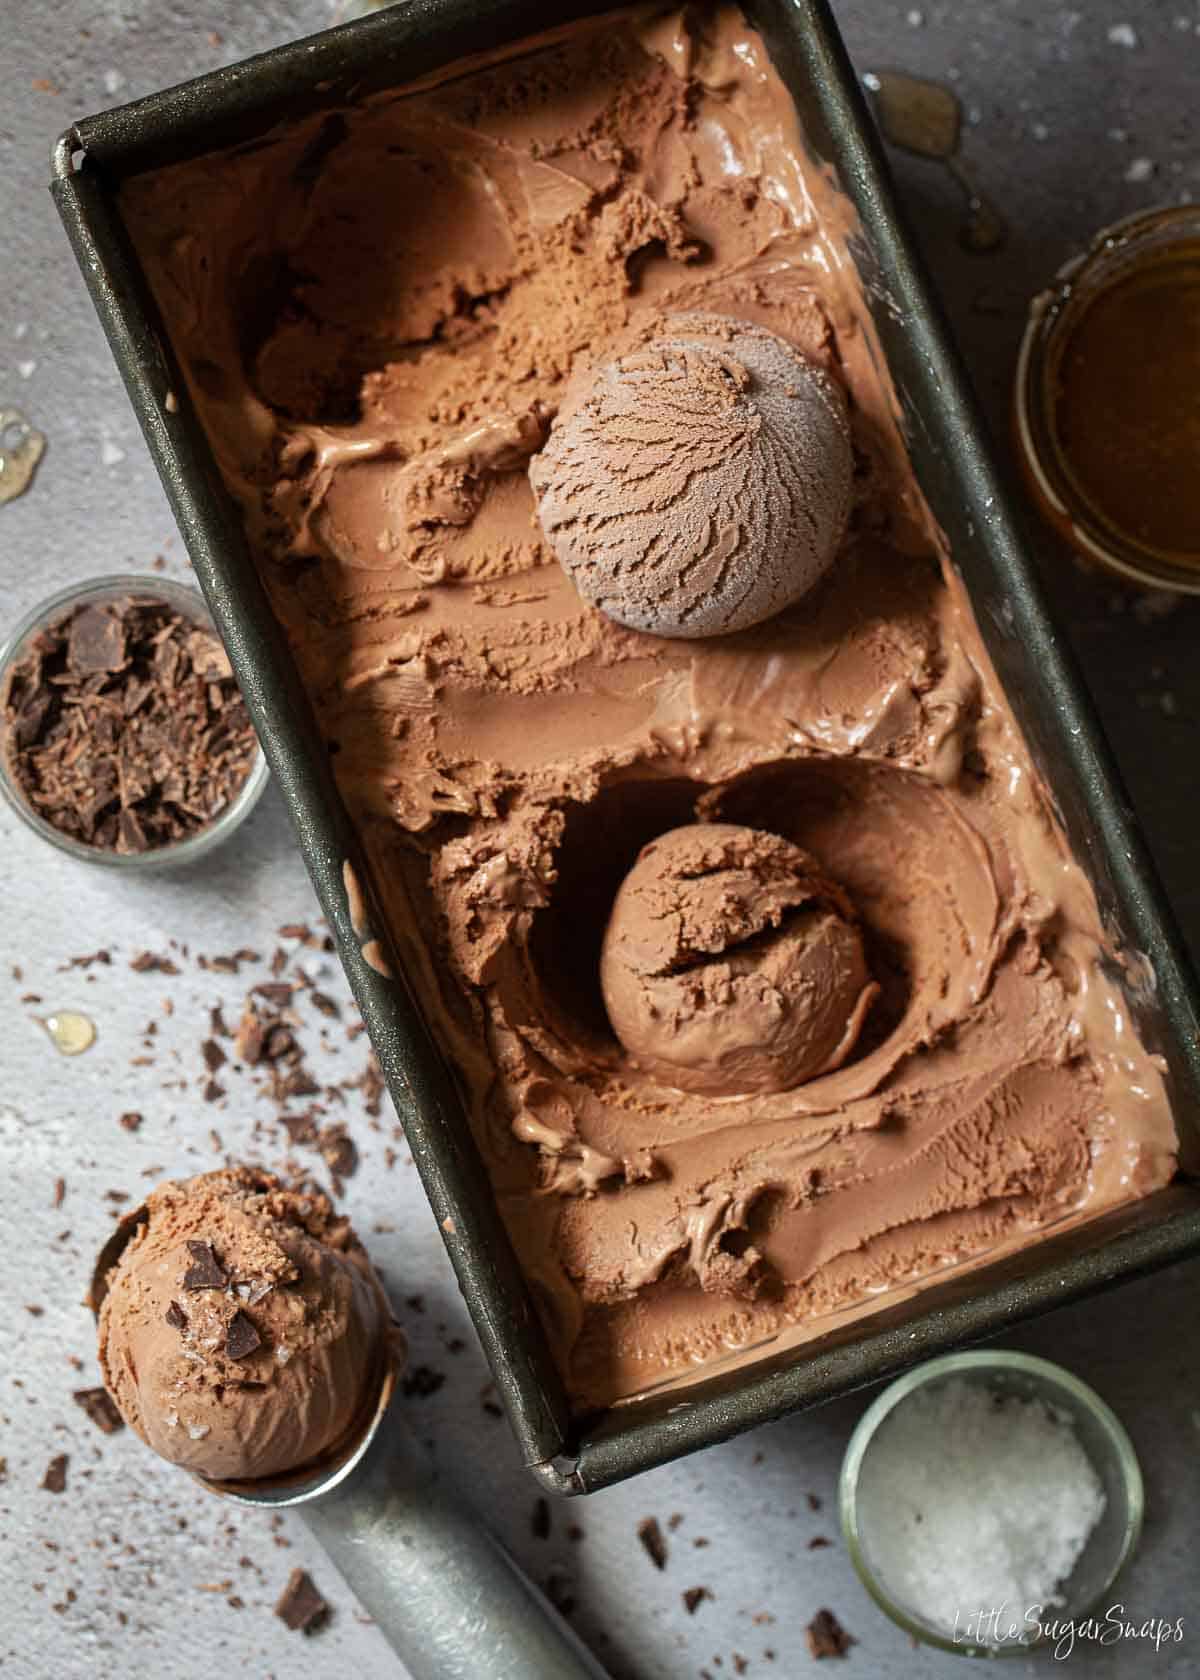
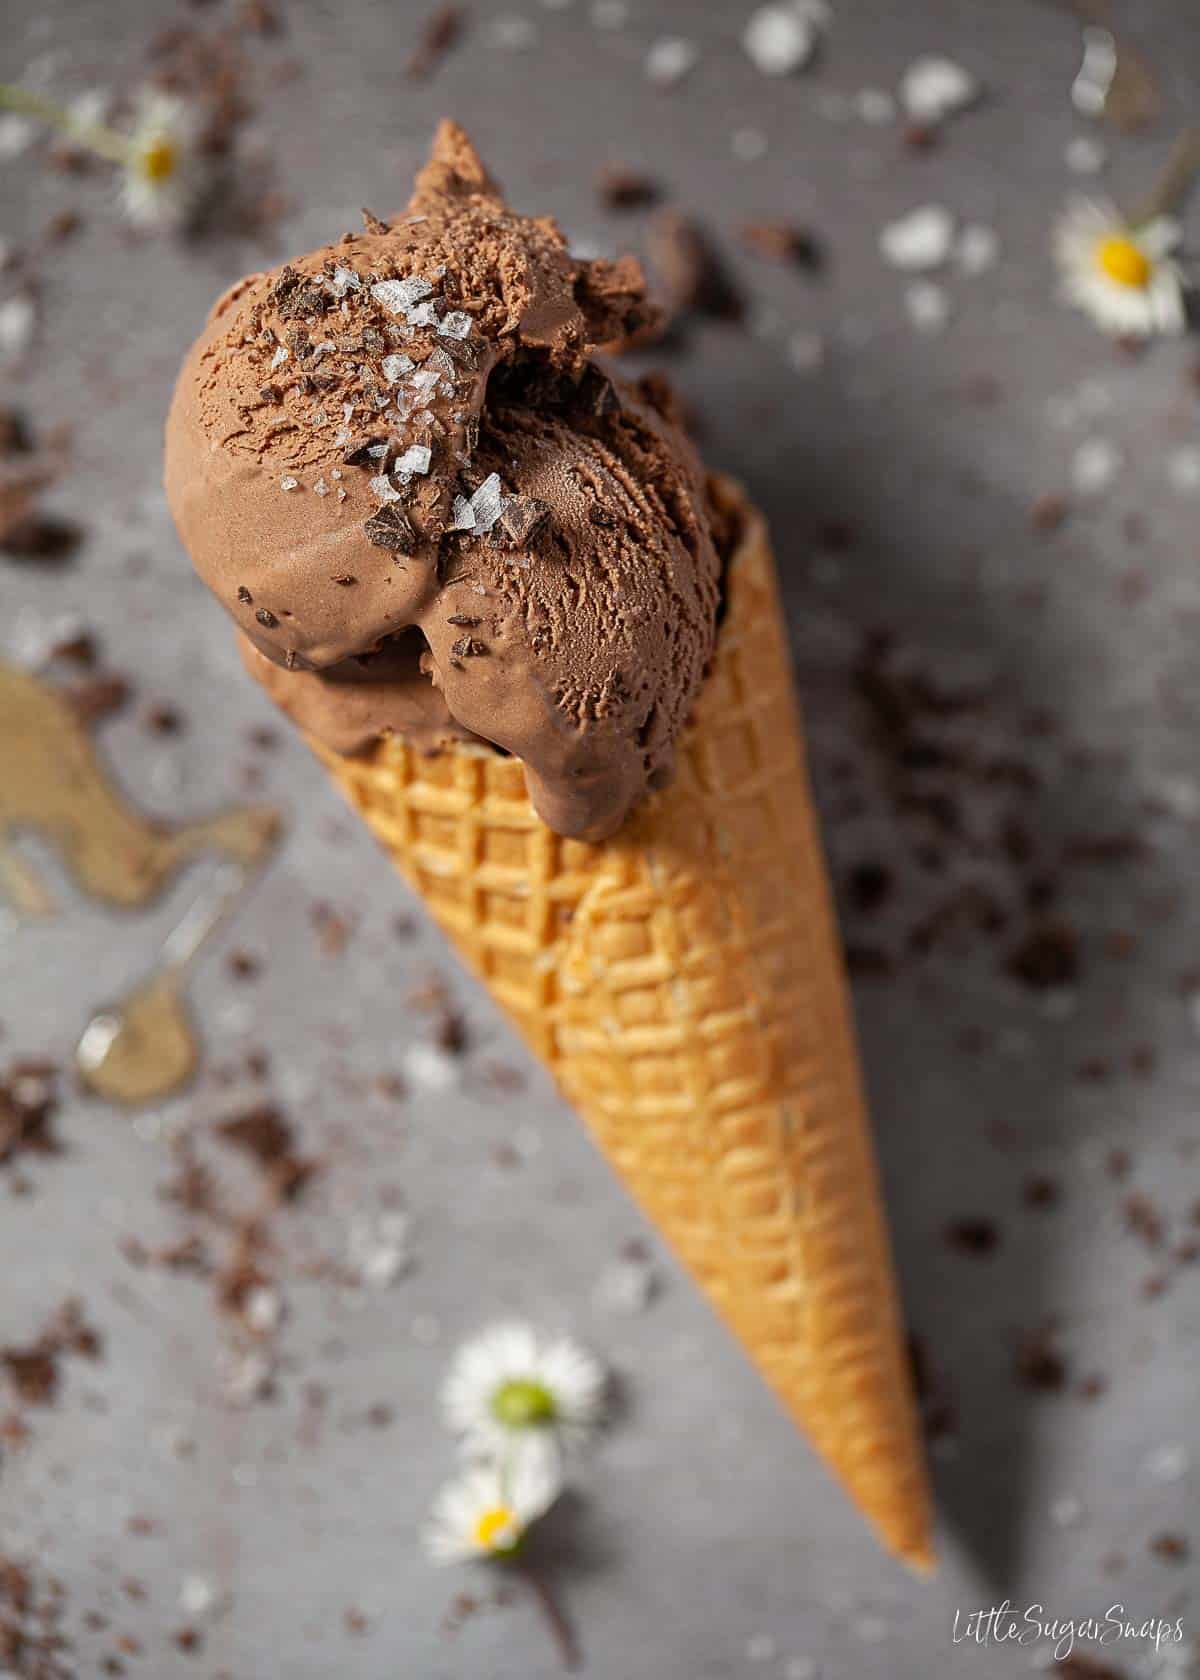
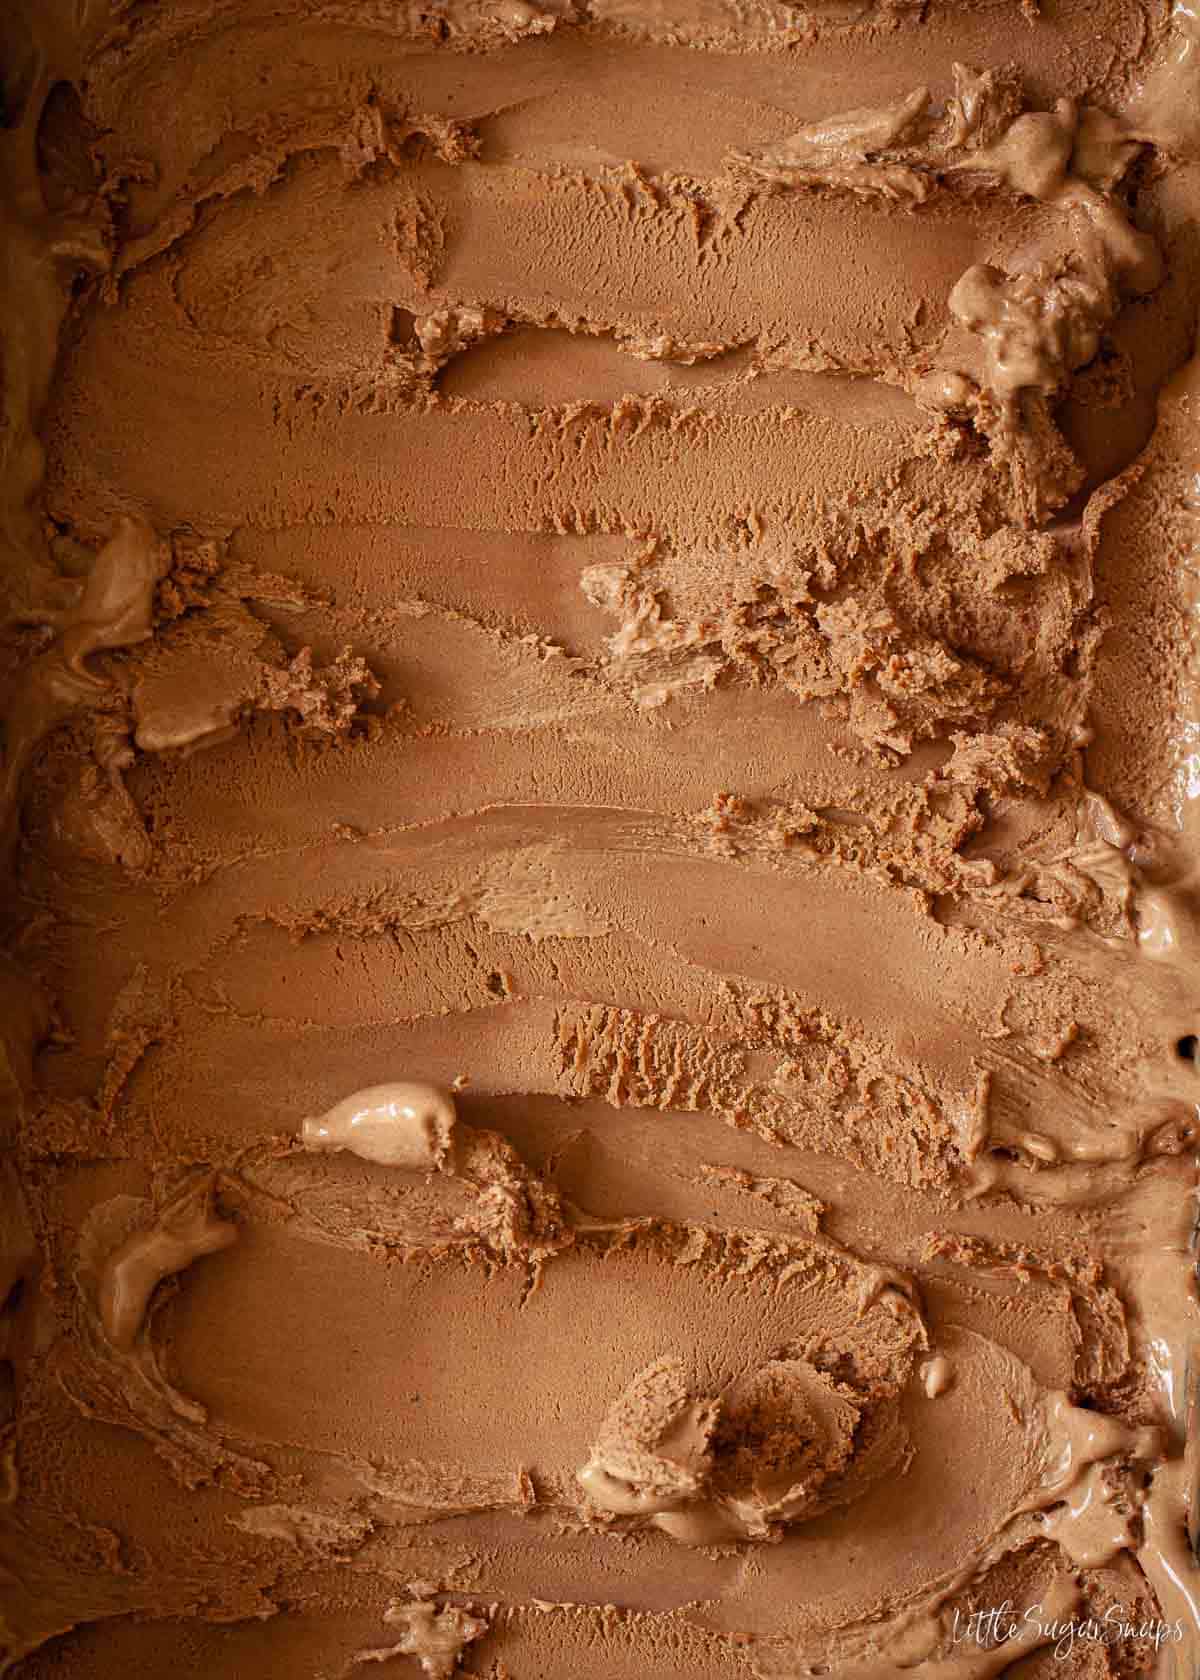
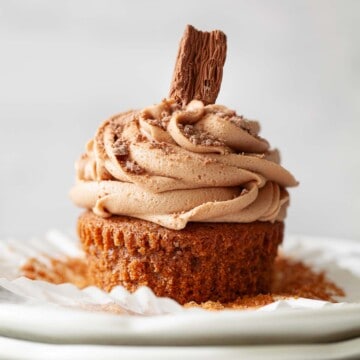
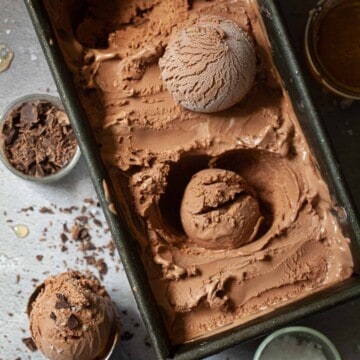
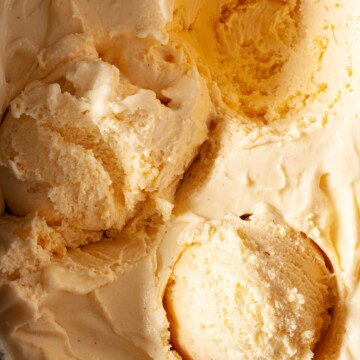
Dark chocolate ice cream amplified with honey and sea salt is a bit of a frozen revelation. Expect intensely rich and bold flavours in this double chocolate ice cream, combined with a mellow sweetness and an enviably creamy texture. Best of all, it can be scooped straight from the freezer - waiting around for it to soften is not necessary.
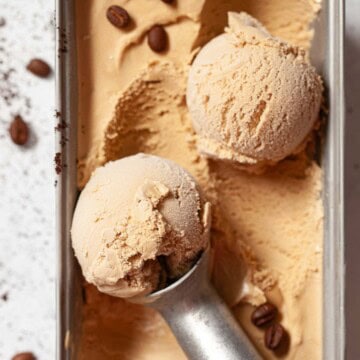
This flavour would partner well with my Bounty ice cream in a sundae-style dessert.
Jump to:
This recipe for dark chocolate ice cream featuring honey and sea salt has been on my agenda for several years. It's a spin-off from my hugely popular salted honey ice cream.
Let me assure you, this chocolate ice cream is just as impressive as my first dalliance with salt, honey and ice cream.
Expect an explosion of flavour from this frozen treat. If you think you know what to expect from a dark chocolate ice cream recipe, then think again. This one re-writes the rule book. It's incredibly rich, intense in chocolate flavour, mellow and utterly remarkable.
And that's just the taste. It's also sublimely smooth, creamy and scoopable straight from the freezer. That's right, there's no waiting around for this baby to soften up. The honey works a little magic to make the texture perfect for serving without having to wait around.
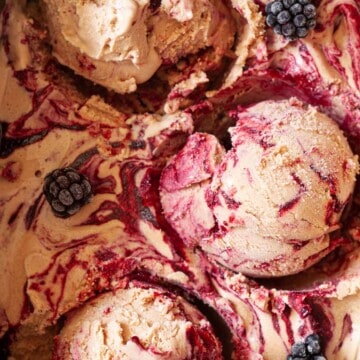
Looking for more unusual ice cream recipes? I've got Stroopwafel ice cream, roasted pineapple ice cream and Nutella ice cream with blackberry ripple. Find these, plus many more, in my full collection of unique & delicious ice cream recipes.
Why you'll love this dark chocolate ice cream
I think I've talked up this recipe enough already, but in case you're wondering why I'm raving so heartily about it, let's just clarify:
- It's particularly creamy and smooth.
- With a wonderfully bold chocolate flavour thanks to the use of 70% cocoa dark chocolate.
- It's really a double chocolate ice cream as it contains both cocoa powder and chocolate.
- The use of honey rather than sugar keeps this ice cream soft enough to scoop straight from the freezer.
- And the sea salt elevates both the dark chocolate and the honey to an entirely new level.
- It can be made with or without an ice cream maker.
All-in-all, this double chocolate ice cream is quite different to most chocolate ice creams. And it has plenty of brazen attitude it likes to impress you with. Without a doubt, this is the best chocolate ice cream I've ever tasted (and I've tasted plenty).
Ingredients notes
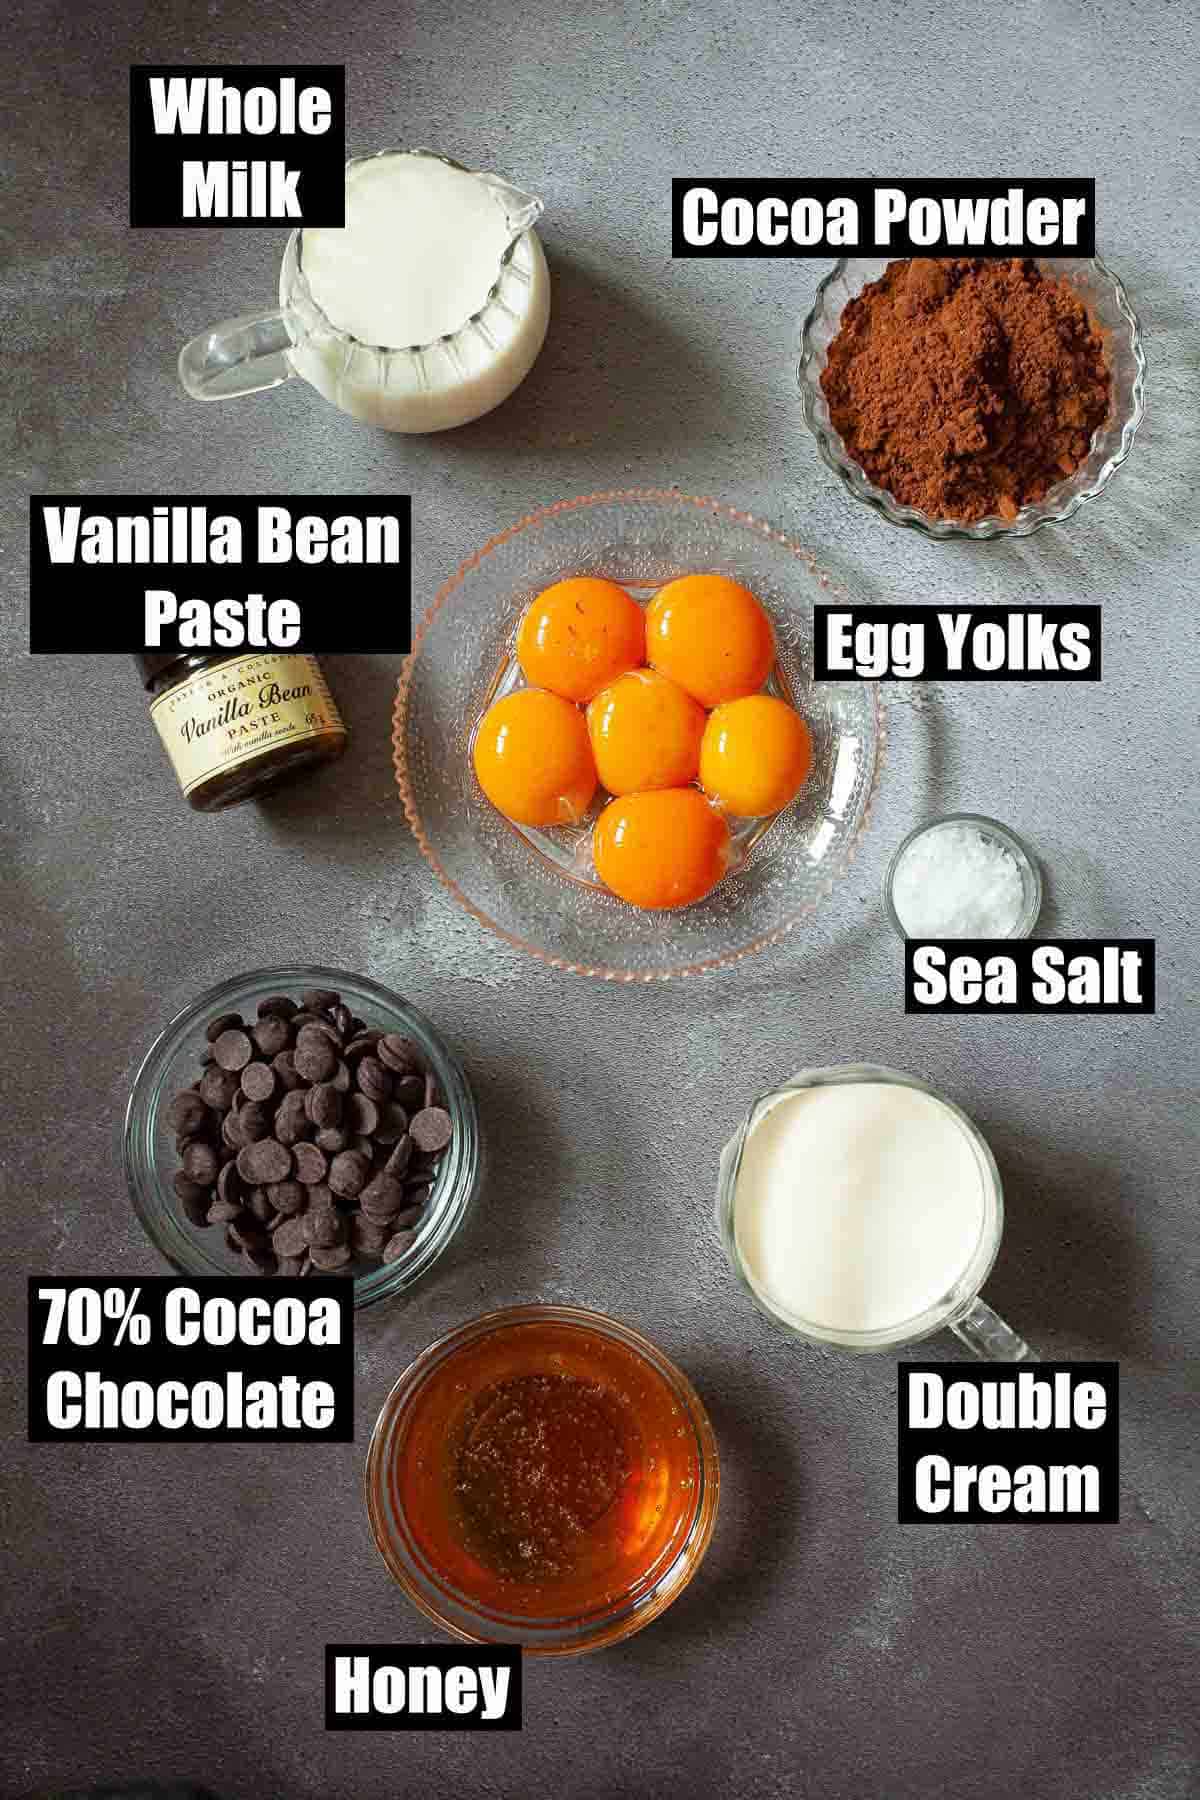
Chocolate: go for quality dark chocolate with a minimum of 70% cocoa solids. I used Callebaut Belgian chocolate but think along the lines of Green & Blacks or Lindt too.
This is not the place to use milk chocolate as the resulting ice cream will be far too sweet. It's the blend of intense dark chocolate with honey and sea salt that makes this double chocolate ice cream so spectacular.
Honey: the use of honey and no other sugar in this double chocolate ice cream helps to create a smooth and soft texture. Honey gives extra body and creaminess to the ice cream whilst also lowering its freezing point. This means that it doesn't freeze rock solid but is instead scoopable when pulled straight from the freezer. (That's either blissful or incredibly dangerous news, depending on your willpower).
Use any runny honey. It doesn't have to be fancy, although if your budget stretches, there's no harm in upgrading this ingredient.
Sea salt: use only sea salt flakes. Do not use table salt. Sea salt is grainier in texture and so a teaspoon of table salt is not the equivalent of a teaspoon of sea salt flakes.
Egg yolks: these help to thicken the custard base and add richness & smoothness to the ice cream. I've used 6 in this recipe to work alongside the very dark chocolate.
Double cream: this UK cream has a high fat content (around 48%). Readers elsewhere in the world should use a cream with an equivalent level of fat.
Step by step instructions
There is nothing particularly challenging about making this dark chocolate ice cream recipe. There are really two stages to making it:
- Make & chill the custard base.
- Add the cream and churn it.
Although I recommend churning using an ice cream maker for the very best of results, I've also included instructions for churning by hand should you not own a dedicated ice cream machine.
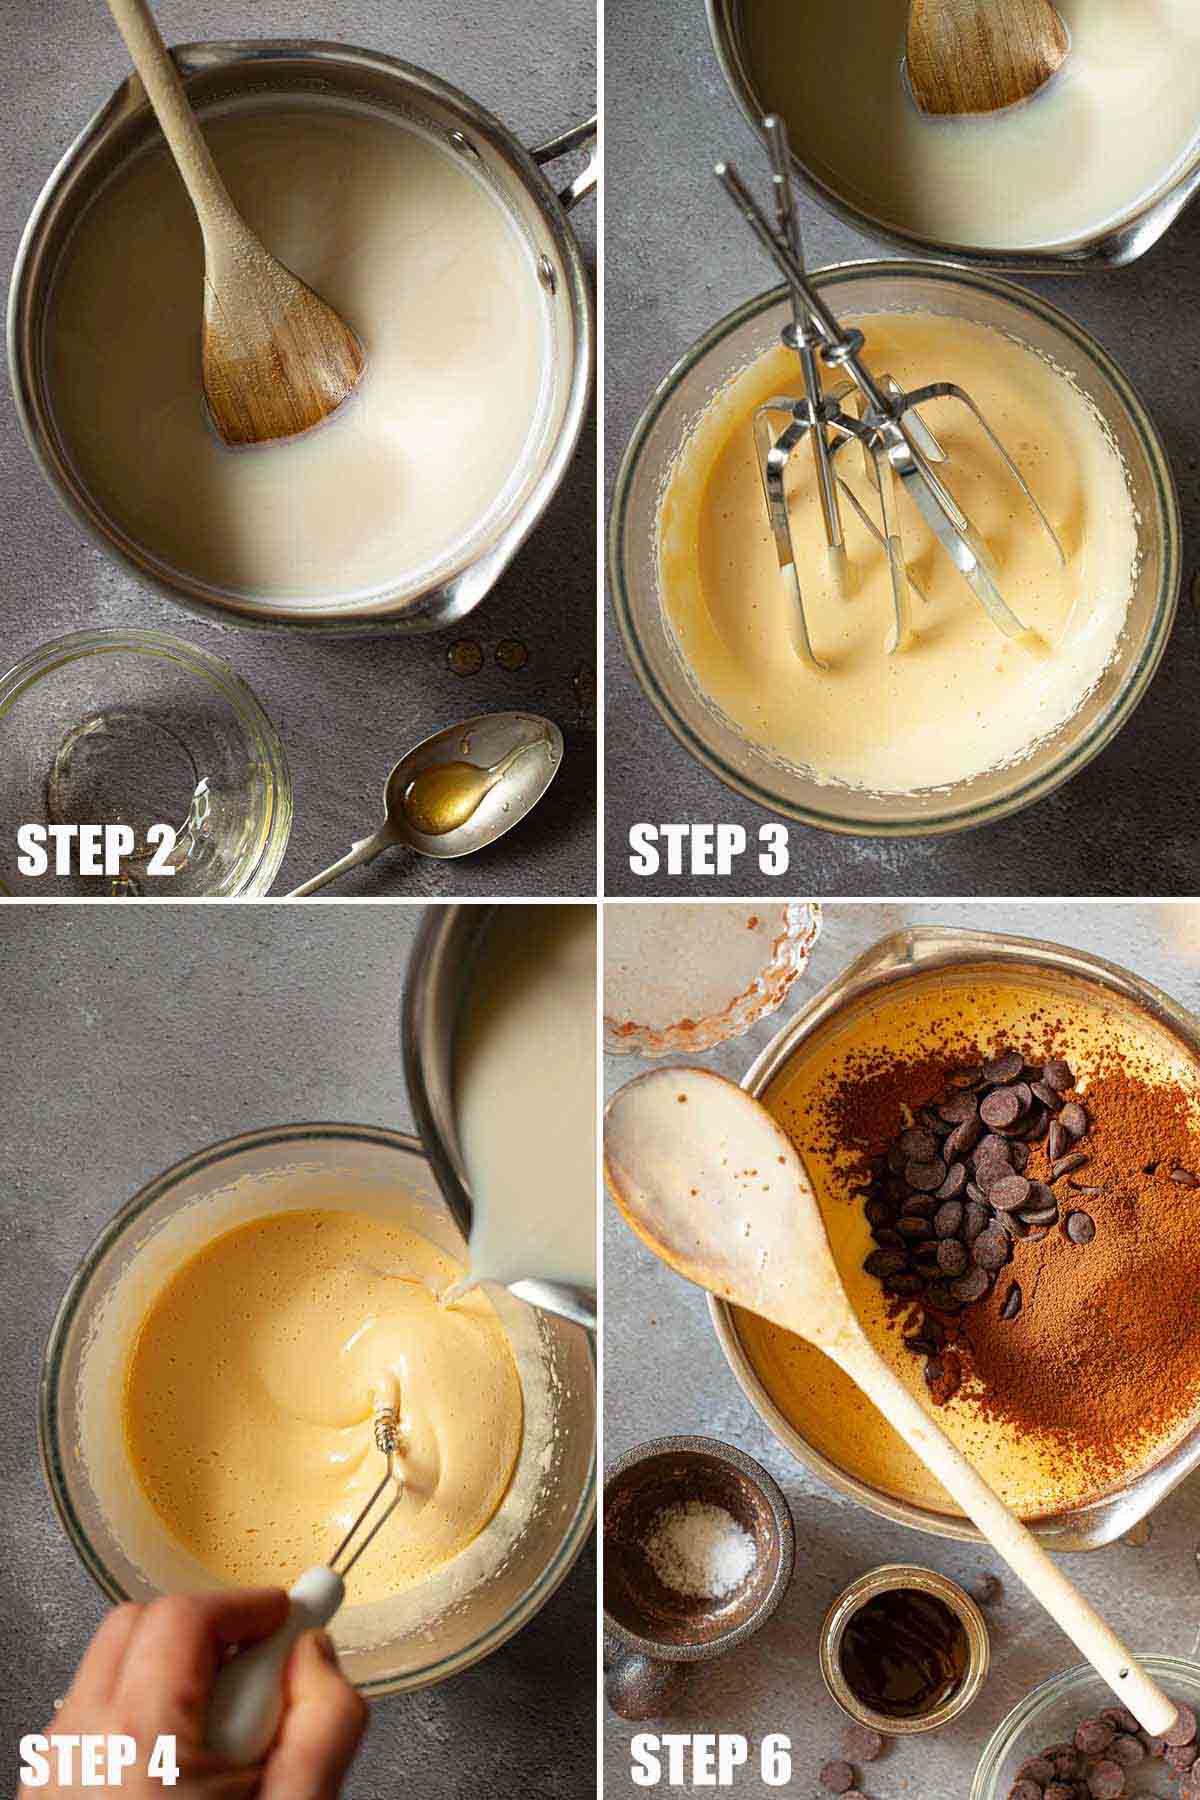
Make the custard
- Crush the salt in a pestle and mortar.
- Gently heat the milk and honey in a medium-sized pan to melt the honey. Continue to heat to scalding but don't let it boil.
- Meanwhile use electric beaters to beat the egg yolks & vanilla bean paste together until pale and thick (about 3 minutes).
- Pour the hot milk onto the egg mixture slowing, beating constantly.
- Next, pour the custard into the saucepan and cook on a low heat, stirring constantly until thickened.
- Once the mixture coats the back of a spoon, take off the heat and add the salt, cocoa powder (sieved) and the chocolate. Stir until melted and combined.
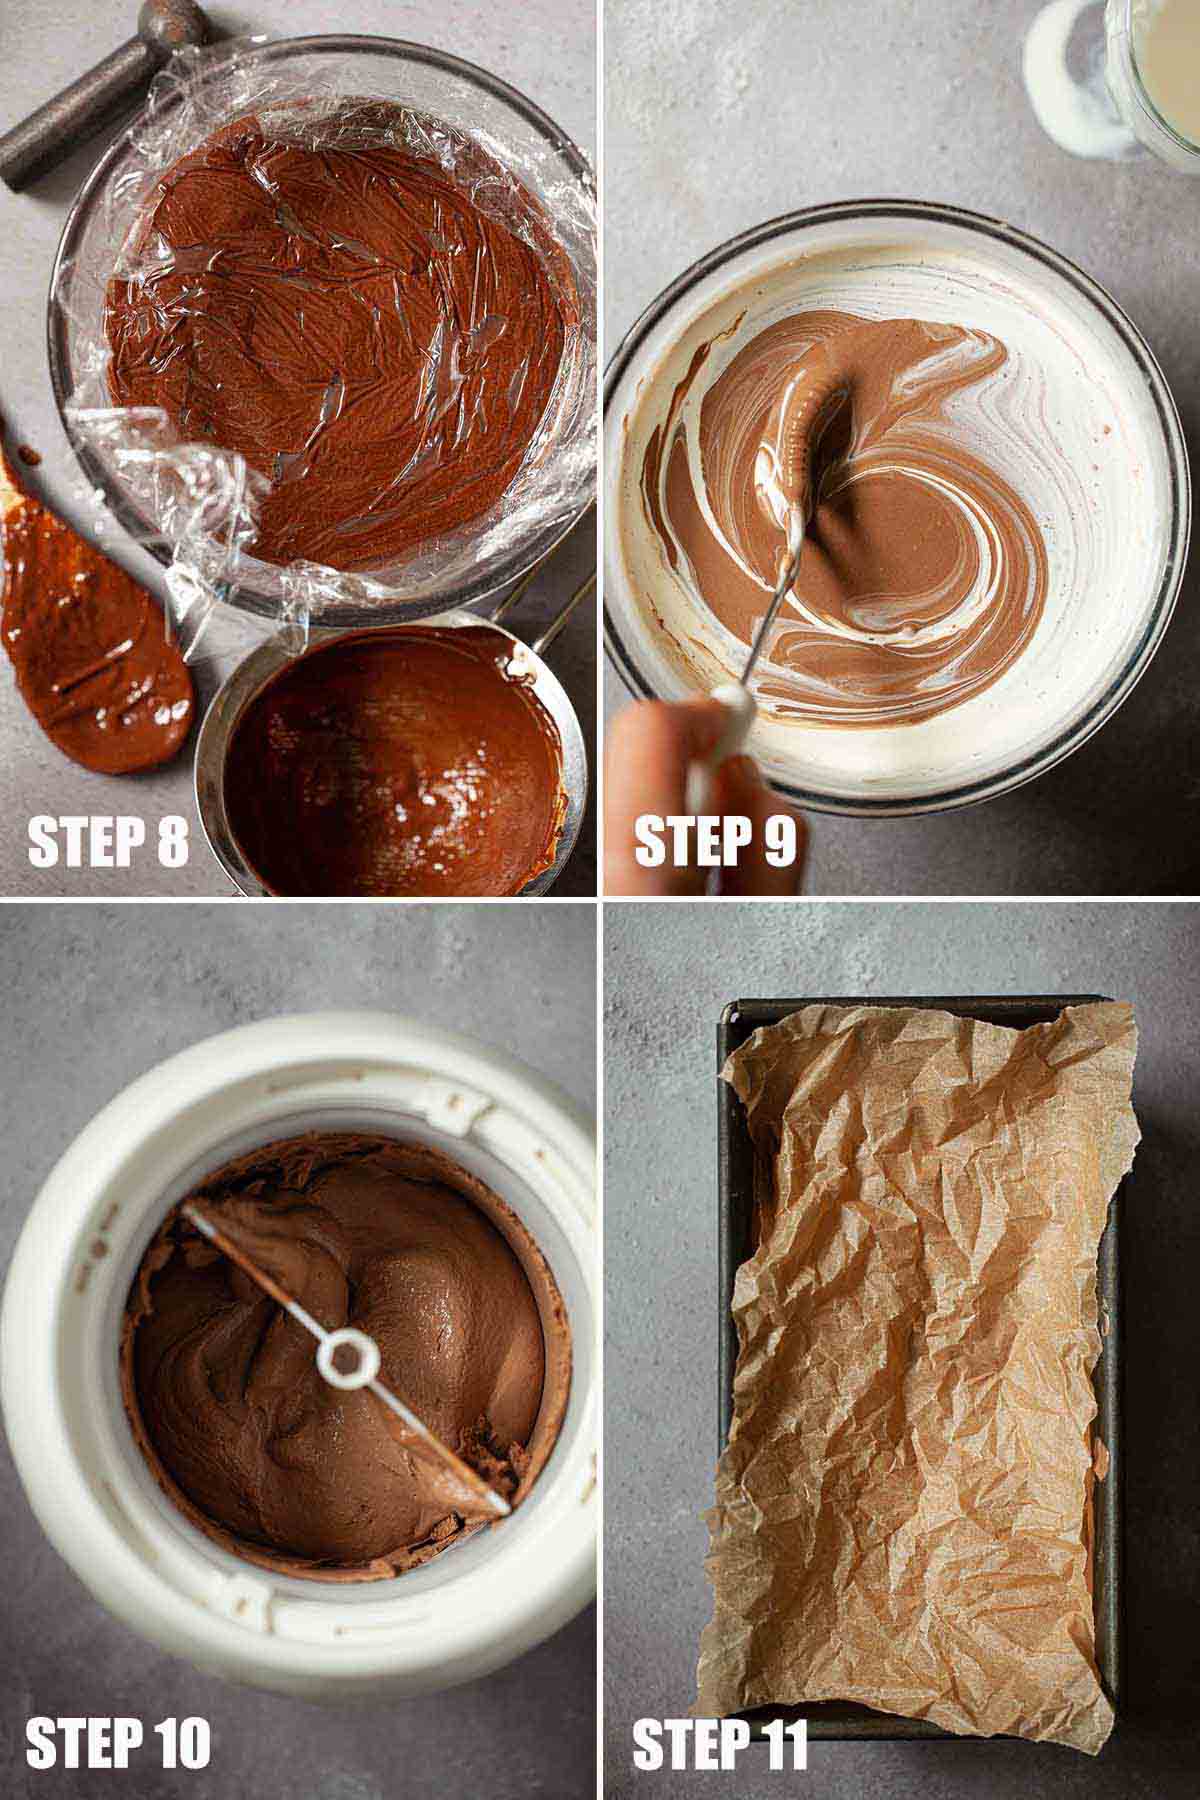
- Strain through a sieve into a clean bowl.
- Cover with a layer of clingfilm (to stop a skin forming), let cool, then chill for at least 6 hours (but preferably overnight).
- When ready to churn, pour in the double cream and stir well.
Churn using a machine
- Pour the custard base into the ice cream maker and churn according to the manufacturer's instructions.
- Once fully churned either serve straight away (soft-set) or transfer to a freezer-proof container, cover with parchment and freeze for several hours until firm.
Churn by hand
- Pour the ice cream into a large freezer-proof bowl, cover and put it in the freezer for 1-1½ hours. The sides should be beginning to freeze, but the centre will be soft and slushy.
- Remove from the freezer and use electric beaters to beat the ice cream until the ice crystals are uniform. Cover and place back in the freezer.
- Repeat this process 6-8 more times at ¾ - 1-hour intervals. The more times you are able to repeat this process, the better the texture of this dark chocolate ice cream will be.
- Once fully churned transfer to a freezer-proof container, cover with parchment and freeze for several more hours until firm.
Expert tips
Top Tip: When making any homemade ice cream always ensure both the churning bowl of your ice cream maker and the custard base are sufficiently frozen/ chilled before churning begins.
- Provided your churner can handle the extra volume the recipe can be doubled.
- If churning by hand it's best to make the custard base and let it chill overnight before starting the churning process the next morning. This leaves plenty of time to fit in 6-8 churns with electric beaters.
- And if churning by hand, set a timer between each churn to ensure it is not left too long between each churn.
- Put the container that you intend to store the churned ice cream in into the freezer before churning begins. Putting the ice cream into a chilled container rather than one at room temperature means the ice cream will melt less at the point of transfer.
- Cover the top of the ice cream with parchment to help stop ice crystals from forming in the freezer.
- Eat within 2 weeks to enjoy this double chocolate ice cream at its prime. It's still safe to eat after this time but the flavour and texture may begin to deteriorate.
Frequently asked questions
Ice crystals in ice cream turn an otherwise decadent treat into something quite gritty and disappointing.
Manufacturers use high powdered machines to freeze ice cream quickly, resulting in very small ice crystals and enviably smooth ice cream. At home, the process is not so straightforward. Even with a dedicated ice cream maker, there is an art to creating perfectly smooth ice cream.
Stick to the following rules to ensure that your homemade dark chocolate ice cream is not blighted from the outset by grainy ice crystals:
1. Ensure your freezer bowl is properly frozen. Aim for at least 24 hours in the freezer ahead of churning your ice cream.
2. Ensure your mixture is sufficiently chilled prior to churning. It really is better to make the base the day before, then leave it to chill overnight in the fridge, ready to churn the next day.
3. Put the container you intend to store your ice cream in once churned into the freezer 30 minutes before churning commences. This ensures that the ice cream is put into a chilled container, so will melt less
4. Once churned, work swiftly to transfer your ice cream to the freezer as quickly as possible. Doing so will help maintain the small size of the ice crystals.
Homemade ice cream should always be stored in the coldest part of the freezer. That's usually the bottom since hot air rises.
To avoid freezer burn lay a sheet of greaseproof paper over the top of the ice cream, even if it is stored in a container with a lid.
The shelf life of homemade ice cream is short. Aim to eat it up within a couple of weeks. When freshly churned any ice crystals present in the ice cream are small, but over time these grow, so the consistency does deteriorate over time.
The egg yolks in this recipe are cooked. First, they are tempered. This means that hot milk is poured over them whilst they are whisked briskly to raise their temperature. They are then cooked to around 70-75C (158-167F) to thicken the custard base. This is the temperature at which egg yolks are considered safe to eat.
Readers in the UK with lingering concerns about the safety of eating ice cream containing egg yolks are advised to use eggs with the British lion mark. Readers elsewhere in the world should use pasteurised eggs.
And of course, anybody with specific health conditions or concerns should follow advice from their doctor.
Variations
There are a few ways to take this dark chocolate ice cream recipe if you fancy ringing the changes:
- Make it very dark by using Dutch cocoa powder instead of standard cocoa powder. Dutch cocoa powder is darker and richer in colour than typical cocoa powder.
- Toss 2 tablespoon finely chopped chocolate in at the last moment of churning. I really enjoy adding in dark chocolate.
- Alternatively, try finely chopped white chocolate for visual contrast and flavour.
- Chopped hazelnuts add in a great flavour too. Again, around 2 tablespoons will be plenty.
- Go fancy by finely chopping Stroopwafel cookies and stirring them through at the end.
More chocolate recipes
Here are a few of my favourites from my extensive selection of chocolate recipes.

Have you made this dark chocolate ice cream recipe? Please give the recipe a rating or leave a comment - I love to hear how you get along with my creations. And of course, if you have a question, just drop me a line and I'll do my best to help you out.
Stay in touch: sign up to receive LittleSugarSnaps newsletters to hear when new recipes are published. Or follow me on social media:
📖 Recipe
Dark Chocolate Ice Cream
Equipment
- 1 1.1litre ice cream churner preferred (but can be made by hand)
Ingredients
- 250 ml Whole milk
- 150 ml Runny honey
- 6 Egg yolks large, free-range
- 1 teaspoon Vanilla bean paste
- 100 g Dark chocolate (70% cocoa solids) or higher cocoa solids for a more intense flavour
- 30 g Cocoa powder
- 1¼ teaspoon Sea salt flakes
- 250 ml Double cream or equivalent with approx 48% fat
Instructions
Make the custard base
- Crush the salt in a pestle and mortar.
- Gently heat the milk and honey in a medium-sized pan to melt the honey. Continue to heat to scalding, but don't let it boil. Stir frequently.
- Meanwhile use electric beaters to beat the egg yolks & vanilla bean paste until pale and thick (about 3 minutes).
- Pour the hot milk onto the egg mixture slowing, beating constantly.
- Next, pour the custard into the saucepan and cook on a low heat, stirring constantly with a wooden spoon until thickened enough to coat the back of the spoon.
- Take off the heat and add the salt, cocoa powder (sieved) and the chocolate. Stir or whisk with a handheld whisk until melted and combined.
- Strain through a sieve into a clean bowl.
- Cover with a layer of clingfilm (to stop a skin forming), let cool, then chill for at least 6 hours (but preferably overnight).
- When ready to churn, pour in the double cream and stir well. Do not whip the double cream first.
Churning by machine
- Pour the custard base into the ice cream maker and churn according to the manufacturer's instructions.
- Once fully churned either serve straight away (soft-set) or transfer to a freezer-proof container, cover with parchment and freeze for several hours until firm.
Churning by hand
- Pour the ice cream into a large freezer-proof bowl, cover and put it in the freezer for 1-1 ½ hours. The sides should be beginning to freeze, but the centre will be soft and slushy.
- Remove from the freezer and use electric beaters to beat the ice cream until the ice crystals are uniform. Cover and place back in the freezer.
- Repeat this process 6-8 more times at ¾ - 1 hour intervals. The more times you are able to repeat this process, the better the texture of this dark chocolate ice cream will be.
- Once fully churned transfer to a freezer-proof container, cover with parchment and freeze for several more hours until firm.
Notes
- When making any homemade ice cream always ensure both the churning bowl of your ice cream maker and the custard base are sufficiently frozen/ chilled before churning begins.
- If churning by hand, it's best to make the custard base and let it chill overnight before starting the churning process the next morning. This leaves plenty of time to fit in 6-8 churns with electric beaters.
- And if churning by hand, set a timer between each churn to ensure it is not left too long between each churn.
- Put the container that you intend to store the churned ice cream in into the freezer before churning begins. Putting the ice cream into a chilled container rather than one at room temperature means the ice cream will melt less at the point of transfer.
- Cover the top of the ice cream with parchment to help stop ice crystals from forming in the freezer.
- Eat within 2 weeks to enjoy this double chocolate ice cream at its prime. It's still safe to eat after this time but the flavour and texture may begin to deteriorate.
- Provided your churner can handle the extra volume the recipe can be doubled.
- Make the ice cream even more intense by using chocolate with an even higher cocoa solid content.
Manon says
Hi, your recipe sounds really good and I am about to try it. Do you think I could replace the honey with maple
Syrup?
Thanks
Manon
Jane Coupland says
Hey Manon, yes, you certainly could use honey instead of maple to sweeten it 🙂 Happy dipping.
Sharon says
Hi Lovely recipe thank you. Can you say when it’s best to add the vanilla paste, I can’t see it in the recipe.
Jane Coupland says
Hi Sharon, oh thanks for bringing this to my attention. Best to whisk it into the egg yolks. I hope you enjoy it.
Heather G says
I was so excited to make this recipe, but when I started to warm the honey and milk, the milk separated and curdled. I only had it on for a couple of minutes of per medium heat when it happened. I tried an internet search to problem solve, but didn’t find any great suggestions. The (whole) milk is not expired and the honey is orange blossom (if it matters). Is this a common occurrence? Is there something I can do to prevent it from happening again? I’m not ready to give up on this recipe, but I’d like to have a plan before possibly ruining another 2/3 cup honey. Thanks for any help you can give!
Jane Saunders says
Hi Heather, I've never heard of honey causing milk to split. In fact, I use honey in milky drinks (as well as numerous ice cream recipes) frequently. My best guess is that there was some lingering acidic residue such as lemon juice or vinegar in the pan or perhaps the milk had not been stored as it should have been at the supermarket before it got to you, reducing it's shelf life despite the use by date? Perhaps, if you still have some of the milk left over, try putting 20ml into a mug and filling up with freshly boiled water to see if it splits.