
A tear-and-share dough ball and baked camembert wreath is the ultimate sharing platter for parties. Topped with red pesto, this gooey cheese is crying out to be dipped into with buttery & garlicky sundried tomato dough balls.
If you enjoy the concept of sharing food then take a look at my marshmallow dessert dipping platter.

IN COLLABORATION WITH THERMAPEN
Way back when my kids were tiny we were holidaying in France and, looking for an easy supper option, I baked up a whole Camembert. With plenty of bread and vegetables to dip in, the meal was an instant hit. So much so that it's a dish we return to time and again at home when we fancy indulging ourselves.
Since that first instance, a certain youngest child of mine has developed quite a penchant for dough balls. So I thought it was about time I revisited our much-loved baked Camembert platter to give it a little makeover by incorporating some tear and share dough balls.


The dough balls are flavoured with sundried tomatoes and glazed in garlicky butter to give a vibrant and enticing golden glow. To give extra excitement to the baked Camembert itself, a dollop of juicy red pesto is ladled on top before baking.
The already winning combination of warm bread and gooey cheese has definitely been taken up a few steps.
These tear and share dough balls and the baked Camembert wreath would go down a storm at any party gathering. But the wreath shape makes this baked Camembert platter an absolute gem to serve to a voracious crowd over the Christmas period.
What are Dough Balls
Dough balls were made popular by a famous high street pizzeria in 1969. Made simply from pizza dough that had been shaped into balls and baked, dough balls remain a widespread favourite for dipping into garlic butter.
My dough balls are loosely based on this concept. I've taken a regular bread dough and added a flavour boost by incorporating finely chopped sundried tomatoes into it.
They have also been glazed with an egg wash prior to baking to give each ball a healthy glow. Finally, a lick of garlic and basil butter serves to amplify this radiant glow and kick up the flavour profile.

Equipment for Making Dough Balls
Bread making requires very little in the way of essential equipment. But there are a few things that will make life far easier if you can use them:
- A large bowl - this is essential bread making equipment for mixing the dough by hand and for holding the dough as it rises
- A Stand mixer - though not essential, a machine that can do the kneading for you will make life considerably easier
- Clean tea towels and a large plastic bag for the rising and proving stages
- A warm place - bread needs time for the yeast to work its magic and help the dough rise. A warm, rather than cold or hot place is best
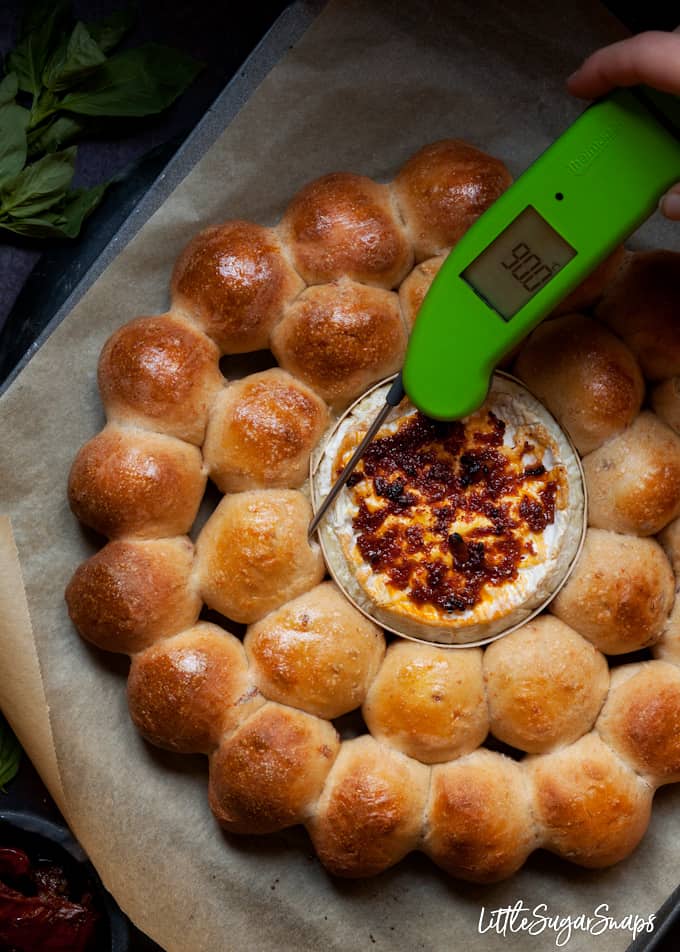
- A food thermometer to help test that the bread is sufficiently cooked - nobody likes to bite into a raw dough ball. I consider this piece of kit essential when it comes to making bread.
Of course, I always whip out my trusty Thermapen digital food thermometer whenever I make bread. It can accurately read the temperature inside the bread in just 3 seconds, meaning that I can rest assured that the correct temperature has been reached. For my dough balls that's anywhere between 88C/ 190F and 93C/ 199F.
Incidentally, the Thermapen Professional can be configured to read Celcius or Fahrenheit. And it comes in a range of fun colours to suit every kitchen going.

How to Make this Dough Ball and Baked Camembert Wreath
You'll be pleased to hear that there is nothing complicated about producing this baked Camembert platter. Despite the stunning visual appearance, it's a straightforward recipe:
- Make the bread dough by mixing the flour, yeast, salt, sugar, oil and water to a soft (but not sticky dough)
- Knead for 5 minutes then work in some finely chopped sundried tomatoes. Continue to knead for a further 5 minutes until the dough is smooth and elastic
- Place in a lightly oiled bowl, cover with a clean tea towel and leave to rise for 2 hours (or until doubled in size)
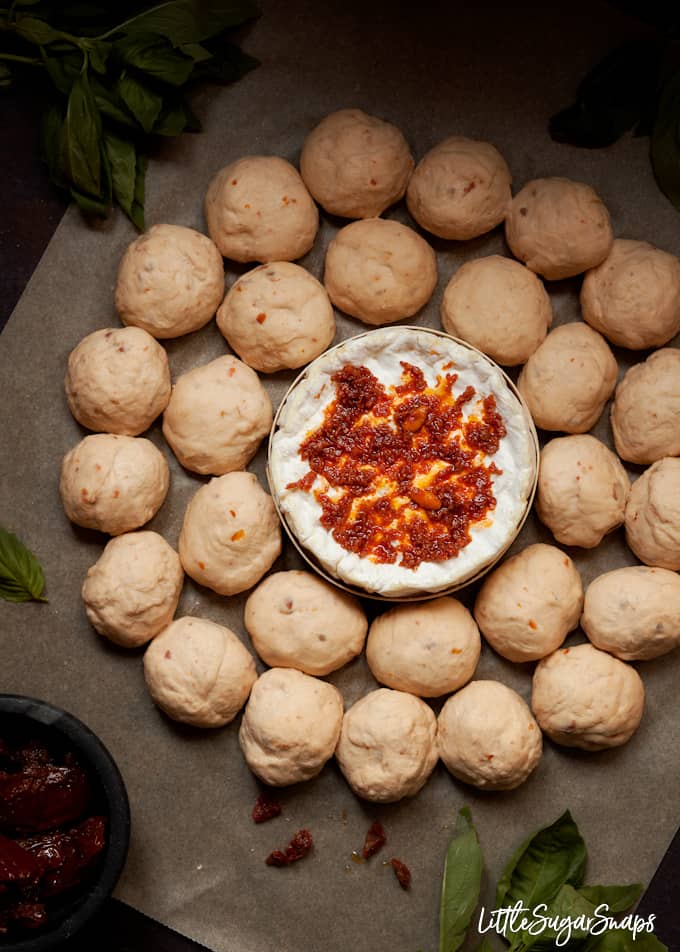
- Knock back the dough and divide into balls approx 30g (1 oz) in weight. You should end up with 27-28 balls
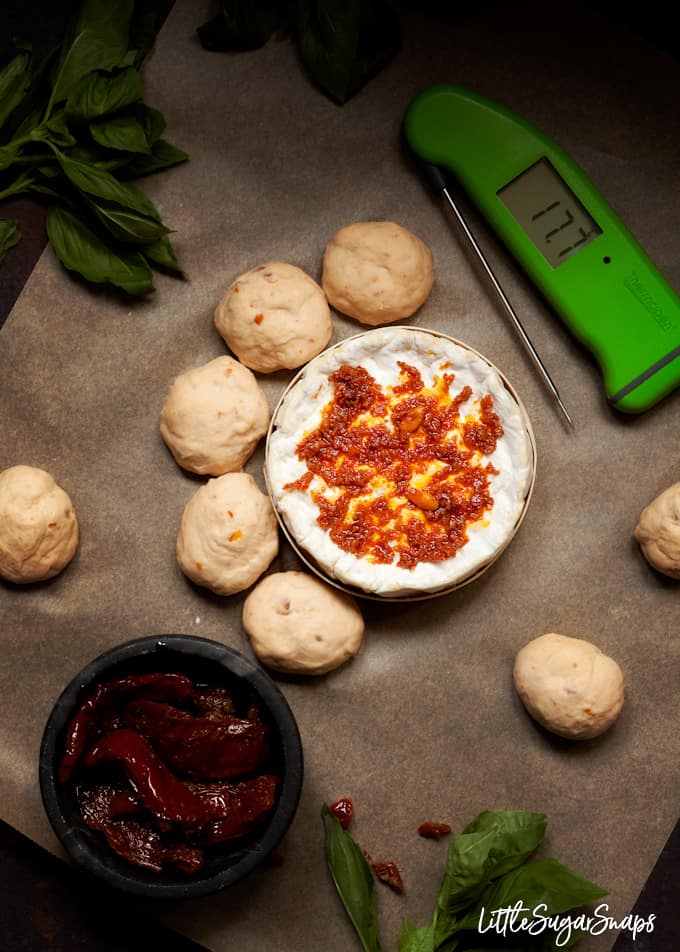
- Unwrap the Camembert, place back in its wooden case and lay in the centre of a baking sheet (lined with parchment). Spoon red pesto onto the top
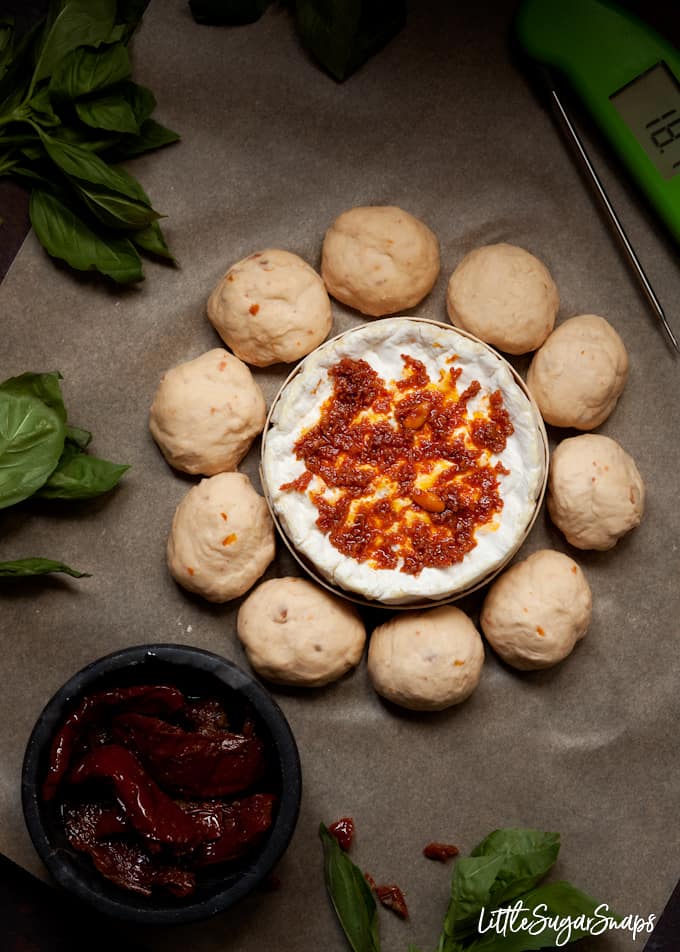
- Shape the dough into balls and arrange around the edge of the cheese in 2 circles. Let prove then brush with a little beaten egg and bake for approx 20 minutes
- Check the dough is cooked using a digital food thermometer. If not, return to the oven for a few more minutes and test again
- Once cooked mash butter, garlic and basil together and brush over the dough balls. Serve straight away
Please refer to the recipe card for full instructions.

Tear and share dough balls in a baked Camembert wreath are a sure way to get a party started right. This sharing platter is fun, inclusive and very welcoming when served to guests.
Additional party favourites
Browse all my easy & delicious party nibbles recipes to plan your next occasion - here are a few of my favourites:


Have you made this recipe for dough ball and baked camembert wreath? Please let me know if you enjoyed it by leaving a review.
Stay in touch: sign up to receive LittleSugarSnaps newsletters to hear when new recipes are published. Or follow me on social media:
📖 Recipe

Dough Ball and Baked Camembert Wreath
Ingredients
- 250 g Camembert (bought in a round)
- 500 g Bread flour
- 2 ½ teaspoon Fast action dried yeast
- 1 teaspoon Salt
- 1 teaspoon Caster sugar
- 1 tablespoon Olive oil
- 300 ml Water (tepid)
- 45 g Sundried tomatoes Use those preserved in oil rather than dried
- 1 Egg
- 45 g Butter (softened)
- 1 Garlic clove Use 2 cloves for a really garlicky hit
- 5-6 Basil leaves
Instructions
Mixing By Hand
- Put the flour, salt, sugar, yeast and oil into a large mixing bowl and add ¾ of the water. Begin to mix, adding more water as necessary to form a soft, but not sticky dough
- Turn out onto a lightly oiled work surface and knead for 5 minutes
- Drain the sundried tomatoes and blot on kitchen paper. Chop finely and work to the dough, kneading for 5 more minutes until smooth and elastic. Proceed to the Rising and Proving stage
Mixing By Machine
- Put the flour, salt, sugar, yeast and oil into the mixing bowl of a stand mixer fitted with a dough hook. Add ¾ of the water and let the machine run. After a few moments, turn off, scrape the sides of the bowl with a rubber spatula if necessary and then let the machine continue to mix. Add more water as necessary to form a soft, but not sticky dough (turn the machine off and feel the dough to guide yourself
- Let the machine knead the dough for 5 minutes then turn off
- Drain the sundried tomatoes and blot on kitchen paper. Chop finely and tip into bowl. Let the machine knead the dough for 5 more minutes, turning off and scraping any loose tomato back into the dough as required. Stop with the dough is smooth and elastic
Rising and Proving
- Lightly oil a clean bowl and place the dough inside. Cover with a clean tea towel and leave in a warm place for around 2 hours until doubled in size
- Turn the dough out onto a lightly floured work surface and knock back. Dived into small balls each weighing around 30g (1 oz). You will end up with approximately 27-28 balls
- Lay baking parchment on a large baking sheet
- Take the Camembert out of it's case and wrapper, then push it back into 1 half of the wooden case it came in, then place in the centre of the baking sheet
- Using floured hands, roll each portion of dough into a ball and place arund the Camembert in 2 concentric circles
- Cover loosely with a large plastic bag and leave to prove for 30-40 minutes until well risen
- Meanwhile, preheat the oven to 210C/ 410F/ GM 6 ½
- Beat the egg and use to glaze the dough (use a silicon brush and wipe gently over the dough balls to retain the good rise
- Top the cheese with the pesto and slide the baking sheet carefully into the oven
- Let cook for 20 minutes, then test the dough balls are cooked by using a digital food thermometer, such as a Thermapen, to check the temperature. It should be between 88C/ 190F and 93C/ 199F to be cooked sufficiently. If below 88C/ 190F, return to the oven, cook for a few more minutes and retest
- While the wreath is cooking make the garlic butter: finely chop the basil and crush the garlic clove then mash into the butter using a fork
- Once the wreath is baked, remove from the oven and brush the garlic butter over the dough balls using a silicon brush
- Serve immediately


Taylor says
This is what dreams are made of!!!! So festive and SERIOUSLY delicious!
Laura says
Tried this as a something special for family coming over. I was at work that day and wouldn't have had time to do it all so I reached out to Jane on insta and she talked me through getting it started and how to leave it overnight. It worked a treat!! Will definitely be making it again!
Jane Saunders says
Thankyou, Laura, for such lovely feedback. I'm always happy to clarify things or answer wider questions relating to my recipes. I'm so pleased you enjoyed this delicious recipe.
Sarah says
How do you do it overnight please?
Jane Saunders says
Hi Sarah, make the dough and leave in a covered bowl in the fridge to prove overnight. In the morning, take it out, knockback and shape into the balls. You'll need longer for the balls to rise as the dough will be cold, but once they are doubled in size you can bake as instructed. Hope this helps.
wilhelmina says
Oh my goodness! This is cheesy, doughy heaven! Talk about the hit of the party!