
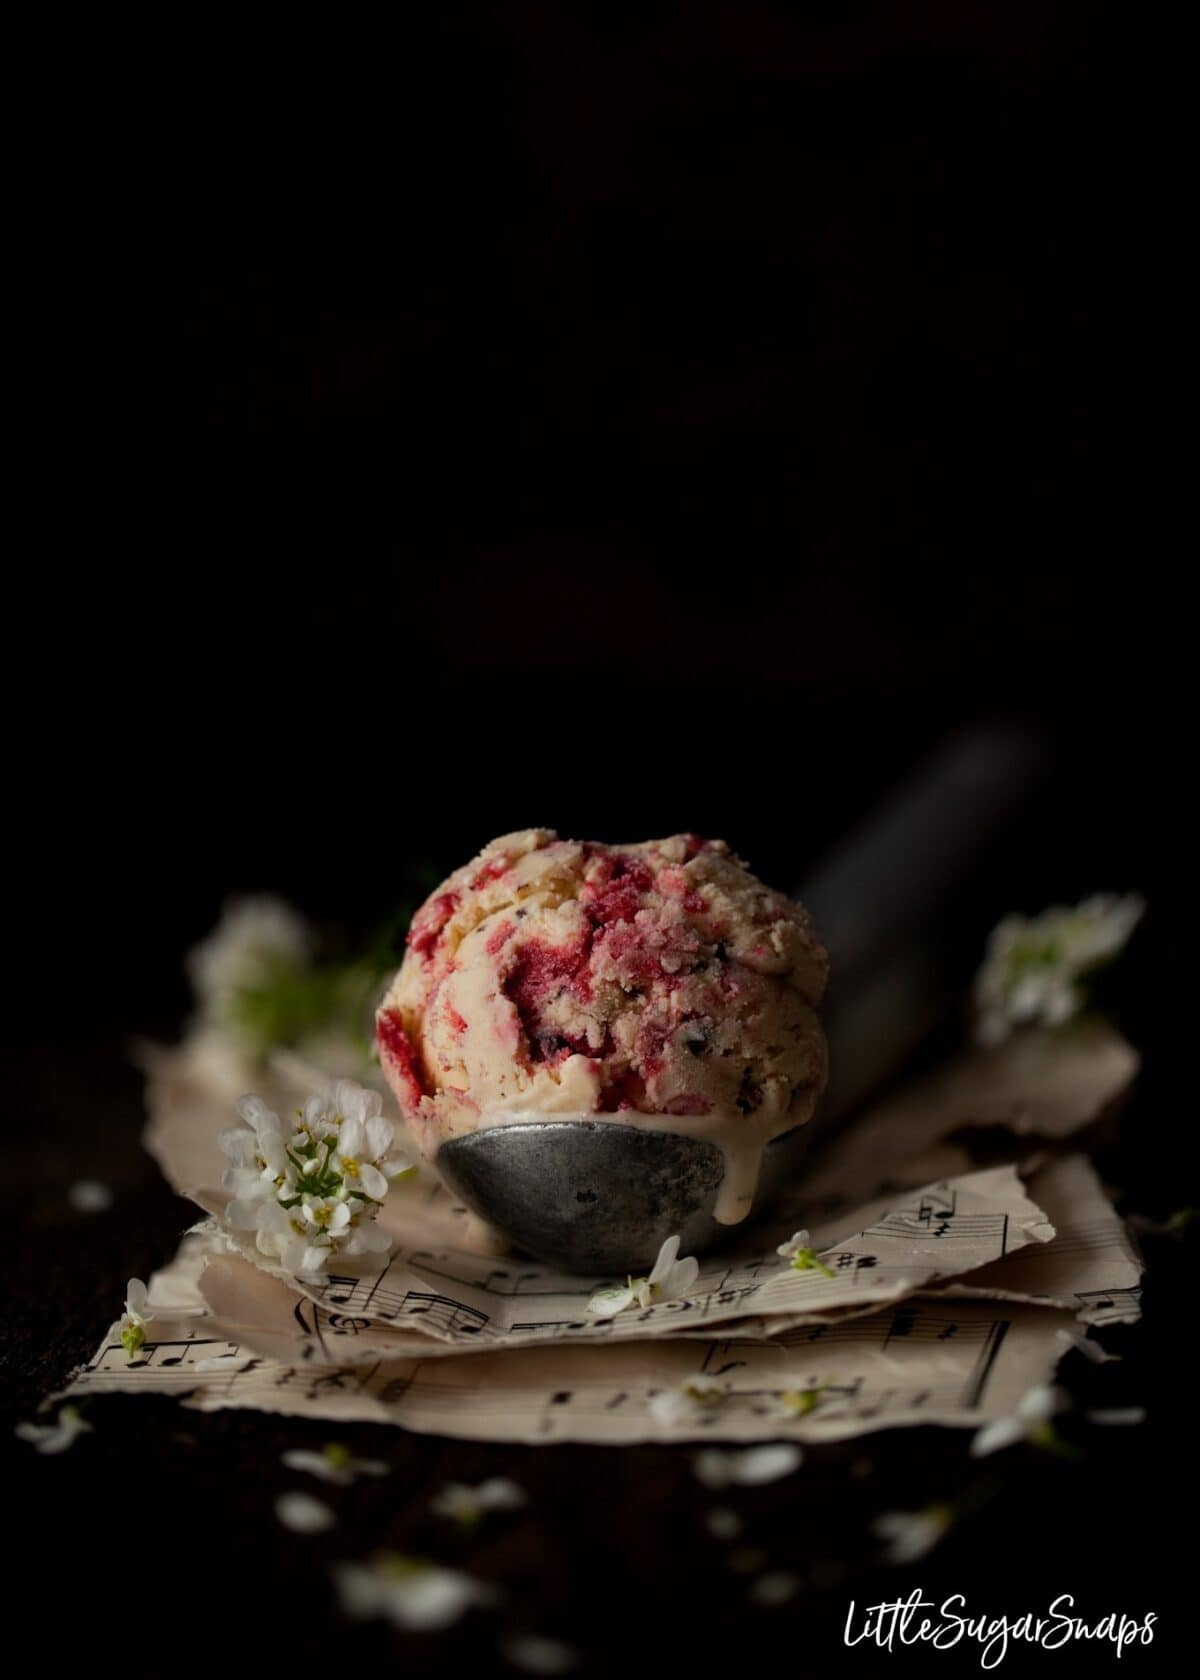
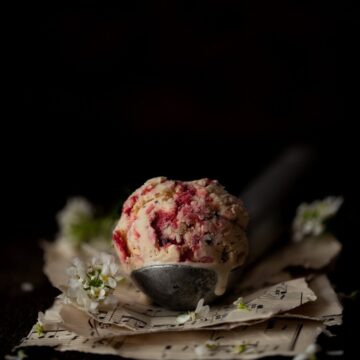
Vanilla Malt Ice Cream with Chocolate Chips and Raspberry Ripple is incredibly fun and downright delicious. It is guaranteed to appeal to adults and children alike.
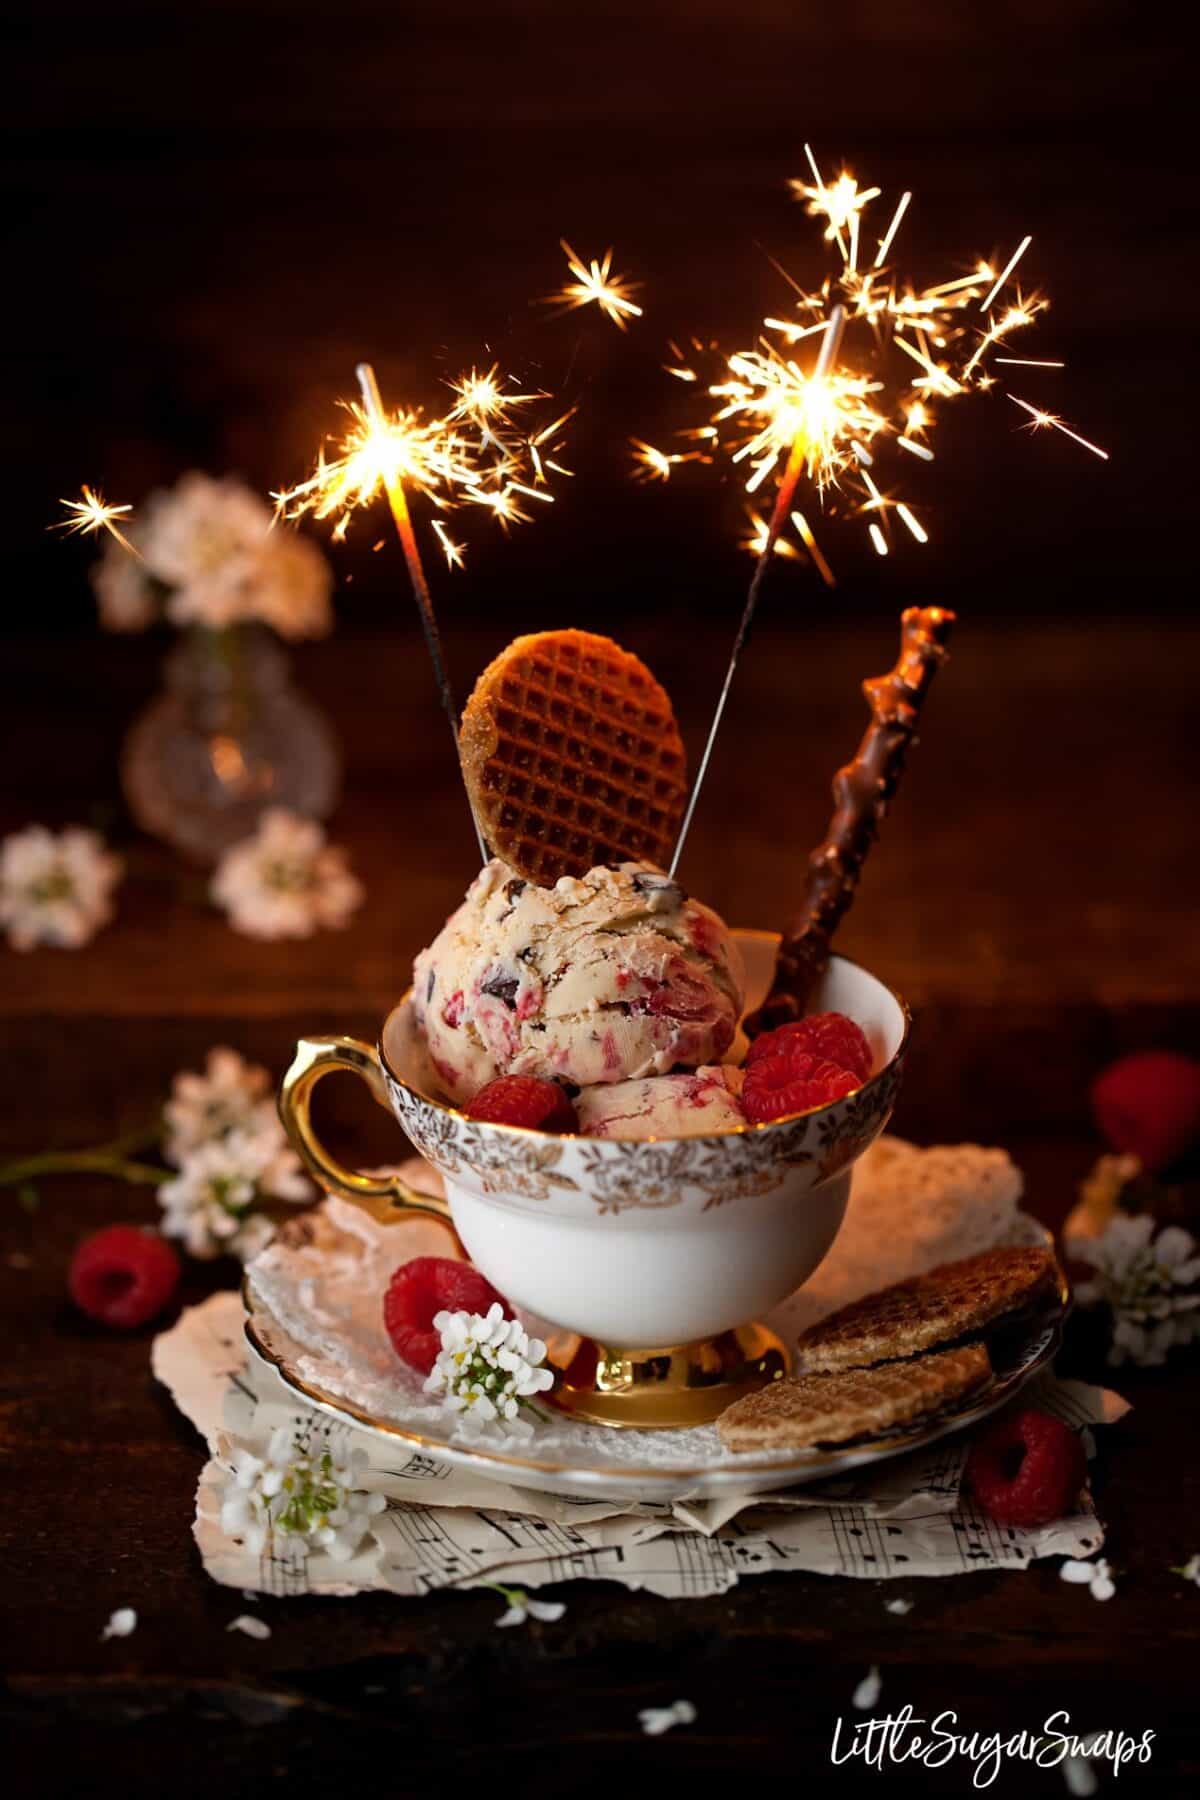
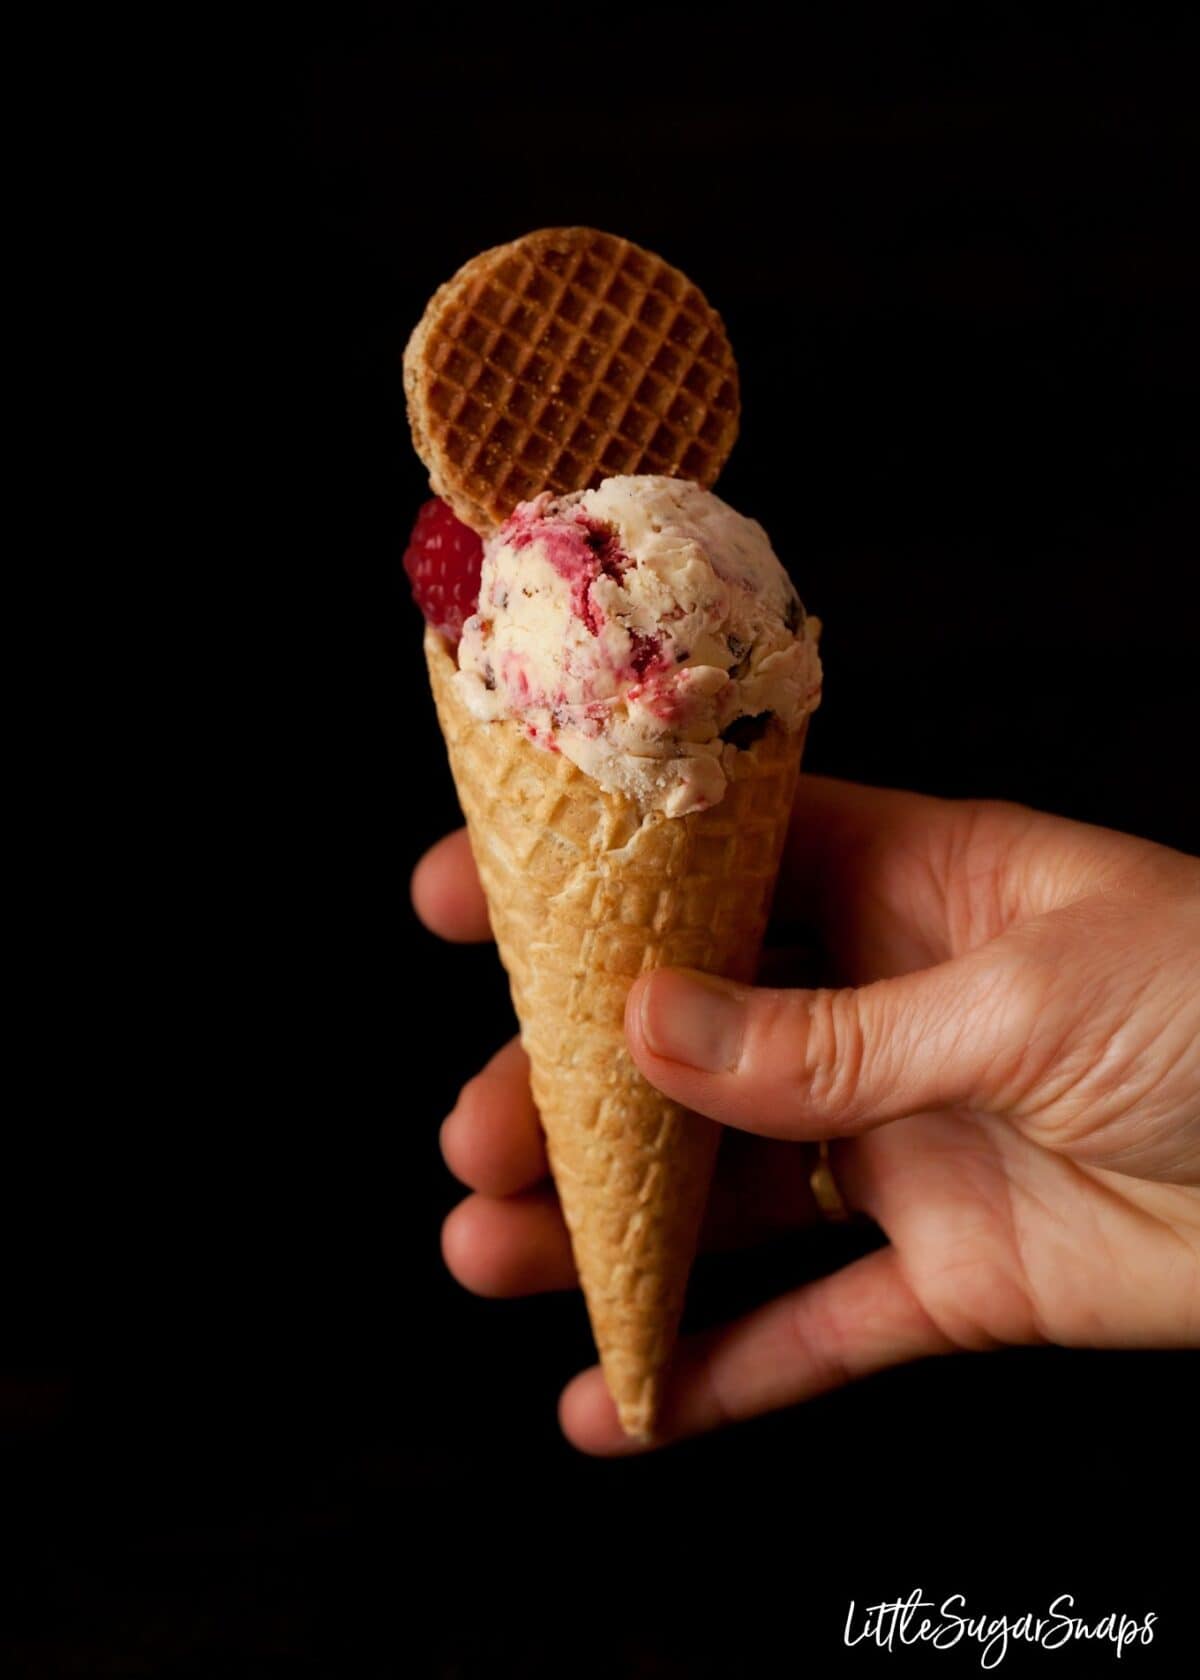
Try serving this ice cream in easy-to-make chocolate dipped waffle cones.
Boy oh boy, have I got some ice cream for you. I've been developing quite a few recipes recently involving malt and this Vanilla Malt Ice Cream is my latest related-recipe wheeze. It's my first ice cream of the 2019 season and, I'm chuffed to admit, it is somewhat extravagant.
When I was a child, c 1980, choices of ice cream in the UK were mainly limited to vanilla, strawberry, chocolate, rum & raisin, mint-choc-chip (my favourite), Neopolitan and last, but by no means least, good old Tutti-Frutti. All served in the only option - a wafer cone. Life was simple. But times have moved on and there seems to be an endless supply of new ice cream flavours available to buy these days. And waffle cones. My kids don't know how lucky they are.
Of course, with all these new flavours comes fresh inspiration for cooking enthusiasts like me (and you). Don't get me wrong, I enjoy all of the flavours that were around 40 years ago, but, similar to the wrinkles on my face, I like to evolve and go into new territory.
Fast forwarding numerous decades to the present day, picture dreamy vanilla ice cream with a punchy hit of malt added to it. Sounds good already doesn't it? Now throw in a generous handful of chocolate and swirl through some fruity coulis. Yes, Vanilla Malt Ice Cream with Chocolate Chip & Raspberry Ripple is now a thing. Especially in my house.

If there were a wish list for ice cream characteristics, this baby would manage to tick a lot of boxes on that list. Top of the list is creaminess. All ice cream deserves to be luxuriously rich, indulgent and creamy and this one certainly is. But it's also right there for anybody wishing to take a break from classic vanilla. Blending malted milk powder and some light brown sugar into the custard base adds an element of complexity to the base flavour. These caramelised malty undertones perk up the vanilla flavour in fine style. On its own the Vanilla Malt Ice Cream is downright delicious. But with the additions of semi-sweet chocolate and a tart raspberry ripple, it ticks the fun box twice more.
And the best part is that this fancy-pants ice cream (as far as I am aware) is not available in the supermarket, so you can really impress guests with it.
Have you seen my recipes for blackberry ripple & Nutella ice cream and Stroopwafel ice cream with bourbon. They are also extravagant and unique creations.
How to Make Vanilla Malt Ice Cream
Making ice cream at home is far easier with the help of an ice cream machine. It doesn't have to be an expensive or bulky machine. Mine certainly is not. I've been using my Magimix for around 12 years and have achieved fantastic results with it.
It is, however, still possible to make ice cream without a machine. But you will need time and patience. I'm including instructions for both techniques so everybody can enjoy this sumptuous frozen treat.
There are really 3 stages to making this ice cream:
- Make the raspberry sauce
- Make the custard base
- Churn/ freeze and whip
When making ice cream, I really like to take my time over it. I make the custard the day before and chill it overnight, so I'm certain it goes into my ice cream churner cold the next day. For this recipe, it's a good idea to also make the raspberry sauce and chill it overnight. I also recommend chilling the chocolate so it goes into the semi-frozen ice cream cold too.
Make the Ice-Cream Base
- Put the milk & malted milk powder into a medium sized pan (heavy based) over a medium heat. Split the vanilla pod and drop into the pan. Heat until warm, stirring to ensure the powder dissolves
- Whisk the egg yolks and sugars together in a medium bowl
- Pour the warm milk onto the yolks, whisking continuously
- Pour the custard mix back into the pan and cook, stirring constantly with a wooden spoon, until the custard is thick enough to coat the back of the spoon
- Take off the heat. Remove the vanilla pod. Scrape out the seeds and add back into the custard
- Pour the custard into a bowl or jug, cover with clingfilm (to stop a skin forming) and cool. Once cold, transfer to the fridge to chill overnight (or for at least 4 hours)
- When ready to churn remove the clingfilm from the custard, pour in the cream and stir until thoroughly combined
Make the Raspberry Sauce
- Put the raspberries and cornflour into a small pan and cook gently, stirring often, until the raspberries soften (3-4 minutes)
- Stir through some sugar cane syrup and blitz with a handheld blender
- Pass through a fine-meshed sieve, using a metal spoon to push as much juice and flesh as possible though the sieve. Only the seeds should remain
- Set aside to cool and then chill overnight (or for at least 2 hours)
Churning in a Machine
- Pour the custard into your ice cream maker and churn according to the manufacturer's instructions
- When the ice cream is almost ready, begin to slide the chocolate in, a teaspoon at a time, until it is all incorporated
- Put ⅓ of the ice cream into a freezer-proof container and drizzle ⅓ of the raspberry sauce over it. Top with another ⅓ of the ice cream, followed by another ⅓ of the sauce. Repeat with the remaining ice cream and sauce, then use a long skewer to gently swirl the sauce and ice cream together
- Cover the surface directly with greaseproof paper or foil and store in the freezer
- Remove from the freezer 10-15 minutes prior to serving to allow it to soften slightly
Churning by Hand
- Pour the ice cream into a suitable freezer-proof bowl, cover and put it in the freezer for 1-1 ½ hours. The sides should be beginning to freeze, but the centre will be soft and slushy
- Remove from the freezer and, working quickly, use electric beaters to beat the ice cream until the ice crystals are uniform. Cover and place back in the freezer
- Repeat this process 7 more times at 1 hour intervals - the better the texture will be the more the process is repeated
- Beat the ice cream again and then stir through the chopped chocolate. Return to the freezer for another hour
- Stir for a final time (beat if you can, but the chocolate may hold up your beaters), then put ⅓ of the ice cream into a freezer-proof container and drizzle ⅓ of the raspberry sauce over it. Top with another ⅓ of the ice cream, followed by another ⅓ of the sauce. Repeat with the remaining ice cream and sauce, then use a long skewer to gently swirl the sauce and ice cream together
- Cover the ice cream with greaseproof paper or foil and freeze for a further 3 hours or overnight
- Remove from the freezer 10-15 minutes prior to serving to allow it to soften slightly
More malt recipes

Have you made this vanilla malt ice cream? How about sharing your gorgeous creation on Instagram - don't forget to tag #littlesugarsnaps so I can see it too. or leave a review below.
New here? Why not sign up to receive LittleSugarSnaps newsletters. You'll hear first-hand when new recipes are published. You're welcome to stay in touch on Facebook, Instagram and Pinterest too.
📖 Recipe
Vanilla Malt Ice Cream with Chocolate Chips & Raspberry Ripple
Ingredients
For the Raspberry Sauce
- 100 g/ 4 oz Raspberries
- ¼ teaspoon Cornflour (cornstarch)
- 1 tablespoon Sugar cane syrup
For the Custard Base
- 375 ml/ 1 ½ cups Whole milk full-fat
- 1 Vanilla pod
- 4 tablespoon Malted milk powder Avoid "light" and "chocolate" versions
- 50 g/ ¼ cup Light brown sugar
- 50 g/ ¼ cup Golden caster sugar
- 5 Egg yolks (large, free range)
- 375 ml/ 1 ½ cups Double cream heavy cream
60g/ 2 oz Milk or semi-sweet chocolate - finely chopped
Instructions
- Ensure the chocolate is finely chopped and store in the fridge until ready for use.
- Put a freezer-proof container into the fridge or freezer to chill, ready for the churned ice cream to be loaded into
Make the Raspberry Sauce
- Put the raspberries and cornflour into a small pan and cook gently, stirring often, until the raspberries soften (3-4 minutes))
- Stir through some sugar cane syrup and blitz with a handheld blender
- Pass through a fine-meshed sieve, using a metal spoon to push as much juice and flesh as possible though the sieve. This will take 2-3 minutes or hard work - more or less only the seeds should remain in the sieve
- Set aside to cool and then chill overnight (or for at least 2 hours)
Make the Custard Base
- Put the milk & malted milk powder into a medium sized pan (heavy based) over a medium heat. Split the vanilla pod and drop into the pan. Heat until warm, stirring to ensure the powder dissolves
- Whisk the egg yolks and sugars together in a medium bowl
- Pour the warm milk onto the yolks, whisking continuously
- Pour the custard mix back into the pan and cook, on a just below medium heat, stirring constantly with a wooden spoon, until the custard is thick enough to coat the back of the spoon
- Take the pan off the heat. Remove the vanilla pod. Scrape out the seeds and add them back into the custard
- Pour the custard into a bowl or jug, cover with clingfilm (to stop a skin forming) and cool. Once cold, transfer to the fridge to chill overnight (or for at least 4 hours)
- When ready to churn remove the clingfilm from the custard, pour in the cream and stir until thoroughly combined
Making the Ice Cream Using an Ice Cream Maker
- Pour the custard into your ice cream maker and churn according to the manufacturer's instructions. When the ice cream is almost ready, begin to slide the chocolate in, a teaspoon at a time, until it is all incorporated
- Once churned, put ⅓ of the ice cream into a freezer-proof container and drizzle ⅓ of the raspberry sauce over it. Top with another ⅓ of the ice cream, followed by another ⅓ of the sauce. Repeat with the remaining ice cream and sauce, then use a long skewer to gently swirl the sauce and ice cream together
- Cover the surface directly with greaseproof paper or foil and store in the freezer
- Remove from the freezer 10-15 minutes prior to serving to allow it to soften slightly
Making the Ice Cream by Hand
- Pour the liquid ice cream base into a suitable freezer-proof bowl, cover and put it in the freezer for 1-1 ½ hours. The sides should be beginning to freeze, but the centre will be soft and slushy
- Remove from the freezer and, working quickly, use electric beaters to beat the ice cream until the ice crystals are uniform. Cover and place back in the freezer
- Repeat this process 6-7 more times at 1 hour intervals - the better the texture will be the more the process is repeated
- Beat the ice cream again and then stir through the chopped chocolate. Return to the freezer for another hour
- Stir for a final time (beat if you can, but the chocolate may hold up your beaters), then put ⅓ of the ice cream into a freezer-proof container and drizzle ⅓ of the raspberry sauce over it. Top with another ⅓ of the ice cream, followed by another ⅓ of the sauce. Repeat with the remaining ice cream and sauce, then use a long skewer to gently swirl the sauce and ice cream together
- Cover the ice cream with greaseproof paper or foil and freeze for a further 3 hours or overnight
- Remove from the freezer 10-15 minutes prior to serving to allow it to soften slightly
Suzy says
This is beyond delicious! Love it.
Jane Saunders says
Thanks Suzy!
Taryn says
The raspberry ripple is amazing! So good combined with the other flavors.
Jane Saunders says
Thanks so much, Taryn.